The Equestria Railroad - My Daughter's OO9 scale "My Little Pony" Railroad.


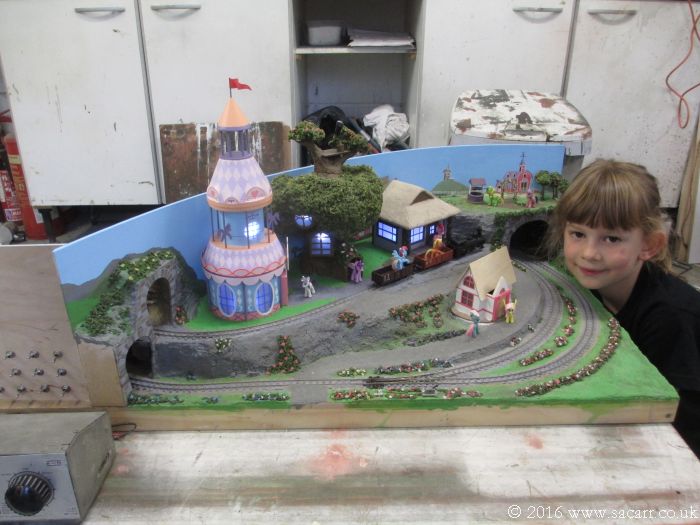
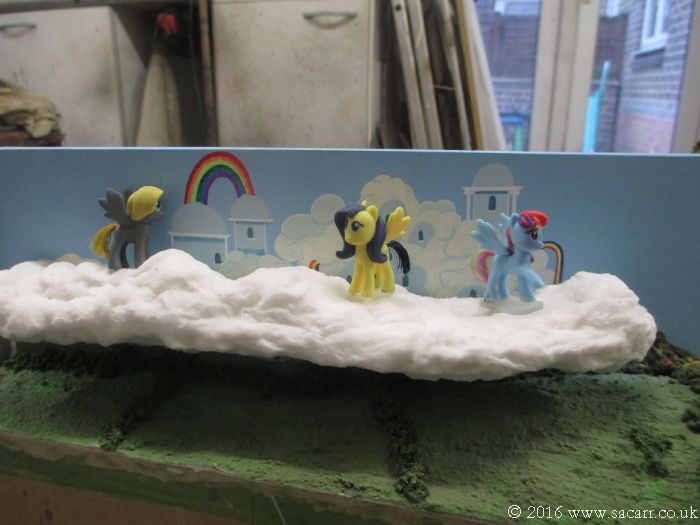
Who would have ever figured there are so many ponies. Looks great. I do like the idea of making cakes of this too. Wow there is lost money in that I'm sure. But I would be careful to cross into the money side of this product too.

Dave
 
Once you start researching MLP, you find there are dozens of different ponies, some of which are recurring characters, and some are one show or background characters.

One of the resin ponies is being converted to "Daring Do"; an Indiana Jones type character. Because of the difficulty spotting defects in the translucent resin of the first resin pony, I gave this one a thin white wash first. This immediately showed mould seams and an air bubble that needed sanding and filling.

The body was a fairly easy clean up of flash and mould lines. The head needed most of the mane sanding off and the adventurers hat making. This was done from some 0.5mm GRP sheet and modelling resin board, turned in the lathe. A 2mm metal rod was inserted into the head to provide a handle for working on it, and reinforcing between the head and body.

mlp294.jpg


A set of plastic wings was left over from a Fluttershy, and these were cyanoed into a depression made in the resin body.

mlp295.jpg
 
The neck was blended in with Milliput epoxy putty, and that was also used to add the mane and fringe. This was done in the early evening and left overnight to cure. Once hard, the mane and fringe will have a little cleaning up an reshaping with the minidrill and diamond bit.

mlp296.jpg


After school and dancing class, we moved the layout to the middle of the workshop, and cleaned the track. It was time to play; and introduce the current selection of ponies to their homes and world of adventure!

mlp297.jpg
 
Zecora is walking in the Everfree Forest, while Amethyst Star is further down the woodland track. Minty has just got off the train and is heading down the path near the Diamond Dogs teritory while Applejack is waiting for the train to carry on to Ponyville station.

mlp298.jpg


The sky on this side of the layout is a bit empty, and may receive some painted clouds.

mlp299.jpg
 
Cloudsdale received its first flight of Pegasi, with Muffin, Sunshower and Rainbow Dash visiting for the first time.

mlp300.jpg


Looking fairly complete from this side, Ponyville only needs the cottage finishing and the control panel marking up to identify which switched do what.

mlp301.jpg
 
For me, it's a bit of a novelty having a layout with two sides with different scenes. Virtually all of my previous layouts have been exhibition layouts, with a public side and a hidden staging area.

mlp302.jpg


All too soon it was time to pack up for the night, so the last train made its way to Ponyville Station and everything switched off.

mlp303.jpg
 
Going by the crowd waiting to do the return journey, passenger traffic is booming. An increase in the number of open wagons need to be ordered
 
I need to scratch build some wagons and coaches to match the look of the ones on the show. They can come once the layout is complete.
 
A trip to the model shop for supplies the other day, allowed the thatched roof to be added to the cottage and also the painting of "Cheerilee".

mlp306.jpg


mlp307.jpg
 
I've had a few weeks off this project due to work and other activities, but after ordering some more materials, got back to it a few days ago. The cottage LED was wired up and fitted, followed by final painting of the cottage, before it was glued down and the base blended in with sand. The grass is still wet in this picture, and dulled down a bit once dry. It still needs a few plants in the garden.

mlp308.jpg


mlp309.jpg
 
The clear acrylic parts for the Crystall Empire arrived earlier this week, and cutting began on Thursday 10th. It appears to be extruded acrylic, rather than cast, so it melts if it gets too hot when cut or sanded. It cut ok on the bandsaw, but I had to be careful when sanding on the belt sander. As a result, much of the cleaning up of the saw cuts was done by hand both by dry and wet sanding. It's still quite hard stuff, and this took several hours to clean up the bandsawed edges.

mlp310.jpg


The parts were placed roughly in position dry, to check on the size of the finished building, as it wasn't too late to make some adjustments if needed.

mlp311.jpg
 
I have some quite powerful acrylic solvent which was used for gluing the pieces together. The watery solvent turns the joints fairly clear where it melts the two surfaces together. I didn't seem to have enough hands when it came to holding it and gluing, but got by without the need to grow any more!

mlp312.jpg


mlp313.jpg
 
Slowly it came together. Sanding the pyramid on the centre spire was a challenge keeping it square, but it came out well. The structure was proving difficult to photograph though, being a bit too see through!

mlp314.jpg


mlp315.jpg
 
Two smaller spires were made from 8mm acrylic rod, sanded with a cone top. Certain areas like these will be left unpolished, in the hope that the rainbow LED's shining up the legs will cast their rainbow colours onto the matt surfaces, having reflected internally up the structure. As seen here, the structure is all glued except the centre spire.

mlp316.jpg


mlp317.jpg


Back
Top