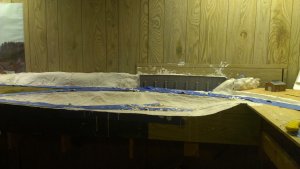
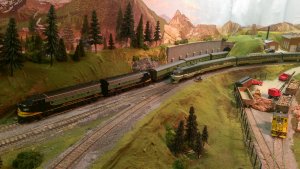
Plywood + Foam, just plywood, or just foam?


Raincoat2

Well-Known Member
Hi, everyone. I'm building my first "real" layout, an HO scale "around the walls" in an 18' x 12' basement room. I've built the support infrastructure and now ready to put on the top. I've watched youtube videos and read articles in mags and online until I'm blue in the face, and totally confused. My question is what to use: plywood only, plywood + foam layer, or just foam layer?? Everyone's got rationales for their approach - all seem to have advantages and disadvantages. I'm stalled in construction right now because of this question, and need to move forward, but I want to get this right from the start. I'm still listening. Any suggestions? Past experiences good and bad?
 
First of all, welcome to the forum. This is the friendliest most informative forum that I have found. Hopefully you will be able to ask more questions and document your progress as you go along. Note that you can't post pictures until you have made a certain number of posts, five I believe...at least it used to be that way.
Now on to your question. You have certainly done some homework and have listed three of the most common methods. There is no right or wrong way. You use what suits your layout the best. I personally model flatland railroading so I use plywood/cork roadbed alone. All of my track is dead-level. I do use "Homasote" to add elevation to adjacent areas and model mild cuts and hills. I could use foam instead, but the homasote was free. When using plywood, most recommend 1/2" as a minimum. 3/8" will certainly support a model railroad, but needs additional support to keep it from bowing. I use 1/2" and support it every 16" with 1" x 4" boards, as well as a 1" x 4" frame. I have a few locations where I have streams; there I just drop the plywood and build up the banks with homasote and Hydrocal.
Foam is useful when one wants to model mountainous railroading. Foam alone needs to be supported but I cannot advise there because I have no experience. Foam on top of plywood is "first-class" and is by nature more expensive. In some parts of the country (northern mostly), 2" foam is widely available. Here in Texas, 1/2" is available in some home in improvement stores, but every thickness can be ordered. Of course stacking enables any thickness to be useful. I have seen foam damaged by tools before.
In any case you would want to apply roadbed before laying track. Silicon will hold any roadbed to either foam or plywood. I use Elmer's white glue and cork roadbed.

Stop by the Coffee Shop and BS with some of the forum members there. Always interesting.

Willie
 
Willie,
Thanks for your response. I read one article where the guy used Homasote over the entire layout (on top of plywood). Yeah, most people say 1/2" plywood works best. Your idea of making the layout mostly plywood (flatland) but building up higher sections with Homasote or foam is good, and I've read similar suggestions elsewhere. Part of this layout will be flat with a hilly section in the middle. Seems to be all kinds of ways to build up higher landscapes. Cork roadbed is what I would use if I go with just plywood. BTW - I'm involving my adult son and son-in-law in this project, so it will be a way to share the fun as well as the work and creativity.
Will stop by the Coffee Shop. Thanks again.
Raincoat2
 
I am old school I guess. My entire layout is plywood. Bench work is very similar to what Willie has done. !x4's for the bench work and cookie cutter with the sub road bed screwed to 1x4 risers. towns and yards are on plywood. I have no experience with foam but it can work well for scenery and for modular layouts that have to be moved because of less weight.

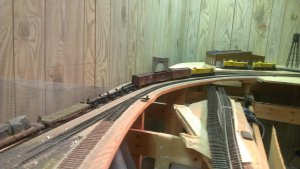
Here's an example of the "cookie cutter" method.
IMAG0538.jpg IMAG0655.jpg
IMAG0506.jpg This is just one of many ways of building a layout. I have no plans of moving it so foam for light weight isn't necessary, but when I was building hills and mountians foam could have been a option.
 
I plan to use plywood for the flat(ter) areas but the open risers for the area of my layout I will have a quarry and mountains.

BTW: Welcome to the forum Raincoat2. I'm sure you will find a lot of information as well as some great people. There are a lot of model railroad forums out that and I visit a few but this one is home.

Dave
 
I have foam over plywood. The terrain I model (South Central Illinois) is pretty flat and the foam allows me an easy way to model the small variations in the ground. I opted for 1/2" plywood under the foam on the advice of a local friend who has an older layout all on plywood. I think he was right, the whole thing is much stronger then it would be with foam sheet alone.
 
Raincoat2:

Welcome to the Forum.

I'm like Montanan and used the cookie cutter method to build my layout. I've seen many layouts that were constructed using this method as well as layouts built using foam.

Here's my 2 cents worth on either method.

Plywood/Cookie Cutter: Easy to install roadbed with either nails or adhesives using plywood. Mounting under layout switch machines is easy with the plywood as a sub-road bed. Plywood provides a strong foundation.

Foam: Like Switchman remarked, using foam allows you to crave small variations in the terrain. Installing roadbed maybe a bit harder to do using adhesives and pins to hold the roadbed in place. Mounting switch machines is more of a challenge in that you may need to install a plywood or similar material as a mounting base for the switch machines.

Since this is your first larger layout, I would recommend a plywood sub-roadbed.

Thanks.

Greg
 
My first "real layout" was frame work with 3/4 ply laid flat on it then with 2" extruded foam on top of that again, what I call table top bench work. My second real layout was cookie cutter method.

Table top bench work was quick, easy and straight forward to build and ensured a level base for the layout proper. Using that method allows you t create character and variation with the terrain without too many issues. Carving out foam or using a blow torch to melt the foam into valley's etc is quick and easy. The foam also provides "some" sound proofing, albeit not much.

Laying your road bed and track onto foam is also very easy to do. I use Hard as Nails (Project) for those purposes. If you are going to have elevations, they are easy as well using Woodlands risers which are foam and adhere very well to the foam. Basically, they take the guess work out of your grades. Any structures, hills, valleys etc can also be much easier to place on the layout as you are working with solid and flat base.

The downside to this method is having so much more material to go through for your wiring, 2" of foam, 3/4" of ply at least.

The cookie cutter method is not as straight forward and requires cutting out your track plan from the ply you would use so you have to have some carpentry ability to do this as well as cut risers etc for the track to sit on. Bottom line, it is more time consuming than a table top method. There will be more work involved in placing scenery as well.

The upside to it though is it makes wiring much easier as you will only be going through the ply and will have open areas so as to access your layout.

One thing you might want to take into account is how complex your track is going to be. The more complex it is, the harder the cookie cutter will be.

I suppose it comes down to how hard you want to make your first layout to set up. Both have their advantages and both have their disadvantages, time and complexity of the build being the main factor for me.
 
I like foam over plywood, BUT it does complicate turnout installation if you use under-railroad turnout control, like Tortoise machines. Other than that, it's your choice.
 
Thanks, everyone - your comments really help. It's great to learn from the experience of others!

Chet, I watched your YouTube video of the tour of the Logan Valley RR - holy cow! That is super detailed. I can only dream - - - Anyway, I could identify the section of the tour that you showed how you built it in your "cookie cutter" photos. Is that backdrop painted or a mural that you can buy? If so, where'd you buy it? I also watched the ridethrough (with a GoPro mounted on the engine?) Anyway, really nice layout, lots of ideas, including the turntables and yards, not to mention the towns - very inspiring. Thanks so much.

Thanks again - I'll keep watching for replies to see what other ideas there are. But this is helping me make some decisions.

Raincoat2
(AKA Johnny)
 
The backdrop is from Walthers, called "Instant Horizons". I am not an artist and that was all that was available at the time. They back drops come in three foot lengths and are printed so they can go from scene to scene. There are others available now that are really excellent, but I stuck with these because in older parts of the layout I tried to work the hardshell scenery into the backdrop. You could probably order them from MB Klein. http://www.modeltrainstuff.com/ They are one of the larger on line retailers and do sell at a discount.

As you are new to the forum, you might check them out. Many of the forum members use them along with other on line retailers. I have no hobby shops at all in my area and work on my layout was extremely slow because of this. When on-line retailers started up, I could finally move ahead. MB Klein is probably my first place to look, and I have had excellent results working with them. Customer service is great. Louis, who you'll see in the Coffee Shop part of the forum lives very close to them and he loves them. I am hoping to attend a NASCAR reace in Dover, DE in October which could give me a good excuse to visit Louis and MB Klein in person.

Stop by the Coffee Shop and introduce yourself and have a cup.
 
Last edited by a moderator:
As it so happen's, your space is very similar to mine although 2 feet wider. I'm building in a 10x18' room and have taken progress photo's and posted them here:

http://atlasrescueforum.proboards.com/thread/3737/jims-layout-progress?page=1

I've used old school open grid 1x4' framework with OSB 7/8" waferboard as Plywood and used homasote in the main yards and staging yard and cork road bed out on the mainline. I've only gotten to the plaster over the plaster cloth, which is over hot glued card board strips but you can see how it all goes together by following the links. I prefer not to use foam because I like to secure my track with spikes or Atlas track nails, which I can pull out later after it is ballasted.

I feel that using adhesives to hold the track down is too permanent too soon, and I've had to remove and relay track a number of times so I'm sure glad I didn't use adhesives. Also, when the track is nailed down, I can sight down it and if it's crooked, I can usually tweak it a bit to make it straight, or to even out a curve if it has some "wobble" in it. If I had put that track down with adhesives, it's basically locked into place when the adhesive has set, and I can't tweak it without breaking the bond. That's why I don't like adhesives to hold track down.
 
Last edited by a moderator:
Again, thanks for all the tips and comments. Thanks for the info about MB Klein, Chet. I'm looking for discounts anywhere I can find them, especially as we think about buildings for the towns in our layout.
And thanks, Riogrande - your photos and comments are really helpful. BTW, how high is your benchwork?

This is a great forum - I'm glad I joined. You guys are all really helpful, sharing your ideas, past experiences, etc. Probably like many of you, I had a train set when I was a kid - 4 x 8 American Flyer layout in the basement, and I loved playing with it. My adult life didn't allow me to continue with model railroading, but now as I approach retirement, I'm setting this up as a project to spend time on for the rest of my life, with my son and son-in-law joining in and grandkids, too.

Raincoat2
(AKA Johnny)
 
My benchwork is 42 inches from the floor all the way around. The mainline gains elevation and raises up to 51 inches where it is over the top of staging.

This is my 3rd layout. My first real layout was one I built in my garage during graduate school - it was 16x19 feet and made it to the plywood pacific stage before I had to move - I sold it to someone in Kokomo Indiana to recover the costs I had into it in building materials and the guy who got it had a major head start toward a layout. My second one was built in my basement in New York, a 14x25' layout but it was torn down when I moved out and became a bachelor again.
 
but I want to get this right from the start. I'm still listening. Any suggestions? Past experiences good and bad?
That is just it. There is no "right" there are only options. Eventually one just has to choose one and go with it.

The current construction method I use is a simple open framework with only plywood (well and roadbed) under the track. Everything else is filled in with foam. That way the joists and risers are exactly where they need to be so the track has a solid base and everything else has the flexibility of sculpting foam for structures and scenery.

I found with foam only there is a greater chance of noise problems. The foam vibrates slightly when the train passes and acts like a drum head amplifying the sound. Good cork, foam, or asphalt roadbed helps, but it is still an issue. More so with metal wheels in the cars.

A flat top or even cookie-cutter plywood only base yields very flat "plateauish" looking scenery. No natural terrain except a salt flat is totally flat like a sheet of plywood. It is hard to camouflage that with paper mache or plaster mountains. It always seems to end up with transitions between flattish parts.

The only plywood + foam I've done was for the children's Youth in Model Railroading modules. More expensive cause you've basically done everything twice. Easy to do shallow below grade scenery cuts. Difficult to get things like turnout controls mounted well because they have to reach so far through the foam to get to the tracks. Running wires through the foam is more challenging than one would think for surface accessories. There is extra thickness to consider when dealing with grades and bridges.
 
Again, thanks for all the ideas and opinions. I kind of like the idea of a plywood-only base (with cork roadbed) especially for the flat areas including towns, then using foam out in the rural areas, hills, mountains. I'll try it - if it doesn't work, I'll start over - live and learn.
 
Hey, Chet - two questions about your layout: 1) do you airbrush any of your buildings or do you prefer handpainting? 2) Is the main part of your layout (Galletin Junction) pretty flat, and then gets hilly farther away from it?
Johnny
 
I prefer to use an air brush, but there are times when you have to hand paint some details such as windows and door. Almost everything will get a coat of clear flat when they are done.

Gallatin Junction is is not the main part of the layout, but one end of a point to point layout. The other end is Logan, but there are hidden staging tracks where loads outbound to other railroads go, which later will become inbound loads. The hidden staging tracks will also allow continuous running. Towns were set on flat "ground" as each town has a number of rail customers to serve and switching on a flat area is a bit easier, but grades were purposely built into the layout to limit how many cars one locomotive could pull. 14 cars can usually be handled by a single locomotive so that also dictated the length of passing sidings.
 
Great. Thanks for the information, Chet. is there a particular brand of paint you prefer, like ModelMaster or something? Also, do you use mostly acrylics?
Raincoat2


Back
Top