Yeah I'm on my over there too as I have many rolling stock weathered also.Glad you’re checking it out here! Lots of skilled guys here, lots of shared ideas. I read this section, but haven’t ventured into weathering a locomotive yet.
Check out the “Weathering Rolling. Stock…” thread. I’ve got some projects in there. A lot more posts in that thread - many of the same good folks involved. Many techniques cross over for both.
I would say keep the shiny side up and the greasy side down, but the point of a weathering is to make all the sides greasy (and dusty and grimy and rusty).
You are using an out of date browser. It may not display this or other websites correctly.
You should upgrade or use an alternative browser.
You should upgrade or use an alternative browser.
Weathering Engines a Continuous thread.
- Thread starter CambriaArea51
- Start date
Jaz avalley
Station cat
Sorry was missing I accidentally wiped my history and could not find the site, luckily smudge fell over me on a uk railway site and gave me a link home - so you can blame him, I will spend sone time catching up on your lovely thread I see sone good work has been carried out…not to see if there is any ideas worth stea…l….um I mean copyingHere is NS 9-40c # 8820. Still a bit different than 8777 but similar. View attachment 179736View attachment 179737View attachment 179738View attachment 179739View attachment 179740View attachment 179741View attachment 179742View attachment 179743If Terry says yes I will clear coat them tonight, do the wheels and put it into stack service on he layout
TLOC
Well-Known Member
Our fair lady returns. Many worries about you missing in action. Glad you are backSorry was missing I accidentally wiped my history and could not find the site, luckily smudge fell over me on a uk railway site and gave me a link home - so you can blame him, I will spend sone time catching up on your lovely thread I see sone good work has been carried out…not to see if there is any ideas worth stea…l….um I mean copying
TomO
TLOC
Well-Known Member
What colors did you use for the rust? Looks great
The handrails were done with Burnt Umber artist oil paint, the rest was airbrushed with AK Rust Streaks paint.What colors did you use for the rust? Looks great
Old 97
Hogger
Fairbanks and Morse?
TLOC
Well-Known Member
Thank youThe handrails were done with Burnt Umber artist oil paint, the rest was airbrushed with AK Rust Streaks paint.
I’ve never airbrushed the AK streaking paints.
Any amount of thinning, do you the remember PSI you ran?
I feel an experiment happening soon at my bench. I hand brush the dust effects but airbrushing them would be more consistent, same grime streak.
This particular brand and color didn't need any thinning, in fact it was just a bit too thin but maybe it's supposed to be since people might not use it for airbrushing. As for the PSI I generally run around 22- 25 PSI but with all my airbrushing I always use a small test piece of posterboard to try out my spray and make adjustments beforehand. I also use the smallest needle available for my airbrush for fading and weathering.Thank you
I’ve never airbrushed the AK streaking paints.
Any amount of thinning, do you the remember PSI you ran?
I feel an experiment happening soon at my bench. I hand brush the dust effects but airbrushing them would be more consistent, same grime streak.
TLOC
Well-Known Member
Thanks. PSI is a personal choice thing but looks like we both are in the same ballpark.This particular brand and color didn't need any thinning, in fact it was just a bit too thin but maybe it's supposed to be since people might not use it for airbrushing. As for the PSI I generally run around 22- 25 PSI but with all my airbrushing I always use a small test piece of posterboard to try out my spray and make adjustments beforehand. I also use the smallest needle available for my airbrush for fading and weathering.
I will look at my AK streaking grimes today as I don’t recall them being that thin, but …
CambriaArea51
Well-Known Member
Well not to much on the weathering topic, but I don't feel like starting a new thread, so I'm adding it here. A new project I'm adding to a couple of engines. Since I run coal trains empty and loaded I was watching some videos on helper service in the mountains. I seen an engine cutaway on the move so I know he had Helper Link on the engine. What was great is the camera angle gave me a chance to get a good look at one straight on. After doing a little search I found them at CMR Products in PA. Got them in the mail today and have the bits and pieces (cable and air line) to put one together.

Jaz avalley
Station cat
Once you get the bogie heavily weathered I would love to see another picture and a reference picture if you have one.
fyi photograph at an angle to hide the kaddee, or dump something in front
a wagon in front and the picture cuts out the kaddee on the wagon
also get some clean water and careful check where it sits as that is real rain draws dirt
notice the dirt / dust lines low down especially on horizontal surfaces
sorry don’t model your excellent American stock, you’ll have to suffice with Brit kit.
Jaz avalley
Station cat
Having gone through my own learning curve I sympathise, if people just remembered dirt is usually light dust just enough to stick then rain makes it run and rain moves down when stood still or at an angle depending on speed of travel,oil dirt can be manually added so overkill occurs even in reallife, but green? Perhaps it was going for a fade, but then thin the lighter colour and build up to areas where fading might occur, and dirt dust the bogies before and after rust effects for a nice b,end, otherwise watch this thread
seriously guys loving the catch up, some really nice pieces.
Jaz avalley
Station cat
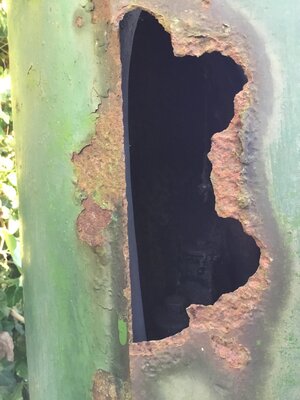
Examples of rust, fyi different colours are almost always different metals of blends there of, not railway but easy to look at
Thumbprints as not truly on topic but hopefully helpful
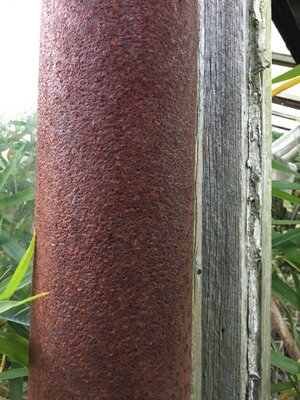 Old thickened
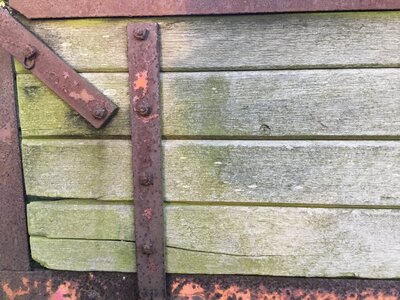
traces of old red paint now heavily faded
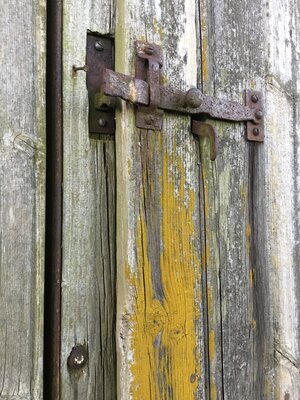
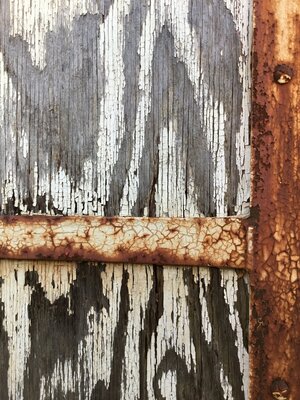 Paint cracked and flaked and even running into wood (think old wagons)
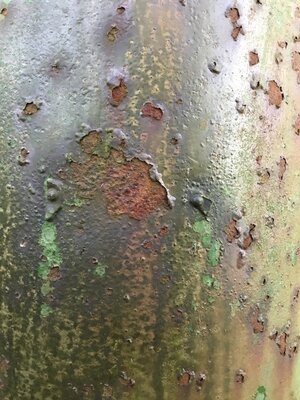 paint faded blistered water gathering in and causing hayhem
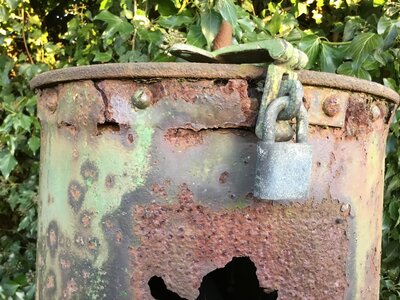 metalwork eventually eaten away
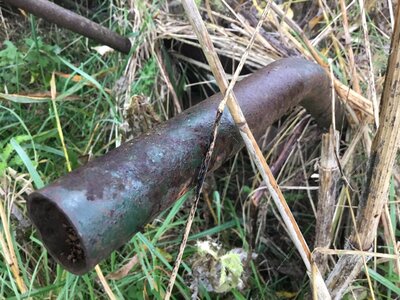 paint finish was green rubber band,es offered a slight slowdown before paint lost
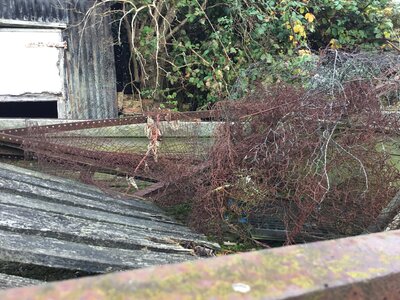 metal fencing this red rust is usually the rust shade = beyond rescue
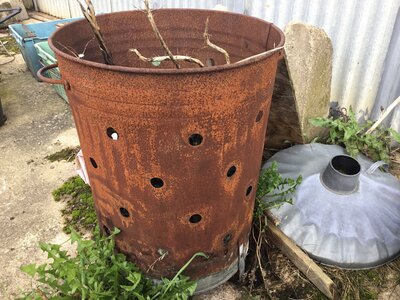 burning bin left the lid of same (see the bottom of the bin is still ‘silvered’ also 2 rust tones initial damage and heavy rust
Thumbprints as not truly on topic but hopefully helpful
 Old thickened
traces of old red paint now heavily faded

 Paint cracked and flaked and even running into wood (think old wagons)
 paint faded blistered water gathering in and causing hayhem
 metalwork eventually eaten away
 paint finish was green rubber band,es offered a slight slowdown before paint lost
 metal fencing this red rust is usually the rust shade = beyond rescue
 burning bin left the lid of same (see the bottom of the bin is still ‘silvered’ also 2 rust tones initial damage and heavy rust
Jaz avalley
Station cat
Before I hit the engines I trialled on cheap kit first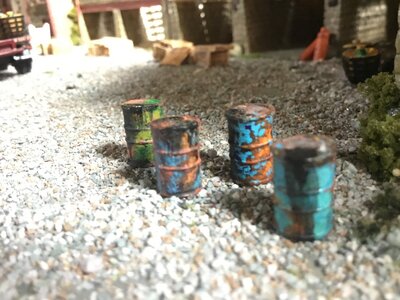 trialling the rust,the two tone rust,the paint and faded )I use the normal colour and mix in white) and then black ‘oil’
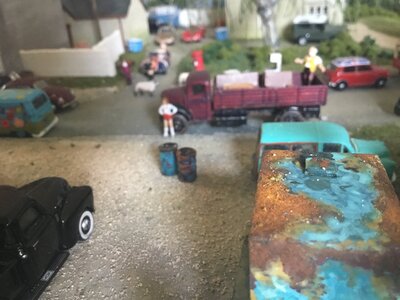 texture is possible but can be difficult to get to scale
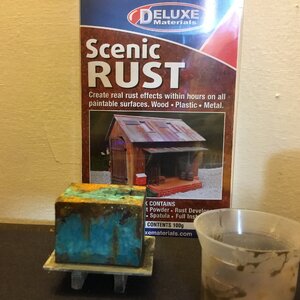 this literally creates a rust with a metal component attacked to replicate and a well weathered engine for reference with some nice coal kit nearby and rusted bogies enlarged picture, if you can enlarge further nice reference even tho Brit kit.

ok off to annoy someone else
 trialling the rust,the two tone rust,the paint and faded )I use the normal colour and mix in white) and then black ‘oil’
 texture is possible but can be difficult to get to scale
 this literally creates a rust with a metal component attacked to replicate and a well weathered engine for reference with some nice coal kit nearby and rusted bogies enlarged picture, if you can enlarge further nice reference even tho Brit kit.
ok off to annoy someone else
TLOC
Well-Known Member
Thanks for the info and the pictures.Before I hit the engines I trialled on cheap kit firstView attachment 181096trialling the rust,the two tone rust,the paint and faded )I use the normal colour and mix in white) and then black ‘oil’View attachment 181097texture is possible but can be difficult to get to scaleView attachment 181098this literally creates a rust with a metal component attacked to replicate and a well weathered engine for reference with some nice coal kit nearby and rusted bogies enlarged picture, if you can enlarge further nice reference even tho Brit kit.
View attachment 181099
ok off to annoy someone else
Rust is always in topic!
I have never tried the Deluxe Material products. Came close a couple times to buy but…
CambriaArea51
Well-Known Member
Well getting there. I just need to find a line /wire from the bottom coupler to the box. Then paint.Well not to much on the weathering topic, but I don't feel like starting a new thread, so I'm adding it here. A new project I'm adding to a couple of engines. Since I run coal trains empty and loaded I was watching some videos on helper service in the mountains. I seen an engine cutaway on the move so I know he had Helper Link on the engine. What was great is the camera angle gave me a chance to get a good look at one straight on. After doing a little search I found them at CMR Products in PA. Got them in the mail today and have the bits and pieces (cable and air line) to put one together.View attachment 181075
CambriaArea51
Well-Known Member
All done, ended up using a piece of speaker wire for the last airline. Painted, next will be trying out how to have the coupler disconnect so to speak. I ground down the hook part but I think I'll have to glue it in the open position.


