Lipstick On a Pig: Upgrading a Bachmann Sound-Value GP7


IronBeltKen

Lazy Daydreamer
Ok, time for another model loco upgrade thread! Not sure whether this qualifies more as a kitbash, since it started as a GP7 and ended as a GP7. Either way, lots of time went into it - a LOT more than I originally planned. I have ~ a dozen GP9's of various brands, but not a single GP7 suitable for painting in later [post-1967] B&O livery. My Atlas Kato GP7 runs quite nicely, but since everything below the cab & hood is solid cast metal, I can't make it look like the B&O geeps that had their side skirts cut away. And I'm not about to try to mill the that frame - way too much work and risk!


This started out as a Bachmann "Sound Value" unit decorated for Pennsy. Since I am lucky enough to live within 30 minutes driving distance of MB Klein, I went there and had one of the guys run it on their test track before buying it since I've never really trusted Bachmann's QA. I was pleasantly surprised to see that it ran nicely at slow speed [though definitely not like a Kato], and that the headlight LEDs actually shine like incandescent bulbs, not the horrible peachy-orange color of their earlier models! And the Soundtraxx decoder [a stripped-down Tsunami?] sounded pretty good for the $107 price tag. This, plus a modifiable shell, provided a good starting point to eventually get a good-running and nice-looking GP7.


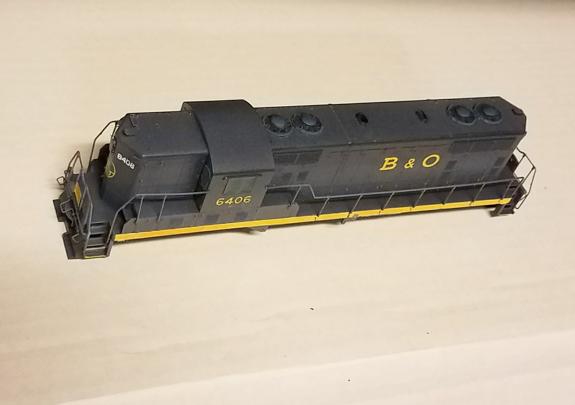
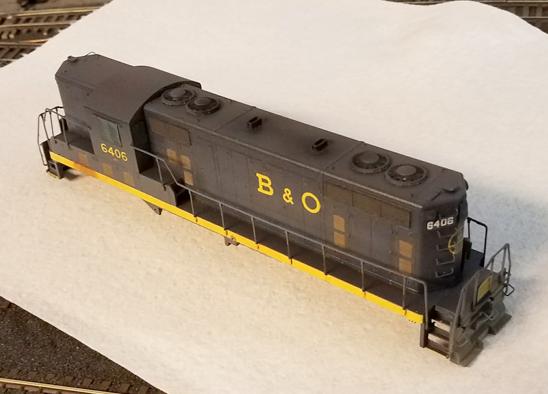
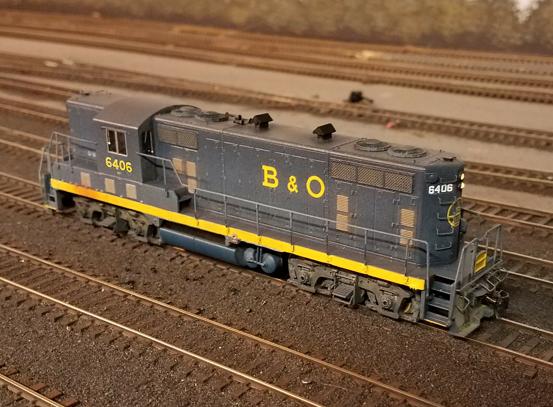
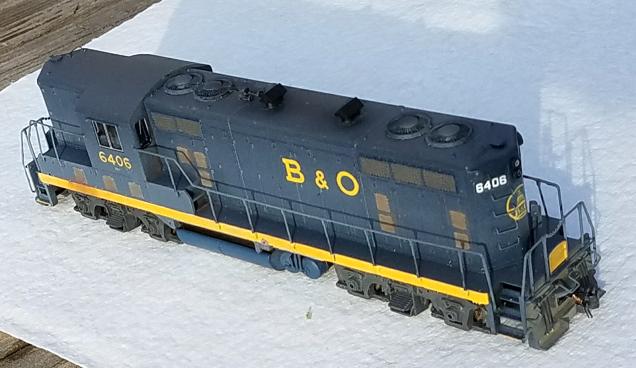
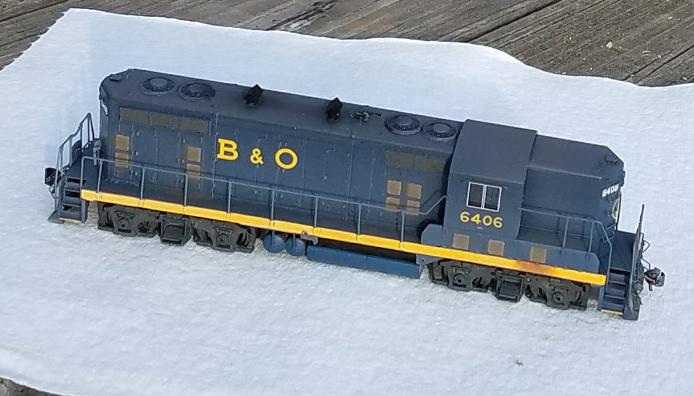
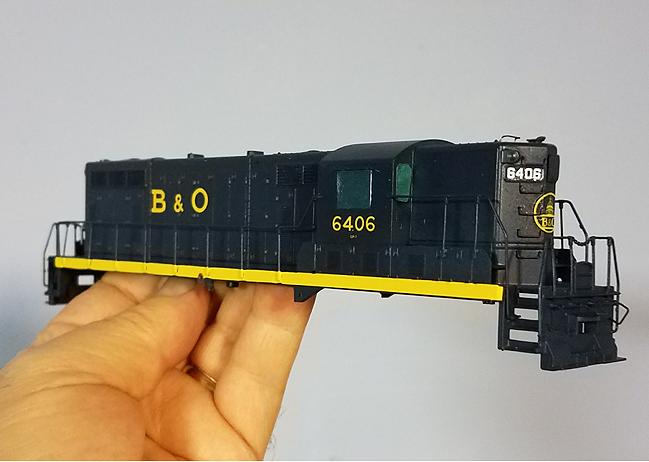
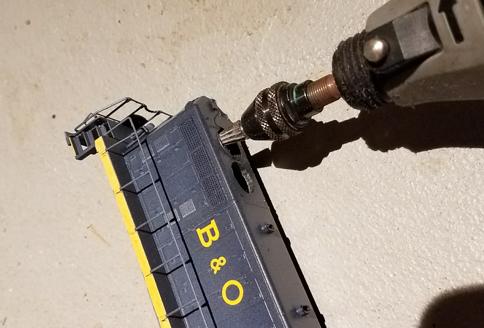
The first thing I did when I got it home was to install some Cal-Scale grab irons. Then I carved away the side skirt so the body would resemble B&O #6406: [url]http://rr-fallenflags.org/bo/bo6406jpa.jpg[/URL] . Masking the windows and headlight lenses, I airbrushed it with PollyScale Enchantment Blue followed by a very thin coat of Krylon Clear. I used Microscale decals for the lettering and the sill stripe, and the decal film blended in quite nicely with the surface of the Krylon Clear that I didn't feel that an over-coating of DullCote was even necessary. Here is what it looked like with the decals applied:


BnO_6406_ShellOnly.jpg
 
Later in the week it occurred to me that most of my layout visitors and guest operators would be seeing the model from the top down. The cheap Bachmann molded-on radiator fans would be plainly visible - even more so since there was no dynamic brake blister to divert attention away from them:


BnO_6406_CheapShallowFans.jpg


Soooo...the following Saturday, I made a "pilgrimage" to Main Line Hobbies in Blue Ridge Summit, PA, and picked up a set of Cannon & Co. 36-inch 1st-generation EMD fans. Later that day I began the process of carving away the molded-on fans. I started by drilling thru the shell from the inside...


BnO_6406_FanHoleDrillThru.jpg


...then using a Dremel with a grinding tip on the slowest-possible rpm setting to finish carving out each hole to so a fan base would fit snugly inside it:


BnO_6406_FanHoleGrindOut.jpg


..and they did:


BnO_6406_FanBasesPressedOn.jpg


What I didn't anticipate was all the extra work of forming the fan cover screens and assembling the fans themselves. [It really would've been nice if Cannon had included some diagrams to go along with their text instructions!:rolleyes:
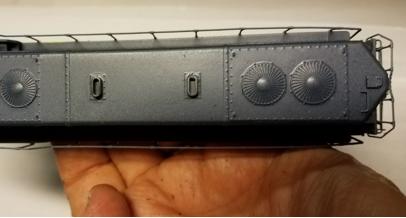
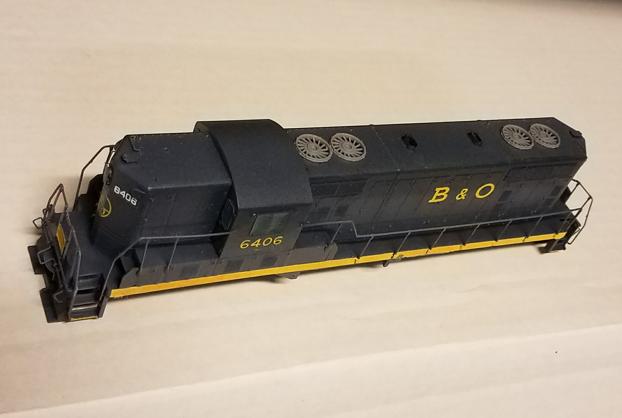
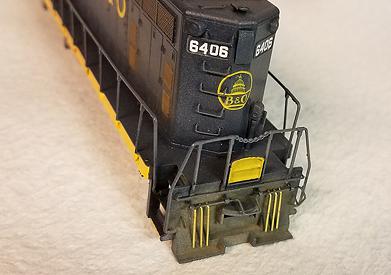
] Eventually, after a bit of sweat and "nautical jargon", I finally did manage to get the Cannon fans installed and painted:


BnO_6406_CannonFansInstalled.jpg


(More to follow, stay tuned...)
 
B&O is not my line but I do like the Bachmann products so I find this thread very interesting. I’ve felt for many years that the recent( past 10 years or so) Bachmann products are greatly under-rated. I think they are very good value in general and the Sound-Value ones in particular I have had very good luck with. Yes the details are scanty compared to other brands but considering the price I would say one actually gets a better bang for the buck with Bachmann.
 
Nice work Ken. I a a bit partial to western railroads, but that doesn't mean I don't like eastern roads. For the east, B&O is probably my favorite. I do prefer the pre merger roads also.
 
B&O is not my line but I do like the Bachmann products so I find this thread very interesting. I’ve felt for many years that the recent( past 10 years or so) Bachmann products are greatly under-rated. I think they are very good value in general and the Sound-Value ones in particular I have had very good luck with. Yes the details are scanty compared to other brands but considering the price I would say one actually gets a better bang for the buck with Bachmann.

Gene, I bought 4 of their GP9's in 2012 when they were available in the dark blue & yellow scheme, on sale at at MBK for ~50 bucks apiece. I knew their mechanisms were pretty good, but I decided to swap out the Bachmann factory-installed decoders with some NCE D13SR's - and that improved their slow speed performance quite a bit. Also added the grab irons and swapped out the orange-colored LEDs with some YelloGlo's.
 
Nice work Ken. I a a bit partial to western railroads, but that doesn't mean I don't like eastern roads. For the east, B&O is probably my favorite. I do prefer the pre merger roads also.

Thanx Chet! I grew up in C&O territory [southeast MI] so I've always been drawn to the blue & yellow diesels of both roads.
 
Beautiful work, Ken! Nothing short about your modeling ability.
Looking forward to seeing some spark arrestors and mu hoses?
 
Part II: Going for the Lightly Seasoned Look

My next challenge was to weather the Geep. Not too heavily, but enough to make it look well-used. Since it is a dark model that needed lighter shades to represent dirt and sun-bleaching, I once again hauled out the old Badger 150. Light-colored powders nearly dissappear when they get sprayed with Dullcote, and since this unit was destined to be handled a lot, it was absolutely necessary for the weathering layers to be finger-proof! (Sorry, I didn't shoot any in-process photos of this phase because I was anxious to get it all over with ASAP.)

I started by spraying a very light wash of Tamiya Flat White (XF-2), mostly on the lower half of the body shell. I kept another weathered geep model nearby to compare against with each coat. It was difficult to discern the effect of the wash immediately after I spraying; I had to wait several minutes for each layer to dry, so that job ate up quite a bit of time. I probably over-diluted the wash, but I figured it was better to err on the side of "not enough" -vs- "too much" [which would be irrepairable without a total repaint, don't ask me how I learned that!:eek:]

Weathering the roof with dust and soot residue was especially challenging because: (1) I had to make sure this paint landed only on the top surfaces and nowhere else; (2) putting masking tape along the sides was not an option because that might result in an abrupt line between the clean and dirty surfaces - not very "natural" looking at all; and (3) making sure that the airbrush nozzle was aimed precisely at the exhaust stacks when I applied the thick black soot - very difficult with these old eyes! I didn't think [during this process] that the stacks looked nearly sooty enough, but I started chanting silently to myself, "Don't let the Perfect KILL the Good!"

I wound up solving the exhaust residue dilemma by brushing-on generous amounts of Bragdon black soot powder against the edges of the fan housings that faced the stacks, with faint straight lines lengthwise along the center of the roof. I sealed the entire roof with a shot of Dullcote - luckily, dark powders do NOT dissappear when wet! My last step was to dab a thin wash of brownish-gray over each of the louvres to make them look dusty.

After so many hours of painting, I decided that this amount of body shell weathering would have to be sufficient for now:

BnO_6406_Weathered_2.jpg


(-- to be continued --)
 
Yo Ken: Nice work. I especially like the replacement fans, they make the model. The weathering, is probably right as it is. Remember, the dark color used by the B&O was designed to not show dirt. Can't wait until yu have Mu air hoses, train ne and MU jumper receptacles. Also, the footboards went away sometime after 1967 also, I cannot remember exactly when. Great model.
 
MU Hoses "On the Cheap"

Something I was reminded of as I set the shell beside one of my Genesis units, was that it had no MU hoses. But when I took a closer look, it occurred to me: these hoses could probably be represented by bending little pieces of K&S .020" brass rod - I had plenty of that in my scrapbox! I just needed to drill out a few holes - twelve, to be exact - in the proper positions.

Here are the materials I used, along with the first few sample "hoses":

BnO_6406_BrassMU_hoseMaterials.jpg


..and here is how they looked when I test-fitted them:

BnO_6406_BentBrassMU_TestFit.jpg


I would paint them later, after I got the shell back onto the chassis. That will be covered in my next installment...
 
Yo Ken: Nice work. I especially like the replacement fans, they make the model. The weathering, is probably right as it is. Remember, the dark color used by the B&O was designed to not show dirt.

Thanx Joe! So they did dark blue to hide the dirt, eh? LOL I should'a figured that out!

Can't wait until yu have Mu air hoses, train ne and MU jumper receptacles.
All in good time my friend, all in good time...

Also, the footboards went away sometime after 1967 also, I cannot remember exactly when...
I know the new GP38's and 40's of 1970 and later, came out of LaGrange without footboards. But many of the older units like 6406 still had them as of 1972 [when Jim Parker shot this photo ]
 
Making room for the Kadees

As far as painting goes, the fuel tank and the truck sideframes were a walk-in-the-park compared to the shell; I knocked all those out in ~1 hour. Now I could simply install some Kadee "whisker" couplers and presumably all the hard work would be behind me, but...WRONG!! When I finally managed to squeeze-in the first of the Kadees, I discovered that it did not swivel at all!:mad: Naturally I needed to do some filing-down of a few surfaces to make them work properly on this unit. I did take several photos of this particular task, in the hopes that I could spare somebody the unnecessary frustration that I had.

First of all, the delrin plate that holds the coupler in place had a slight bulge protruding up the inside end - that definitely would restrict lateral movement:

BnO_6406_CouplerPlateLipToBeRemoved.jpg


I also figured that now would be the perfect time to slightly narrow the forward end, to make it easier to slide back into the opening. Here is a "before" shot...

BnO_6406_CouplerPlate_BeforeNarrowing.jpg


...and what it looked like after I narrowed the corners and filed away the lip:

BnO_6406_CouplerPlate_AfterNarrowing.jpg


But I still needed to slightly enlarge the hole in the body shell, so I filed-down a teensy bit of that also:

BnO_6406_CouplerHoleEnlarged.jpg


That did the trick - my couplers swiveled freely after I did that.

(-- time for a dinner break, be back soon --)
 
Fast Forward to The End

I finally did get the Geep ~98% finished by adding homemade spark arrestors [Evergreen "angle" stock] and a leftover Details West Nathan P3 horn that was in my scrap bin. [What it really needs is an M3, but I still need to order a few of those...] The MU recepticals and other details Joe asked about will have to wait till after the next op session.

I snapped the following photo while it was on my layout, but I wasn't too pleased with the quality of the image:

BnO_6406_Completed.jpg


...so this afternoon, even though the northwest wind was beginning to howl, I took the model outside and got a few shots in the fading sunlight. I figured that full-spectrum daylight would do a better job of rendering the colors. Unfortunately, the weakest link seems to be the photo sensor in my cell phone; it just can't seem to capture the slight nuances in colors of similar brightness or darkness. The weathering on the roof is not visible at all, except for the exhaust soot. Oh well, guess I'll have wait until the weather calms down and I can dig out the DSLR with a tripod.

BnO_6406_Outdoors_LongHoodFwd.jpg


BnO_6406_Outdoors_SideView.jpg


Still need to re-address and optimize the decoder settings, but other than that, I'm done with it.
 
Last edited by a moderator:
Ken: I love the MU air hoses, much better than some of the white metal castings available. great job.
 
I definitely would not call that a pig. More like the frog that the princess kissed and turned into a prince. Excellent work.


Back
Top