
You are using an out of date browser. It may not display this or other websites correctly.
You should upgrade or use an alternative browser.
You should upgrade or use an alternative browser.
3 Bay Car Shop
- Thread starter goscrewyourselves
- Start date

goscrewyourselves
I'm the one
Ahh yeah, not the tidiest of desks/work benches that's for sure. One of these days, and it needs to be soon, I will clear everything off of it so I can start my layout build, THEN you'll see mess ")
I've had that coffee cup for eons and will NEVER part with it. It was the very first thing, in conjunction with a "Demon Bell", my wife bought me when I first got the bike.
The car shop is getting there slowly and I am starting to believe it will actually go together okay, not with standing any physical fitment issues with the parts. Once I get the Pits (today according to DHL) the build/assembly will begin in earnest and there will be more interesting (hopefully) progress to show. At the moment I am trying to figure out the lighting for the building as well as adding lights to the insides of the Pits.
Olie
Active Member
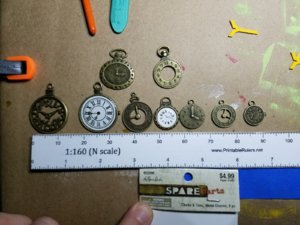
Ah, the trials of figuring out lighting. I'm at that stage now with the station. My wife picked up some "clocks" last night when we were at Hobby Lobby getting paint. Should look good but I have to figure out what I want on the inside of the main area. It would look kinda funny only having a clock hanging from the ceiling.
goscrewyourselves
I'm the one
Lighting is always a challenge, not so much the wiring etc but concealing the wires and how best to place it in a structure.
I don't know the clocks your talking about but, and if your game, you could cut a circle in one of the towers and insert the clock face into it ... maybe?
I don't know the clocks your talking about but, and if your game, you could cut a circle in one of the towers and insert the clock face into it ... maybe?
goscrewyourselves
I'm the one
I like the "White Faced one", the one second from the left, but any of them will look great. All I'd do is cut off the hanger ring.
Olie
Active Member
Tony, we must be brothers from another mother. That was my pick. I envision it hanging from the ceiling in the middle of the main room. In scale, it's a 15 foot clock face! With lighting, it should show up nicely through the windows.I like the "White Faced one", the one second from the left, but any of them will look great.
Sorry for hijacking your thread, I have a bad habit of doing that....
goscrewyourselves
I'm the one
Your not hi jacking the thread at all so no need to apologize. Where both doing (more or less) the same thing so passing idea's and info is fine by me, even if it doesn't directly apply to the thread topic - it's all relevant.
goscrewyourselves
I'm the one
Yippee! The Inspection Pits arrived this morning and to my surprise they were in Kit form!
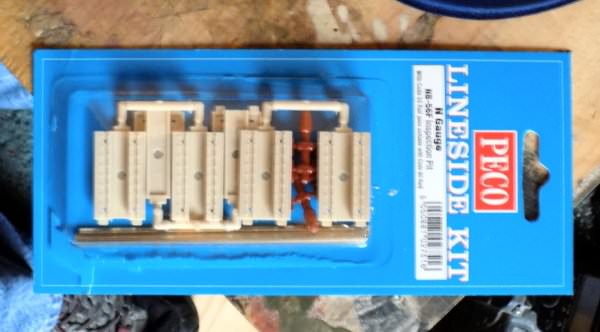
I really thought they would have been already together. To be honest, I am glad they are a Kit - it will make painting and detailing much easier. I also like how they come with 4 lengths of Code 55 Rail, no having to cut any to fit!
I really thought they would have been already together. To be honest, I am glad they are a Kit - it will make painting and detailing much easier. I also like how they come with 4 lengths of Code 55 Rail, no having to cut any to fit!
goscrewyourselves
I'm the one
Well, have put together one of the pits - it is so easy, unless your me that is !
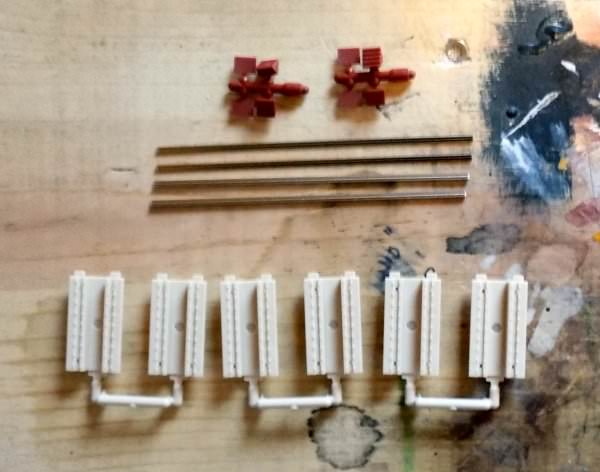
The kit comprises 6 1" (and a bit) long sections that connect to each other by way of 3 tabs, 2 on one end and another on the other. How hard can that be???
So, I connect the first 3 sections together and while doing so am thinking about how I can ensure (1000%) that everything is aligned correctly ... hmm - OBVIOUS, slide the rails in as well! Darn I'm smart. So I slide the rails in and turn everything upside down so as not to get my Micro Weld on the visible part of the pit - more great thinking on my part, what! Taking my small Micro Weld Specific Artists Brush I carefully, very carefully, apply a little to each of the joins then let it sit for a few minutes for it to dry. This is going to be GREAT!
After 5 or so minutes, and ensuring the sections are well and truly welded together, I flip the pit over and it looks great ... no sign of glue at all, clean as a whisker as us Aussies would/might say Now all I need to do is the other 3 sections, join those two together, remove the rails and I'll be ready to paint and detail - WRONG!
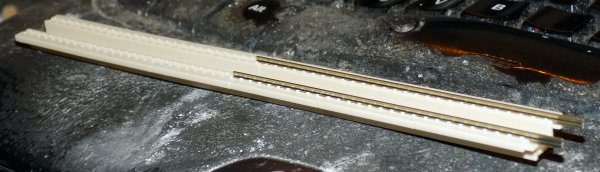
At this point the only thing I can say is this - Micro Weld Welds EVERYTHING, including Code 55 Rails to plastic Yep, you got it, not only did I very securely connect the 3 sections together but, in my infinite wisdom (which I apparently left in my other pants) I very successfully welded the Pit to the Rails which are now firmly in place and never to be removed!
Why aren't I jumping up and down or ranting and raving about the screw up? As it turns out I lucked out with the placement of the rails and they are almost where they should be. 1000% pure DUMB luck The only thing that will be a little messed up will be the painting as I cannot see any way around NOT getting paint on the rails OR being able to get into paint the rail ties. Other than that, it's all good, well fair um, average would you believe?
!The kit comprises 6 1" (and a bit) long sections that connect to each other by way of 3 tabs, 2 on one end and another on the other. How hard can that be???
So, I connect the first 3 sections together and while doing so am thinking about how I can ensure (1000%) that everything is aligned correctly ... hmm - OBVIOUS, slide the rails in as well! Darn I'm smart. So I slide the rails in and turn everything upside down so as not to get my Micro Weld on the visible part of the pit - more great thinking on my part, what! Taking my small Micro Weld Specific Artists Brush I carefully, very carefully, apply a little to each of the joins then let it sit for a few minutes for it to dry. This is going to be GREAT!
After 5 or so minutes, and ensuring the sections are well and truly welded together, I flip the pit over and it looks great ... no sign of glue at all, clean as a whisker as us Aussies would/might say
Now all I need to do is the other 3 sections, join those two together, remove the rails and I'll be ready to paint and detail - WRONG!At this point the only thing I can say is this - Micro Weld Welds EVERYTHING, including Code 55 Rails to plastic
Yep, you got it, not only did I very securely connect the 3 sections together but, in my infinite wisdom (which I apparently left in my other pants) I very successfully welded the Pit to the Rails which are now firmly in place and never to be removed!Why aren't I jumping up and down or ranting and raving about the screw up? As it turns out I lucked out with the placement of the rails and they are almost where they should be. 1000% pure DUMB luck
The only thing that will be a little messed up will be the painting as I cannot see any way around NOT getting paint on the rails OR being able to get into paint the rail ties. Other than that, it's all good, well fair um, average would you believe?goscrewyourselves
I'm the one
Have gotten all three pits assembled and ready for painting. I found that I only needed to use 5 of the 6 sections per pit to fit into the Car Shop:

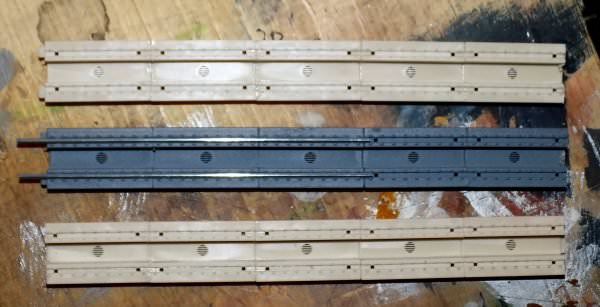
The first two pics were taken BEFORE I realised all 6 sections would be too long. Also, all three are properly aligned. The first pit in the bottom picture makes it look as though that pit is warped but I assure you , it isn't
The first two pics were taken BEFORE I realised all 6 sections would be too long. Also, all three are properly aligned. The first pit in the bottom picture makes it look as though that pit is warped but I assure you , it isn't
goscrewyourselves
I'm the one
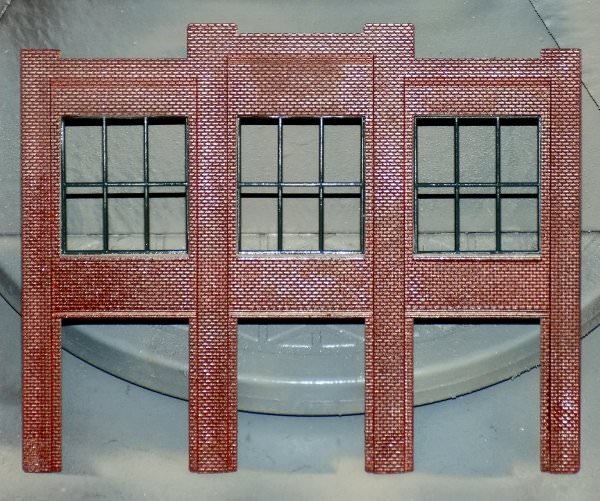
Thanks Olie, appreciate your taking the time to look. Got a little more done over night, one end of the Shop. Main color on and window frames in with a coat of dullcoat for good measure:
Also got all of the rails into the Inspection Pits and started working out the floor for them.
Also got all of the rails into the Inspection Pits and started working out the floor for them.
goscrewyourselves
I'm the one
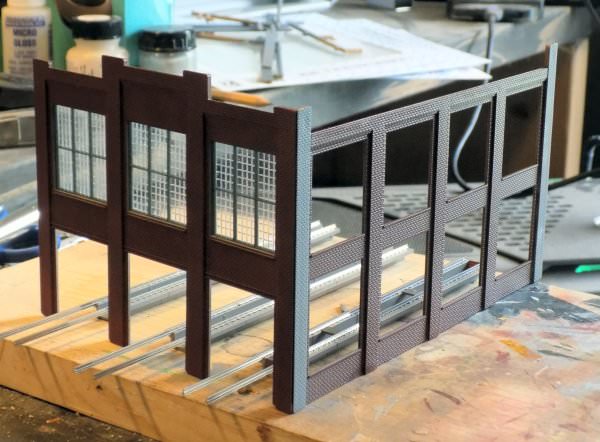
A little more accomplished bu don't get too excited, it is only free standing in the picture - the walls aren't glued together yet. I just wanted to get an idea of how it was going to go together:
flyboy2610
Loveably weird
Riiiiiiiiiiiiiiiiiiiight.Probably not but then again, I don't get into trouble
goscrewyourselves
I'm the one
Mike, it is coming together gradually. Still not really sure about the warping though, and really wont know how much effect (if any) it will/might have until I start gluing everything together. One thing I can say is that the window frames are probably helping straighten things up a bit.
The frames are "thick" and pretty rigid so will hold their shape much better than the wall styrene. I also laid weight on them while they dried in the wall and that pushed everything flat and appears to have stayed that way.
If the front wall is any indication, with the main side walls being virtually nothing than windows, I think it will all come back to square.
migalyto
Well-Known Member
Tony,
Im not very farmilar with that particular kit, but couldn't you get some styrene I-beams to help shore it up? I-beams would add some extra detailing while serving a couple of purposes (making things more rigid, and it will give you a great place to mount lighting....If that is in your final plan). It would look great all light up with those big windows.
The I-beams could also be explained as overhead cranes, which would likely be present in a heavy duty car shop.
goscrewyourselves
I'm the one
Mike,
I see what you are saying and it would help with support and rigidity. The kit has trusses ( 3 of them) that run "across" the shop from side to side (see the green part of the instructions below). I am assuming they will add some structural rigidity to the walls as they are also fairly rigid in themselves.

You mentioned lighting and that is something I have also been thinking about, how/where to install the Shop lights. Essentially, the "top half" of the kit is wasted space as, other than the trusses, there is nothing there. What I was considering was "dangling" the lights from the trusses OR running something in between the trusses (end to end) and install the lights into that.
Honestly, I'm not sure so if you have ideas feel free to put them forward, especially now you can (more or less) see how the thing goes together.
I see what you are saying and it would help with support and rigidity. The kit has trusses ( 3 of them) that run "across" the shop from side to side (see the green part of the instructions below). I am assuming they will add some structural rigidity to the walls as they are also fairly rigid in themselves.
You mentioned lighting and that is something I have also been thinking about, how/where to install the Shop lights. Essentially, the "top half" of the kit is wasted space as, other than the trusses, there is nothing there. What I was considering was "dangling" the lights from the trusses OR running something in between the trusses (end to end) and install the lights into that.
Honestly, I'm not sure so if you have ideas feel free to put them forward, especially now you can (more or less) see how the thing goes together.
Amtrakking
Member
Olie,
The pictures of the "Shop" look great, the actual kit on the other hand is a different matter. So far, the walls and floor are all warped so getting anything structural to fit together properly is questionable and, at the very least, going to create more work than the kit really needed had it been well made.
On a good note, as I am using the Peco Inspection Pits for the interior the warped walthers floor will be discarded so all I'll have to deal with are the walls. I'm hoping that when they are glued in place, that will help straighten them and the roof, so long as that also isn't warped, will draw everything into square.
So, looking at this from a more optimistic perspective, IF everything does work out it will be an interesting build and, hopefully, will end up looking reasonably good.
As for the trouble thing ... well, lets face it - "no one" is perfect right
5 minutes in the oven on low heat should take the warp out of the walls.
goscrewyourselves
I'm the one
Amtrakking,
Thanks but my wife is not so keen for me to use the oven Aside from that, I am well into putting the kit together so trying to "force straighten" the walls now isn't an option for me. As mentioned above, it looks as though the window frames are going to straighten things up pretty well. I am also adding interior detail and am (possibly) going to put 1/8" rod around the walls about half way up, so that should help as well.
Thanks but my wife is not so keen for me to use the oven
Aside from that, I am well into putting the kit together so trying to "force straighten" the walls now isn't an option for me. As mentioned above, it looks as though the window frames are going to straighten things up pretty well. I am also adding interior detail and am (possibly) going to put 1/8" rod around the walls about half way up, so that should help as well.