New project, not sure on how detailed members get here but I will provide details.
If it gets to be to detailed, let me know... I can cut it back.
I seen a post about a couple weeks ago on someone did a fine job of some weathering on a 86' boxcar, and that really inspired me to do one of my own.
It's a Tangent PC Quad door car.
View attachment 185046
I typically always start with the roof of a car.
Here I just did 2 round s of the Vallejo Model Air "Burnt Umber" and water mix.
View attachment 185047
View attachment 185048
I highlighted some spots with Vallejo Model Air "Wood"
I let the car dry for a day in between coats.
Next was doing a fade on all walls of the car.
I used some basic "Titanium White" acrylic paint and shot it with the airbrush at 20psi, I'd say about 1/3 paint to 2/3 of 50% IPA.
View attachment 185050
I got a little spatter but not a problem, most likely will disappear with the clear coat and additional weathering.
Next was a coat of Vallejo Matt Varnish out of an aerosol can .
View attachment 185051
One coat did the job.
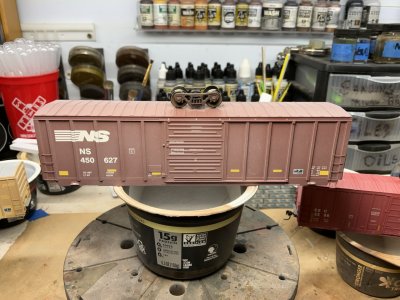
Next I masked off the vertical rivet lines on the sides of the car prior to shooting it with the airbrush at 20psi again, 25% "Burnt Umber" to 75% of 50% IPA.
View attachment 185045
I then did the 4 sets of doors with a wash of the Vallejo "Burnt Umber" and water again.
View attachment 185053
A few things, I got a little bleed through on the tape lines, a little bit of paint pull off by the barcode board and I kind of regret cleaning of some of the fade from that barcode bar and roof walk warning decals, I should have just left those alone. But I can fix all that.
I have to tackle the other side of the car next.
I would like to add a bit of light sponge and oil effects for rust patches followed by some rust streaking this weekend and see how that turns out.
I will follow up, enjoy the weekend!
Z

 think
think