"put layout name here" my restart in H0 Scale


AemJaYstrains

Active Member
Hello everyone

As i told you in my "hi" thread, i will now start to show off my H0 Scale project with no name yet. i will show you my progress and i try to share my learnings i got. i started with N scale stuff, and did some dioramas in N and Z Scale (The Z scale is in Showoff). After those dioramas i knew i love to build scenery and detail stuff. But not in this small scales. So i decided to start a layout (project B) in H0 scale.

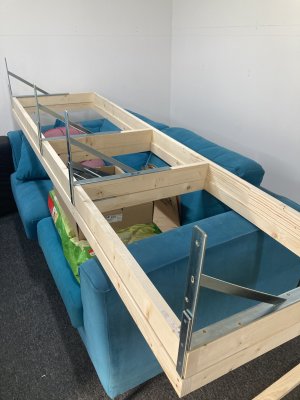
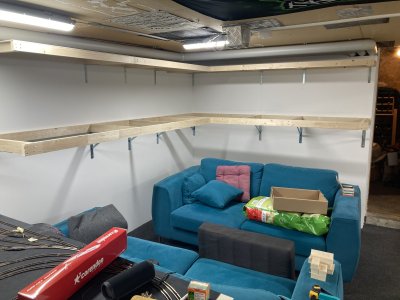
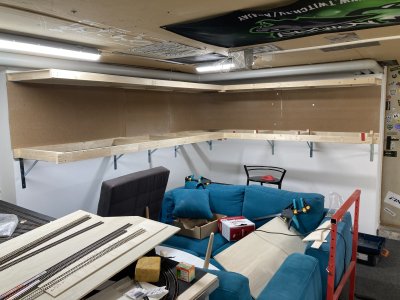
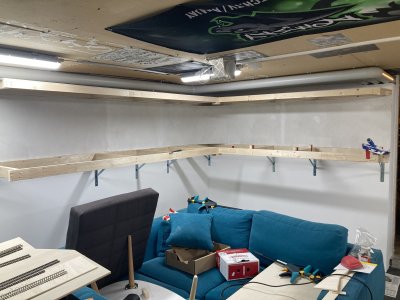
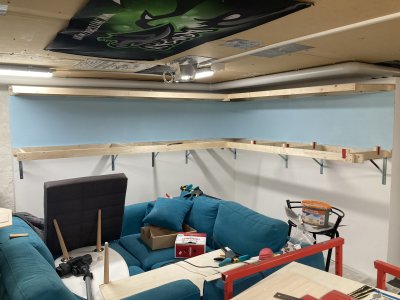
What i also knew is that i love the style of american modelrailroad layouts and also northamerican trains. so thats why project B will be US themed and shelflayout point to point. I started building on the easter weekend. first i built the base. everything is 60cm deep and both sides are around 2m20cm long, so i have a bit of space to build some industries a mountain in the corner and so on.

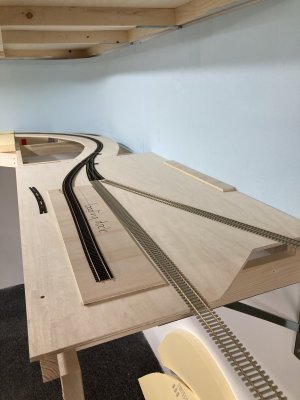
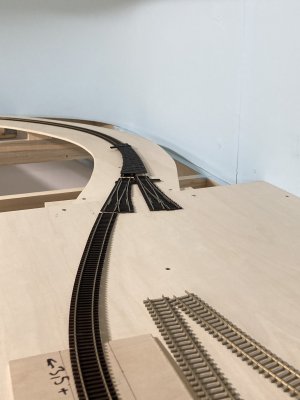
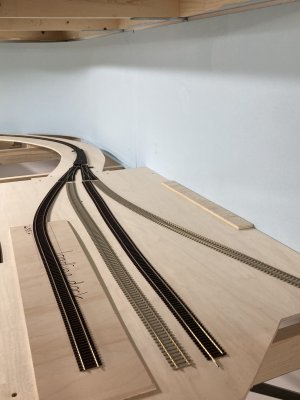
Here are some pictures from the first day of building.
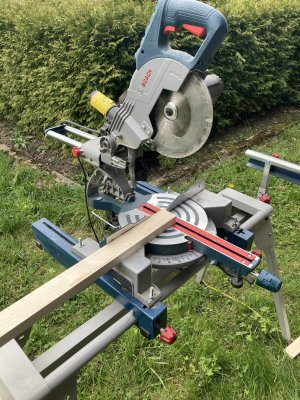
IMG_7168.JPGIMG_7169.JPGIMG_7170.JPGIMG_7174.JPG

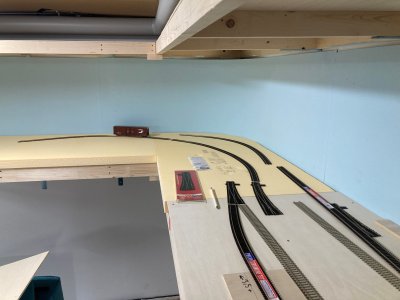
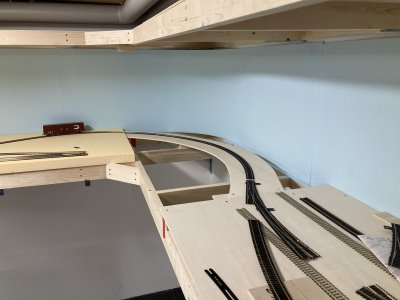
After i built the framework, i started to lay down track, i will work with Peco Code83 and electrofrog turnouts. I will build everything DCC, my digital Station is the Z21. I will not work with a trackplan, it will all be laying down track, check if it looks good and then go on. after several try's i came up with the following idea for Section D.

IMG_7189.JPG

From left to right:

Loading Dock Track 1
Loading Dock Track 2 (Side)
Mainline (that runs trough the industry district further down east (will end here till i maybe add a swing bridge)
Industry Track 1


In the back you see a curved turnout. it turns out that this way it looks way smoother. the curve in the back will be tight, but i will do testruns to see if my 6axles can smoothly pass trough. the whole curve will be covered in a tunnel, for A to block the vision on section C and to B cover the tight curve ;)

Here for you is the first Youtube episode of the build where i also talk about the whole project and idea:


so this was it for update and start episode 1. hope you like it.

Cheers
JaY
 
Howdi Community

My next update is here. after installing all the benchwork and also the top, it was time for the backdrop. So i added some 6mm sheets in the back. then painted it white (2 times). after that i mixed a light blue color and painted it also 2 times (this picture is after the first layer).

IMG_7233.JPGIMG_7248.JPGIMG_7249.JPG

So this means, i will add the second layer today and then its go time.
iam still thinking about my base layer for the track.

there are two ideas:

A:
i will put down some wood plates (like you see in the pictures above) and on top of that some 4cm styro?foam plates. on top of that woodlandscenics track bed.

B: i will raise the trackbed out of wood on the height of the styrofoam, and will apply the woodland scenics trackbed on that wood. around the wood i will build the surface with styrofoam.

what would you do?
thnx for your inputs and ideas.
 
Hello everyone

As i told you in my "hi" thread, i will now start to show off my H0 Scale project with no name yet. i will show you my progress and i try to share my learnings i got. i started with N scale stuff, and did some dioramas in N and Z Scale (The Z scale is in Showoff). After those dioramas i knew i love to build scenery and detail stuff. But not in this small scales. So i decided to start a layout (project B) in H0 scale.

What i also knew is that i love the style of american modelrailroad layouts and also northamerican trains. so thats why project B will be US themed and shelflayout point to point. I started building on the easter weekend. first i built the base. everything is 60cm deep and both sides are around 2m20cm long, so i have a bit of space to build some industries a mountain in the corner and so on.

Here are some pictures from the first day of building.
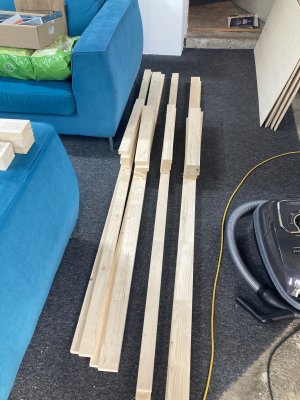
View attachment 185660View attachment 185661View attachment 185662View attachment 185663

After i built the framework, i started to lay down track, i will work with Peco Code83 and electrofrog turnouts. I will build everything DCC, my digital Station is the Z21. I will not work with a trackplan, it will all be laying down track, check if it looks good and then go on. after several try's i came up with the following idea for Section D.
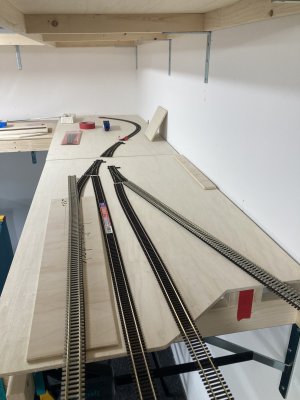
View attachment 185664

From left to right:

Loading Dock Track 1
Loading Dock Track 2 (Side)
Mainline (that runs trough the industry district further down east (will end here till i maybe add a swing bridge)
Industry Track 1


In the back you see a curved turnout. it turns out that this way it looks way smoother. the curve in the back will be tight, but i will do testruns to see if my 6axles can smoothly pass trough. the whole curve will be covered in a tunnel, for A to block the vision on section C and to B cover the tight curve ;)

Here for you is the first Youtube episode of the build where i also talk about the whole project and idea:


so this was it for update and start episode 1. hope you like it.

Cheers
JaY
Looks great so far. What will the curve radius be behind the mountain? Will you be able to access that area if needed?
 
i can not really say what radius it will be. the space there is around 80cm deep. i will cut out the track so it will be accessible from under the benchwork. the tunnel will only be around 40-60cm long i think. really just to hide the big part of the curve and as scenery block from section D to section C
 
i can not really say what radius it will be. the space there is around 80cm deep. i will cut out the track so it will be accessible from under the benchwork. the tunnel will only be around 40-60cm long i think. really just to hide the big part of the curve and as scenery block from section D to section C
It sounds like you have a solid plan for future access. As we've all found out, that is very important.
 
Hi community

iam back with a question for all of you, or some inputs.

trackstyle.jpg

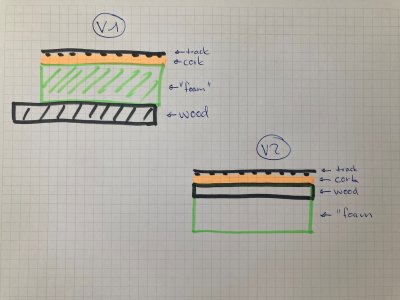
here you see two ideas on how i build up my shelflayout and iam still wondering which way to go.

V1: wood as underground frame, with foam on top. on top of that roadbed and then track. the good things about this, easy to build scenery on it. also to easy carve out holes or other landscaping stuff. negative (in my eyes) i will work with tortoise switchers from the underside, so i have to drill a whole trough everything.

V2: the wood is only used for trackbed. all the stuff on the side like buildings streets and stuff will be on foam. good thing? the switchers can be mounted directly on the wood and i dont have to drill trough everything. "minus" i have to adjust the heigt so i get a flat surface.

so here is my question, which way would you go and why?

Thank you for your feedback.

Cheers
jaY
 
Hi community

iam back with a question for all of you, or some inputs.

View attachment 186049

here you see two ideas on how i build up my shelflayout and iam still wondering which way to go.

V1: wood as underground frame, with foam on top. on top of that roadbed and then track. the good things about this, easy to build scenery on it. also to easy carve out holes or other landscaping stuff. negative (in my eyes) i will work with tortoise switchers from the underside, so i have to drill a whole trough everything.

V2: the wood is only used for trackbed. all the stuff on the side like buildings streets and stuff will be on foam. good thing? the switchers can be mounted directly on the wood and i dont have to drill trough everything. "minus" i have to adjust the heigt so i get a flat surface.

so here is my question, which way would you go and why?

Thank you for your feedback.

Cheers
jaY
Most people use foam, I do not. Totally a personal preference. My wood is the low point and if I want elevation I cut it out of a bendy wood material like 1/4" luann or plywood, mounted on graduated wood blocks to get the grades smooth.

Foam is messy and there is no reason to carve it out if you plan your layout and make the plywood the lowest grade. I used something called hydrocal for all my landscaping/base/terrain. It sets up fast and solid. The learning curve may be a bit tougher, but once you get the knack it is a piece of cake.

Roadbed is a good idea, however I did not use any of that either. There are hundreds of ways to build and, if the train runs well, that is the right way in my book.

Some modelers put down foam no matter what and I am not sure why since it does not hold nails well if at all. You can stick a tree in it.

That is my opinion and it may be a minority opinion. You can see my layout building by clicking on the my youtube channel in blue at the bottom of my signature. There are two separate layouts on my channel. The latest videos are my new layout.

Hope this helps, Dave
 
thank you both for your answer. i think i will go with a kind of mix. in my industrie part (Section D) i will go all ply, then its evan andd i can work with a solid base. when iam out in the open (section C) i will do a mix, because in the front of the track i will try to model the end of a lake. thank you for your inputs.

and i will check your youtube channel @logandsawman .
 
IMHO, both techniques have their place and I've used both. If I were doing mountain scenery the track would likely be on wood (cookie cutter) with hardshell to form the terrain. Look forward to seeing what you come up with.
 
what up folks

yesterday evening i had some time to go down in my basement and work on the layout. i glued and screwed down the first wood and also did work on the idea for the curve.

curved-ideas.jpg

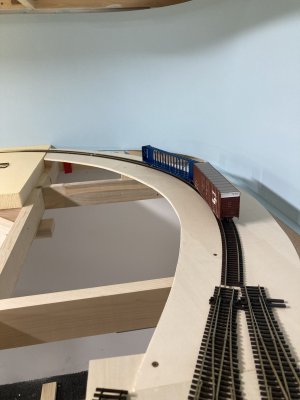
Well after several tries and thnx to the delivery of my first "bigger" box car i found out this will not work how i was thinking it will. back to the drawing board i guess. the curve has to be bigger, so my industry on section D lower left in the picture will be smaller. well it will be still big but not that many tracks that i was hoping for, but still i think i will manage to get in 3-4 tracks. so i can do a little switching. the curve is now wider so maybe i will not build a tunnel just a canyon esk type of scenery we will have to see if it works. i still love the idea of having a tunnel.

So the next step will be soldering the turnouts so they work with dcc and getting the first meters of track together.

cheers
jay
 
Hey folks.

Another weekend is gone and i was downstairs building. Well i was figuring out how to get a decent curve and still some tracks to switch on. After a break where i did try to solder some turnouts and two flex tracks (i hate soldering and it does not really work), i had a idea for my turnouts.

IMG_7298.JPG IMG_7299.JPG

why not flip over the turnout and take it into the curve? and wow that was eye opening. i had more space and now i can manage to get in two turnouts and get back to my 4 tracks i was planing in the first place. and also i got more space so the tracks will be longer for the two industries. hell yeah! i was happy!

IMG_7301.JPG IMG_7303.JPG

But the soldering story is a different one. i really dont get how people can manage to solder tracks. its horrible and i did try it for some time but iam not really happy with it. so my Question for you out there, is there another way to connect flextracks in curves? flextrack connections in curves are hard, or do i have to cut them every time in different lengths? maybe you have some ideas and can help me with :)

btw. i will wait with fixing down the track, till my centerbeam cars arrive, i think those are even longer, so i have to check if they go smoothly trough the curve...


wish you all a good start of the week. cheers jay
 
Yup, you can plan all you want but things always change as you go!
Nice solution using the curved turnout! You end up with a slight S curve but it doesn’t look too pronounced.
Oh, and yes that’s a big boxcar!
 
yeah i know that about the slight S curve, but i think its okay, it does not look that bad :D

When i first opened the box car and saw something like this the first time i was. WOW what the hell ahahaha.
I put a mini figure right next to it and was thinking damn that thing is huuuge. but i like it :)

but iam now a little concerned about the centerbeam cars :D
 
Awesome, i just saw your new layout, but will take time tomorrow to read it through. Years ago while living in an appartment i did something similarto yours...except my railroad ran around the whole living room:
20130605_170129.jpg

Problem was the two entrances to the room. You can see them both on the right side, one on top right corner, the other on bottom right. I solved the problem with swinging bridges since i wanted the layout on eye level.
20130603_153956.jpg

First is the picture of top right swinging bridge. Problem was making perfect allingement when oppened and closed. Bottom pictures are of lower swing bridge:
20130603_154107.jpg
20130603_154124.jpg
20130603_154152.jpg

This lower bridge was actually more problematic, because the tracks are on a curve on the swing side. That led to derailments and it took me a while to fine tune it. Learned not to build swing bridges with a curved track, always keep it on a straight. On both last pictures you can see a recliner and a couch under the layout. I put it high enough to be able to comfortably sit on either one without the possibility of wacking my head on the layout.
 
hey @KriegslokBR52 thnx for sharing those pictures. I was also thinking about swingbridges to maybe expand the layout one day, it is possible but for now iam happy with "just" 50% ussage of the room. Well atm only using around 30% of the left side. So only Section C and D is built. B and A will follow as soon as i have built the wall. Because the original wall is not usable so i have to build a drywall infront.

maybe i will do a roomtour in the upcoming weeks. so i can show all my "mess" haha.

Will keep your reminder (only build straight swing doors) in mind!

Cheers
Jay
 
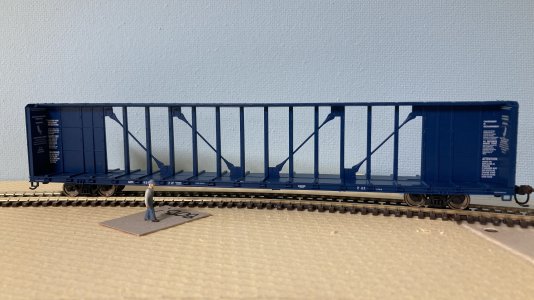
yesterday was the day of truth (is this correct?)

My centerbeam car from walthers arrived. So i got the package, straight up opening and see what i got.

- curved turnout PECO code 83
- Centerbeam Car
- some styro thing plastic plates to try scratchbuild stuff

---
Well lets go downstairs and check out if this huuuuge car is working with my curve. and HELL it works! that means, Bob the engineer has first to approve the car, then do some testruns and after that go on with the build!

IMG_7329.JPG IMG_7331.jpg

The car looks by the way awesome, some more are coming but it takes about three weeks. this blue one was on stock at my local shop thats why i got this one early.

so that means, i now have to solder all turnouts and then cutting track and see how it fits, then roadbed down and lets go!
Oh and i have to see how this works with a bus wire. will try this version because it sounds great.

cheers jay


Back
Top