New Train layout 6-1-23


Hears a project that I just finished. A roof for the Lego's Train Station. I'll have to make about 4 entries(posts)to show you how it's made. I started out w/a back off of a 32" Vizio flat screen TV. I had to cut it down w/my Hot Knife to get it small enough to fit in my Bandsaw. Then I cut it down to the size I needed. 7-13-23 I used 1 of the reflective lens out of the TV to cover up the slots in the raised part of the roof. Icut it to fit, then I installed 2 sets of LEDs in the inside of the roof. I used the reflective side of that sheet instead of the see thru side.
I used a pc. of 1 by 4" shelf board cut to fit the back of the roof. Then I added some Lego parts to the roof to fill in the holes. Painted the inside & outside w/Krylon Fusion Hammered Silver rattle can. 2 coats on each side. The whole project took about 4 hrs to make. The roof is 31" long-9&1/2" wide & 2" high in the middle. The last picture is the inside of the 2 rail Station w/a platform down the middle made out of Lego Bricks & smooth side roof panels. 7-13-23
 

Attachments

  • DSCN3748.JPG
    DSCN3748.JPG
    192.9 KB · Views: 62
  • DSCN3757.JPG
    DSCN3757.JPG
    100 KB · Views: 63
  • DSCN3750.JPG
    DSCN3750.JPG
    176.7 KB · Views: 65
  • DSCN3751.JPG
    DSCN3751.JPG
    137.5 KB · Views: 64
I used a pc. of 1 by 4" shelf board cut to fit the back of the roof. Then I added some Lego parts to the roof to fill in the holes. Painted the inside & outside w/Krylon Fusion Hammered Silver rattle can. 2 coats on each side. The whole project took about 4 hrs to make. The roof is 31" long-9&1/2" wide & 2" high in the middle. The last picture is the inside of the 2 rail Station w/a platform down the middle made out of Lego Bricks & smooth side roof panels. 7-13-23
This next project was a real easy one. I cut off 6" of this plastic roof that came out of the same TV & painted it w/a rattle can of med. Gray Flat. This was the main screen out of the TV that is more ridged & was solid white. I still have to add the LED lights inside the roof & add some vents on top. measures 16 by 21"
 

Attachments

  • DSCN3761.JPG
    DSCN3761.JPG
    108.3 KB · Views: 60
  • DSCN3762.JPG
    DSCN3762.JPG
    163.5 KB · Views: 59
  • DSCN3763.JPG
    DSCN3763.JPG
    186.9 KB · Views: 67
Finally got the Passenger Main Line running last week. Found a few track problems the 1st time it went around & fixed those right away. A few more days of under table wiring to get the Freight Main Line going & then will start on all the sidings wiring, etc. 7-26-23
I was going to put a Video on, but couldn't figure out how to do that.
 

Attachments

  • DSCN3765.JPG
    DSCN3765.JPG
    133.3 KB · Views: 66
  • DSCN3766.JPG
    DSCN3766.JPG
    147.7 KB · Views: 71
Yes & Nickel Silver. I bought 60 brass turnouts in the late 90's for $10.00 & since then people have been giving them to me for free. I have a bunch. I also have a bunch of Steel Flex & some Code 83 misc. track & turnouts. I don't use steel on anything, but it was Free, so I let them give it to me. I also have a mess of Bachmann Steel EZ Track & a 180 plus pcs. of 18" radius Bach. NS EZ Track. Some day I'll have to sell all this stuff I don't use because it takes up a lot of space.

So you are a believer in utilizing brass turnouts?


I have a few brass turnouts I have used on my new layout. I have chosen to treat them with No-Ox (no oxidation), then graphite for conductivity.

lots of discussion here about No-Ox
https://forum.mrhmag.com/post/the-no-ox-thread-12189685
 
Graphite

https://forum.mrhmag.com/post/graphite-track-treatment-12196204

{QUOTE]
I did a one year test and found that the graphite was good for a year with no other track cleaning, the No-Ox was still going strong after a year, and the untreated rails needed cleaning 6 times in that same 1 year time period.
I concluded that the No-Ox treatment worked the best, but that graphite was a close second.
Brent
[/QUOTE]

I'm just using No-Ox on my brass turnouts,...not all the track. Then graphite on most of the other track.
Latest update
We just had another operating session yesterday. We did no track cleaning beforehand and only cleaned the wheels on a handful of locomotives out of a fleet of 70 or more. Electrical pickup was only a problem on a few light switchers and a Budd car with brass wheels, and only on dead frog turnouts.

I talked to one yard operator and he mentioned having trouble on two turnouts with dead frogs on the yard lead. I carefully applied graphite to the powered parts of those turnouts and he later said there was no problem on them anymore. He did complain of a lot of trouble switching the freight shed, though. When I checked the shed trackage, I discovered a couple broken feeders on point rails--no amount of graphite will save you when no power gets to the locomotive.

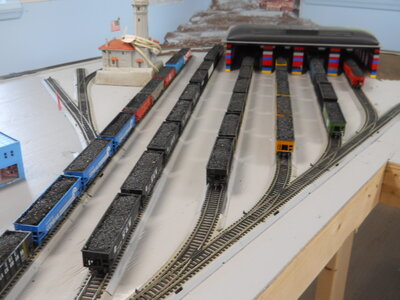
We run 40 car freights up several helices with grades of between 1.6 and 2 percent. We run 3 or 4 diesels on them; they had no traction problems. We used to have spinning wheels with No-Ox at times on the same trains. Even locomotives which used to be considered problem children ran flawlessly. I can't say there were no problems, but electrial pickup was not one of them. It was a pleasure to run the layout, and with a fraction of the pre-session maintenance.
Frankly, if I'm impressed, it has to be good.
--------------
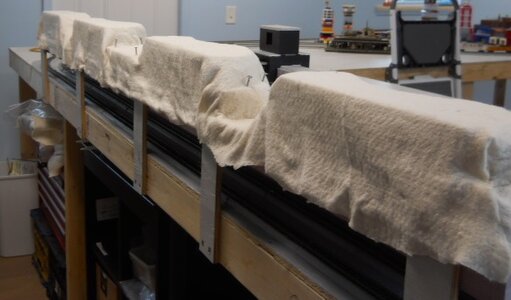
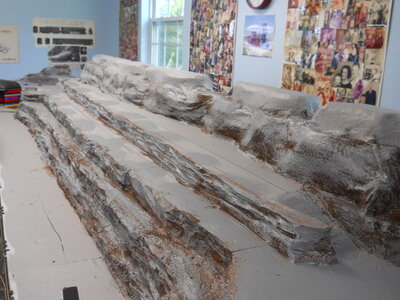
I can see where someone with a smaller layout and easily accessible track and a nice clean layout room could follow the magic No-Ox procedure to the letter and get good results. Our layout is in a converted barn/quanset hut and it took weeks of occasional effort to get to all the track with No-Ox. Applying it was difficult and frustrating and it was hard to keep track of where it had been applied and where it had been wiped off, etc. It was too complicated and in the end, ineffective.

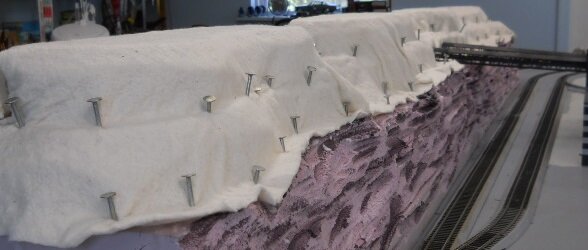
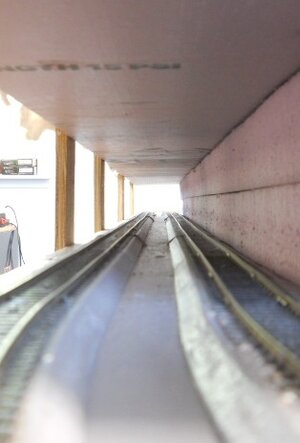
The problem we had with No-Ox was on mulitple levels. First, our layout is pretty big, and mostly handlaid track. Trying to apply No-Ox to the railhead was laborious, and the cloths we used snagged on the spike heads all the time. It was hard to get into deeper areas of the layout and some of the hidden track was inaccessible to this sort of effort.

We also made the mistake of doing a major cleanup after we applied the No-Ox which kicked up quite a bit of dust. The dust seemed to get stuck on the rails afterwards and made operation worse than before we applied the No-Ox. We did try cleaning all the track, but it didn't seem to help. The layout simply didn't run any better after all that effort, and in some cases units which ran well before started giving us problems.

We did all sorts of work on them to fix them and couldn't solve the issues. In some cases they were brand new locos with only a few sessions on them. It was frustrating. Now that the No-Ox is no longer being applied, and in most areas has been removed by track cleaning work, and graphite is being more or less randomly applied, these same units work flawlessly--with no other work done on them. It's almost eerie, how well everything runs. When you get used to sound units cutting out constantly for no good reason, it's strange to have them run perfectly now.

The contrast between having to clean the wheels on every locomotive during our staging sessions, as well as run track cleaning trains up and down all the mainline and hand cleaning the track with abrasives (wrecking trackside detail as we go, naturally) to now doing none of these things and getting better operation than we did with all the effort is remarkable. I was skeptical at first, too, but I am definitely a believer now.
Try it, it doesn't cost much and is easy to do. It doesn't get any better than that.

Jurgen
 
Just got the Freight mainline running yesterday after hooking up all the Drops to the Buss wires the day before. Has anyone tried "T" Connectors besides me under the layout? These are so nice to use when you can't see under the tables to do soldering. I bought all of mine from Amazon. I ran all of my Diesels(55)to make sure they ran ok & only the last 4 in the pictures were bad. 3 are real noisy which I will fix & 1 doesn't run at all which I will also fix. The right side in the 1st Picture is the passenger main line & the one on the left is the freight mainline. I hooked up 36 pass cars & used 2 engines to pull them. I could have done it w/one P42 but it was a slight hard pull, so I added another engine. Next is wiring up all the Sidings on both rails. I bought enough 1 by 12 shelf boards to make all the Facia on the inside of the layout which will be painted dark green flat latex. I also bought 2 pcs of 4 by 8ft by 2" thick Pink Insulation foam for making mountains & a pc. of 4 by 8ft by 1/4 in. Hardboard(masonite)to make table retainers on the outside of the layout to keep equipment from hitting the floor when it derails. Those pcs. will be 2in. high about the table top. I work almost 7 days a week most weeks & about 8hrs each day. Being retired since 2008 has it's perks. Going to be 85 in 2 months & everyone tells me I need to slow down, for what I don't know. 7-30-23.
 

Attachments

  • DSCN3696.JPG
    DSCN3696.JPG
    159.9 KB · Views: 54
  • DSCN3767.JPG
    DSCN3767.JPG
    139.3 KB · Views: 63
  • DSCN3768.JPG
    DSCN3768.JPG
    115.8 KB · Views: 61
  • DSCN3770.JPG
    DSCN3770.JPG
    120 KB · Views: 61
This is what I use. I only use the Blue to tie into the Buss wire & the reds for the Drops. Whats so nice about these is the red male connector will plug into the blue connector real tight. All the different colors will plug into each other w/ease. I use the clamp on blue connector for the Buss which is 14 ga. & the red male plug for the solid 20 ga. drop. All you need is a wire crimper & a pair of Channel locks. I buy mine in Bulk. 7-30-23
 

Attachments

  • 166cb1dc-3216-4b1b-85e8-a3d0f1202330._CR0,624,3424,1793_SX507_QL70_.jpeg
    166cb1dc-3216-4b1b-85e8-a3d0f1202330._CR0,624,3424,1793_SX507_QL70_.jpeg
    13.1 KB · Views: 58
  • 81k4bqhkAFL._SX522_.jpg
    81k4bqhkAFL._SX522_.jpg
    43 KB · Views: 56
Finally gave up using wood as a Bridge in the pass thru opening in the layout. 1 day it would warp to the back & the next day it would warp the other way. next door neighbor was throwing away a set of metal shelves on a steel base w/slanted shelves. I looked for aluminum channel for about a month to make the 3 bridges & finally gave up. So, I decided yesterday I was going to figure out how to use some of that shelving for 2 Bridges. This thing is real strong & light weight & I sepperated the 2 bridges to open seperately so the piano hinge wouldn't warp. t works really good now. 8-6-23 later I'll add some frame work to the sides made out of wood to make it look like a real bridge. this took me 2 days to build. I still have more room on the back bridge to add more track if I need to. I've been running trains off & on almost everyday for about 3 weeks. Started wiring up the blocks in the yards & in front of the engine house this week & will add all the toggles to operate it all as soon as I get my facia boards up & painted.
 

Attachments

  • DSCN3777.JPG
    DSCN3777.JPG
    138.7 KB · Views: 60
  • DSCN3778.JPG
    DSCN3778.JPG
    128.8 KB · Views: 52
  • DSCN3780.JPG
    DSCN3780.JPG
    140.1 KB · Views: 65
  • DSCN3781.JPG
    DSCN3781.JPG
    79.4 KB · Views: 58
Started building a large Mountain w/a double track mainline tunnel. This is 2" Pink Insulation Foam that I bought at Home Depot. I bought 2pcs. of 4 by 8ft. One pc. for this mountain & 1 pc. for the other mountain on the other end of the layout. The one in these pictures is only about half finished. Still have to add some more to the top & finish cutting the front & the ends. 8-11-23
 

Attachments

  • DSCN3783.JPG
    DSCN3783.JPG
    128.5 KB · Views: 52
  • DSCN3785.JPG
    DSCN3785.JPG
    111.5 KB · Views: 55
  • DSCN3786.JPG
    DSCN3786.JPG
    115.4 KB · Views: 58
  • DSCN3787.JPG
    DSCN3787.JPG
    153.4 KB · Views: 54
I still have to a lot of carving to the front & add a lot of rock faces & was planning to add roads to the top in different levels w/small buildings & then a road down to the front at one end & make a Overpass to the front of the layout. Lots to do yet. There's actually 3 different track openings in this mountain tunnel. 8-11-23
 

Attachments

  • DSCN3784.JPG
    DSCN3784.JPG
    150 KB · Views: 52
  • DSCN3788.JPG
    DSCN3788.JPG
    149.4 KB · Views: 60
Started on the Tunnel & Mountain on the other end yesterday. Also a double mainline tunnel. This one is for the Coal Mines & loading building. After I cover it w/Quilt batting & paint the whole thing it won't even look like a foam structure. Still have to make tunnel portals for both mountains & will probably make those out of wood. I had a lot of foam board left over from yesterdays mountain to finish up the 1st one. 8-12-23 When I get done w/both mountains I will hang black felt over the opening in the back so you can't see the inside of the tunnel from either end or when you walk behind them.
 

Attachments

  • DSCN3789.JPG
    DSCN3789.JPG
    149.1 KB · Views: 57
  • DSCN3790.JPG
    DSCN3790.JPG
    143 KB · Views: 57
  • DSCN3791.JPG
    DSCN3791.JPG
    143.8 KB · Views: 61
GOT THE Mountain/Tunnel Covered w/Quilt Batting on the other end of the layout on the 14th & hope to get both mountains painted tomorrow the 19th. After they get their 1st coat of Latex paint they will look completely different. Then after that dries they will get at least 3 more colors added on each mountain & then when that dries the Grass gets added on top of a liberal coating of Elmers glue. Then comes all the Tree's & Foliage. 8-16-23.
 

Attachments

  • DSCN3797.JPG
    DSCN3797.JPG
    132.8 KB · Views: 51
  • DSCN3798.JPG
    DSCN3798.JPG
    108.6 KB · Views: 57
  • DSCN3799.JPG
    DSCN3799.JPG
    114.7 KB · Views: 60
  • DSCN3800.JPG
    DSCN3800.JPG
    150.8 KB · Views: 60
Painted both mountains today. Took about a half gallon of flat light gray Latex paint. This is the 1st coat. Took about 3 hrs. to do both. I'll let it dry for about 2 days & add another coat. I use the 2" throw away brushes from Harbor Freight. 8-17-23
 

Attachments

  • DSCN3802.JPG
    DSCN3802.JPG
    152.2 KB · Views: 72
  • DSCN3803.JPG
    DSCN3803.JPG
    168 KB · Views: 59
  • DSCN3804.JPG
    DSCN3804.JPG
    158.1 KB · Views: 59
  • DSCN3805.JPG
    DSCN3805.JPG
    138.9 KB · Views: 54
I made mountains on 3 of the 4 corners of my layout. Here's how I make them. Use 1" thick pink foam insulation board & cut each piece a little bit smaller as I go up from the bottom. 8-21-23. Then added some Elmers Glue on each level & covered them w/quilt batting & put on the 1st coat of dark gray latex flat paint. Tomorrow I'll add a 2nd coat of Latex.
 

Attachments

  • DSCN3806.JPG
    DSCN3806.JPG
    119.8 KB · Views: 57
  • DSCN3807.JPG
    DSCN3807.JPG
    121.5 KB · Views: 55
  • DSCN3810.JPG
    DSCN3810.JPG
    116.4 KB · Views: 51
  • DSCN3811.JPG
    DSCN3811.JPG
    99.2 KB · Views: 56
Finally took some time & made an Electrical Test Stand for checking LED's & stuff. Have 3.3 Volts for checking those battery operated LED's which is the orange wire & 5.7 Volts for checking other LED's & such, red wire & 12 to 13.3 Volts for those 12 volt LED's which is a yellow wire & a hookup for the ground which is black. Then I hooked up the power supply it's self w/the green wire for hot & a black wire for turning it off & on. there's other wires for negative hookups in the same voltage. there's a thing about hooking up an LED the wrong way & the PS will shut off instead of destroying your LED or whatever your checking. Been using these since about 1990. I always check out a bulb or an LED before I put it in an engine or a light post or a building. I use to sell these for $50.00 ea. All the xtra wires hanging out the back is where you hook up your lights by color of the wire. I use a lot of battery operated lights w/this system. Almost all Dollar Tree string lights, book reading lights take 2 double A or tripple A batteries which is 3 volts & the 1's that takes 3 batteries needs 5 volts. I try to hit Walmart right after Christmas & gather up a lot of Cheap LED's which are 3,5 or 12 volt DC. When I was recycling electronics from 2010 to 2017 I had about 300 Power Supplies that I got for free. When I moved up here to Georgia last year I had to leave about 50 PS's. About 3 weeks ago I started going around to business places looking for old Computers for free & got 3 from 1 spot. They all work & don't forget to make sure it has a fan in it so you will know when it quits if you hook up a light the wrong way. 8-26-23.
 

Attachments

  • DSCN3815.JPG
    DSCN3815.JPG
    174.1 KB · Views: 50
  • DSCN3816.JPG
    DSCN3816.JPG
    170.5 KB · Views: 62
  • DSCN3817.JPG
    DSCN3817.JPG
    175.1 KB · Views: 49
I had almost all my freight cars sitting in banana boxes on the floor under the train tables & the other day I had a few visitors w/kids & they wanted to play w/some expensive trains so yesterday I set all the Coal Cars on the tracks & a lot of others until I ran out of track space.
 

Attachments

  • DSCN3827.JPG
    DSCN3827.JPG
    176.3 KB · Views: 51
  • DSCN3828.JPG
    DSCN3828.JPG
    186.5 KB · Views: 57
  • DSCN3830.JPG
    DSCN3830.JPG
    158.8 KB · Views: 53
  • DSCN3831.JPG
    DSCN3831.JPG
    162.5 KB · Views: 52


Back
Top