My Garden Railway Build - 1/1 Scale :-)


September 25th

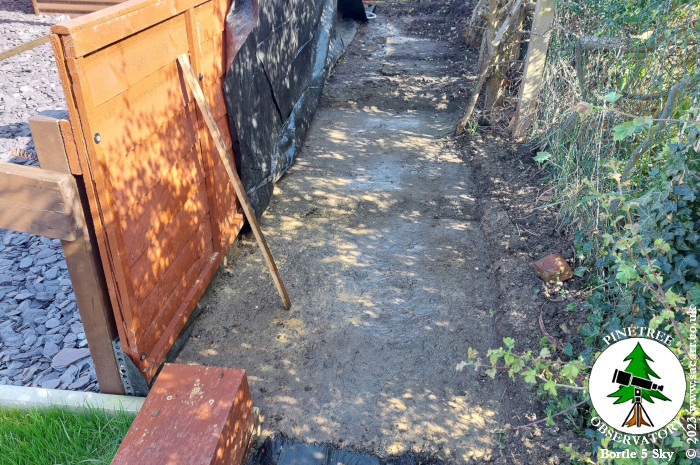
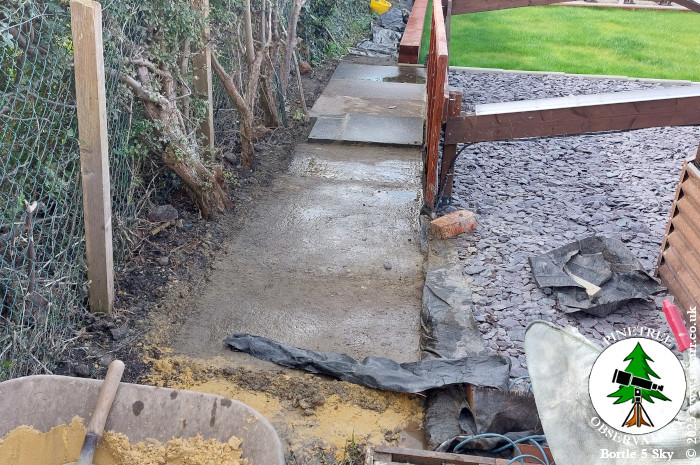
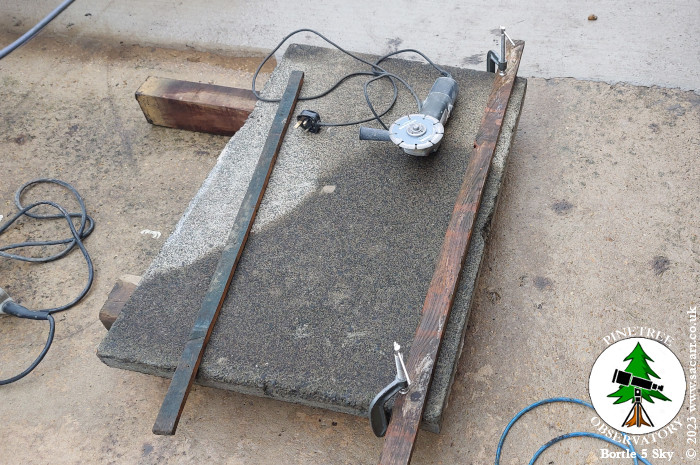
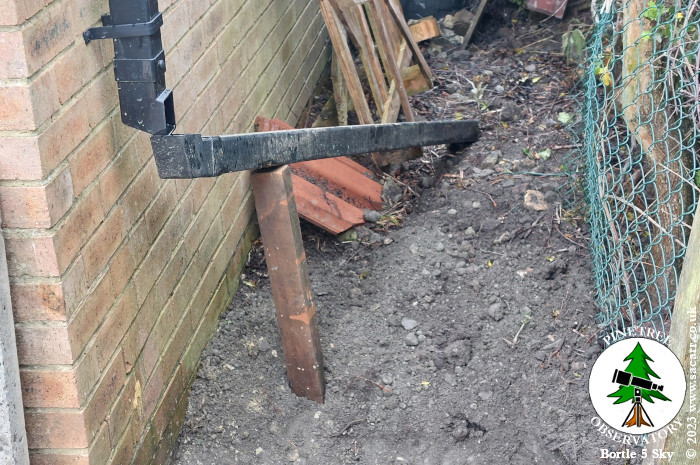
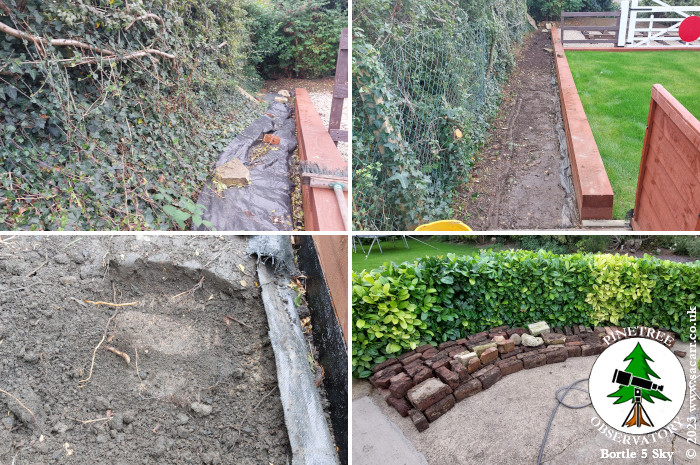
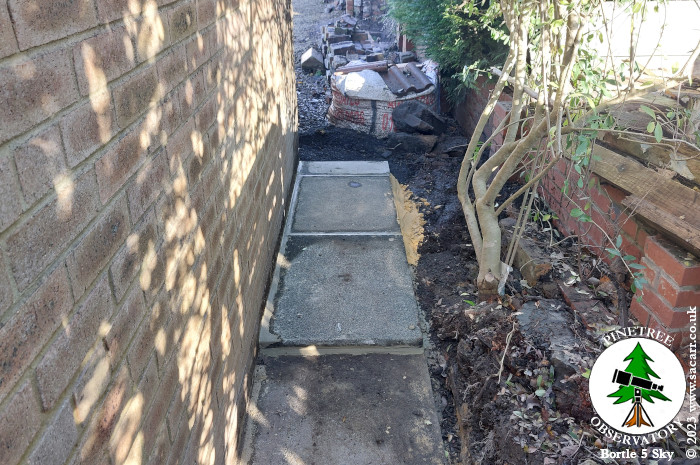
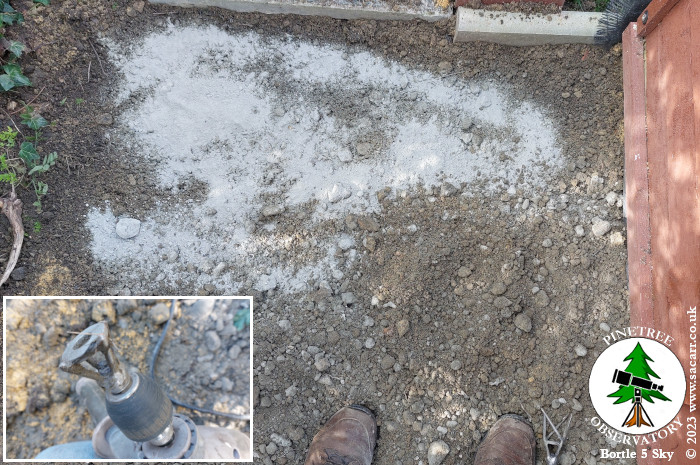
On the 25th, I began working on the foundations for the path, using the "Earth-crete" method. Using my power drill, my new tool worked really well to break up the soil. Due to the amount of stones and the remains of a brick wall under the soil, the nails slowly bent and eventually snapped off. However, the remaining part of the tool I made still worked very well on its own, to break up the soil.

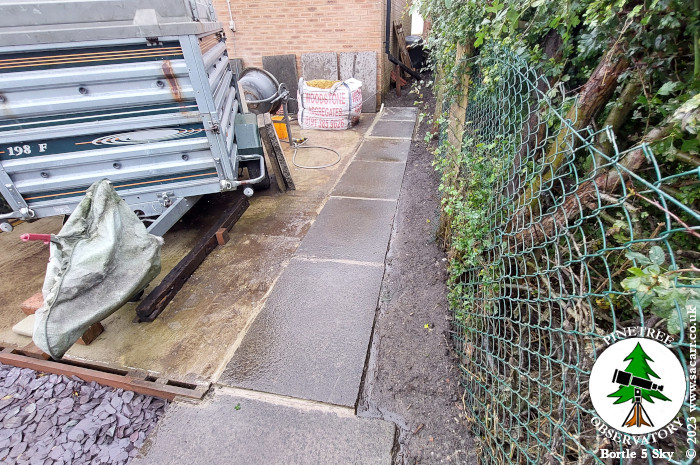
After loosening up the clay soil, I shovelled several scoops of building sand into the soil and mixed that in with the drill. This helped to break up the clay further. After that, I mixed in the cement until the earth was a uniform colour.

obsy557.jpg


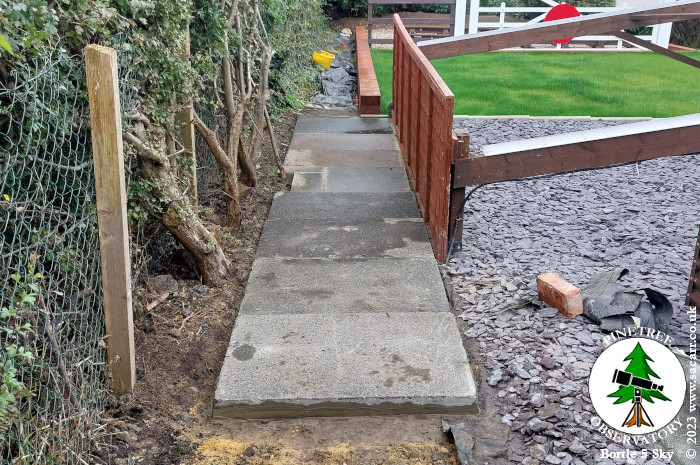
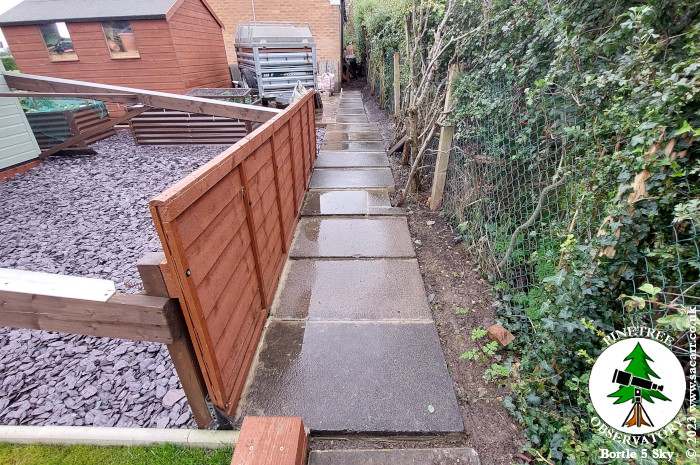
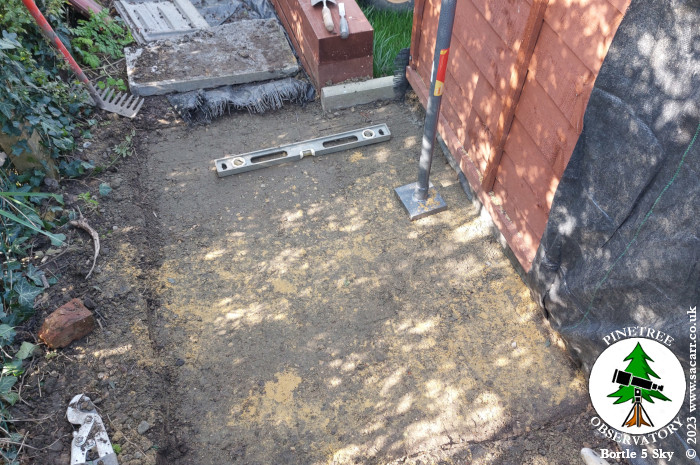
The next step was hard work. I bought a ten pound tamper to pound down the earth to compact it and flatten it. The earth was sticking to the end of the tamper to some degree, so I ended up with a plastic rubble sack on the earth and tamping it down through the bag.

obsy558.jpg
 
I got an area large enough for four paving stones prepared. I need to lay these four slabs before I can go any further, in order to work out the height of the earth preparation for the rest of the path towards the trailer hard stand.

obsy559.jpg


I ended the day by painting my new railway sign in black Hammerite.

September 26th

Much of the 26th was spent moving sand from the front garden to the back, but during some rest breaks, I began painting the white lettering on the crossing sign. Due to the need to rest my hand on the sign in order to paint the white without going over the edges, letters were done a few at a time. By the end of the day, the lettering and edging had all received two coats of white.

obsy560.jpg
 
Sept 26th ~ Oct 2nd

With the railway crossing sign paint baked hard on the evening of September the 26th, it was screwed to the gatepost on the 27th ( I feel safer in the garden now that the sign is up!).

obsy561.jpg


I spent the rest of the day moving building sand from the drive to the back garden. On the 28th, the first three full paving slabs had their edges cleaned up of old mortar ( they are reclaimed slabs ). The first three were laid on a bed of mortar, which lies on top of my earthcrete, which by this time was very hard.

The last slab couldn't be full size, due to a trunk from the hawthorn hedge, which was a bit too close. A large amount of the hedge sprouts out from this trunk, otherwise I would have just cut it out. I made use of one of the broken slabs, cut to a two foot square slab and then two other smaller pieces cut to fit around the trunk, leaving a bit of growing room. That was as far as I could go without more ground preparation.

obsy562.jpg
 
On the 29th, I spent the day with the power drill, breaking up the clay soil, to around 4 inches deep. Building sand was mixed in next, to further break up the clay and to dry it out. That was followed by mixing cement into it and tamping it down. The ten pound tamper took about ten strikes to pack down one square foot. One hundred pounds lifted for every square foot flattened. My arms and shoulders still haven't forgiven me. Once an area large enough for another four paving slabs was flattened, it was lightly watered a few times over the next few hours, to cure the earthcrete.

obsy563.jpg


The 1940s show at the Royal Navy Museum in Hartlepool gave me a couple of days off hard work, but I was back out today. The next four slabs had their edges cleaned up and were lifted up against the fence until the mortar was mixed. More sand was barrowed from the front garden and then the mortar mixing began. These four slabs bring the path almost up to the trailer hardstanding. I've already removed the wooden shuttering that supported the hardstanding concrete, but need to bury the observatory armoured power supply cable along the edge, before preparing any more paving foundations. So eight slabs laid, only another twenty eight to go. The rest of the day was spent giving the laurel hedges another haircut.

obsy564.jpg
 
October 6th/7th

On the 6th, I laid another five paving slabs, from the back of the planters to most of the way along the back of the trailer hardstanding.

obsy565.jpg


Also on the 6th, I moved the remaining eighteen paving slabs from next to the workshop to the trailer hardstanding. Once there, they were all jetwashed. While I was wet, I also jetwashed the concrete driveway in front of the garage. On the 7th, more earthcrete foundations were prepared, ending at the garage.

obsy566.jpg
 
My new diamond cutting wheels make easy work of cutting the 70Kg concrete slabs. One needed cutting narrower to clear the plastic tube containing the observatory power cable. I marked the cut line along a piece of wood using the small grinder, before cutting it with the 9 inch wheel.

obsy567.jpg


On the 8th, I finished laying the last two slabs that bring the path up to the garage. That makes 36 feet of paving laid so far. I'm stopping work at this end now and moving back down the garden, to start extending the path beside the lawn and down to the railway - another 36 feet stretch.

obsy568.jpg
 
After feeling a few spots of rain, I had to make a temporary redirection of the garage guttering, to stop it washing away the fresh mortar from around the last slab.

obsy569.jpg


Here's the full 36 feet length that I've done over the last month. The next stage will begin from where I'm standingtaking the picture, along the new lawn and railway.

I'm fighting to get as much done as I can while the weather allows. Once the lawn and railway stretch are done, I'll then finish the length behind the garage. This area needs much more digging out to stay below the damp proof course. That will conclude the main planned works in the garden. There's other smaller projects of course, but completing the path will finish the whole observatory/lawn/railway landscaping project.

obsy570.jpg
 
October 9th/10th/11th

On the 9th, I spent several hours cutting back the hawthorn hedge and the ivy growing at its base, where I wanted my path. The following day, I began breaking up the clay soil. My drill attachment kept buzzing on some bricks, buried a couple of inches below the surface, so out came the trowel and I started digging them out. Then a few more, and more, all the way along the hedge. This digging bricks out continued into the 11th. I ended up with quite a large pile. They would be useful however, for a wall repair along side the driveway.

obsy571.jpg


My back was aching, so I turned my attention to a job I could do standing up, the wonky wall. Since we moved house, one section of the driveway wall has had a significant bow and lean to it. This was caused by a branch and the roots of an old tree in my neighbour's garden. I'd warned my daughter to keep away from it, as it didn't look particularly stable. Using the 9 inch diamond cutting wheel to cut the mortar, I was able to separate the large capping stones, after which, the bricks were literally falling out. My neighbour came out after hearing the noise and then gave me a hand to dismantle the wall - by hand.

obsy572.jpg


I've taken a few walls down over the years, normally requiring a lot of hammering a bolster chisel to break out the bricks from the mortar. I think this wall was built with lime mortar, as it was very white and powdery, allowing the bricks to be pulled off by hand, many with no effort. How the wall stayed standing for so long is a mystery. By the end of the day, the wall was down, including part of a bodged concrete and brick pillar at the right end, that at one time must have had a wooden gatepost attached to it.
 
October 12th

I got sand mixed into the soil from the end of the observatory to the join between the lawn and railway. Next, two paving slabs worth of foundations had cement mixed in and packed down before light rain stopped work.

October 13th

The remains of the concrete pillar was brought down by slicing it into small sections which could then be chiseled out. My neighbour had also dug out a lot of the soil around the tree and had cut all of the upper branches off. I tried to do some more foundations, but the soil was too wet from the rain.

October 15th

I had a rest day on Saturday the 14th and got back to work on the 15th. The day was spent on the path foundations all the way to the lawn/railway join. Using the 10 pound tamper was exhausting, but I got about another 16 feet of the foundations prepared.

October 16th

The 16th was mostly about laying paving. After sorting the MOT on one of the cars, all the tools came out and I carried seven paving slabs down to the hedge. Much of the rest of the day was spent mixing mortar and laying the slabs.

obsy573.jpg


obsy574.jpg
 
While I had been working on my paving, my neighbour had been digging out more of the tree roots, preparing to fell it. It was actually two trunks intertwined, one of which was already dead. It was already loose in the ground, so I suggested trying a rope around it and just pulling it down. After a few good tugs on the rope, the tree started moving and once we got it rocking, it wasn't going to stay standing long. A few more good pulls on the rope and down it came. Never felled a tree by just pulling it over before!

With the tree on the ground, out came my chainsaw and it was cut up into managable chunks with little effort. Many of the branches were hollow or dead and brittle. The pieces were piled up along the wall, out of the way for now and the concrete rubble bagged up as hardcore for other garden projects.

obsy575.jpg
 
October 18th

The last strip of foundations by the railway, were completed on the 18th. Then there was a brief intermission on the work, to allow storm Babet to do its thing.

obsy576.jpg


On the 22nd, the ground had dried up and the weather was dry, allowing me to add the next four paving slabs. The last slab wasn't laid, as that was where the cement mixer was located. That slab also needs cutting, so figured it would be easier to work there after the current four slabs have set.

obsy577.jpg
 
Lookin' good!
I kind of lost track of this thread, let us know when the golden spike goes in and we’ll all raise a glass! 🙃

I still have one last chair screw to fit, the "Golden Spike". I'll probably hold off fitting that until all the flowers are planted in the embankment in the Spring next year.
 
October 23rd

The final paving stone was cut and laid on the 23rd of October, along with a 10 inch tall slab cut and fitted vertically to end the path and hold back the earth and gravel behind.

obsy578.jpg


Poor weather is delaying further work right now, but the next stage will be to clear out the rubbish behind the garage. When that's done, I can rake out all the dead plant matter, prior to starting to dig out in preparation for the garage path foundations.

obsy579.jpg


I probably won't post again until this path is complete. That will complete the garden landscaping part of the project. The thread will then probably go dormant until the Spring, when I get to plant the flowers in the railway embankment. That will be the final act to complete the whole project.

I'm looking forwards to seeing some colour in the embankment, but for now, I'm really happy to get so much of the path done this year. Fingers crossed for a few more dry days to complete it.
 
October 26th ~ November 5th

From late October to early November, I was working on the path behind the garage. There was a lot of earth to dig out, around two and a half 850Kg bulk bags worth.

obsy580.jpg


Foundations were prepared, paving laid and repeat. The area of the last three slabs was tarmac covered hardcore. It wasn't flat and was a bit too high, so I took an inch or so off the top by slicing it with the diamond cutter and breaking it out with a hammer and chisel.

obsy581.jpg
 
The last stretch took two full paving slabs and a twelve inch cut slab, which were laid on November 5th. At some point, I need to build a low retaining wall next to the path behind the garage, due to the ground height along side the path.

obsy582.jpg


I also want to make a gutter along the rest of the path, down to a soakaway at the bottom by the railway. That's not a priority right now.

obsy583.jpg
 
I'm planning to add a six feet tall fence, next to the garage door, blocking the path access from the front for better security.

obsy584.jpg


I also need a low fence to fill the gap in the fence, currently filled with a shipping pallet.

obsy585.jpg


We're well into the Autumn/Winter weather now, so my next priorty, as the weather allows, is the rebuilding of the garden wall, damaged by the tree.


Back
Top