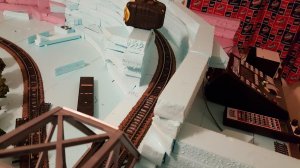
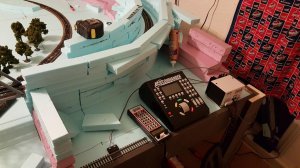
It has begun, sort of...


It seemed fitting that I pull out "the twins", two Athearn BB SD45s, powered/dummy, the first engines I assembled and a testament to how much I care about accuracy and detail...

and with that, I present the completed mainline of the LSL (as soon as I cut and fit that last section). Now if I can just find my soldering iron...

20160116_114919.jpg
 
You must have a big crowd standin' around and hangin' off the locos to make that scene authentic.:)
 
the view from the future maintenance siding that will also be the control panel location for DC operation and the DCS & DCC controllers, however I have an IR module on order, I'll have it set up so I can run DCC wirelessly from any point


[video=youtube_share;5D6QKlMCxRE]https://youtu.be/5D6QKlMCxRE[/video]
 
Last edited by a moderator:
I was surprised actually, this was all done in sectional track, the straights and 22" radius are all Atlas NOS bulk I bought a couple years ago for pennies on the dollar, threw it in a cardboard box and there it sat till now. I currently have two power feeds, didn't solder any of the joiners, gave everything a quick wipe with a 3M pad and some alcohol and DCC and DC run fine. I'm adding more feeds, prolly go with one every 3 feet, have a Parts Express order on the way for the stuff for the control panel, an issue popped up with the DCS Commander I use that doubles as my DC controller, the throttle wheel is becoming very unresponsive, since it's digtal I'm going to assume they use some kind of optical sensor that needs cleaning.

Been going through engines and rolling stock now, see if any just won;t run with the steep inclines, have a few decoupling issues with some on the break overs but none I can't live without. The Bachmann "Alaska Railroad" cars are definitely not going to be running on it, but that was a total impulse buy I never could explain... on the other hand, I have some UP passenger sets from Riv that like it just fine.
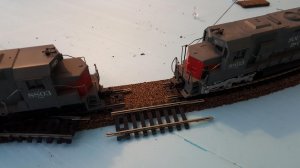
 
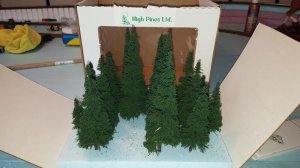
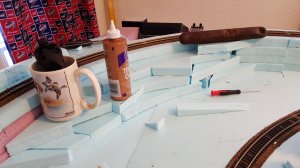
Only place I ever saw these was at our local hobby store. although I can find references to them on the 'net. As I understand it from the store owner, it was a local man who made them. I had forgotten I bought them, found them in a storage tub, they will come in handy today, going to start gluing in foam blocks for the mountain base and play with tree placement for giggles.

20160122_101313.jpg
 
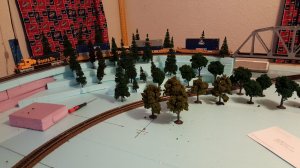
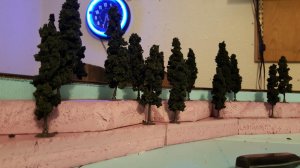
Just playing around as a build terrain up, the High Pines trees are awesome bottle brush style, the deciduous trees are a Woodland Scenics pack, and the other conifers are also a Woodland Scenics pack, and quite frankly the Woodland Scenics conifers suck, not at all impressed, the deciduous trees are tolerable, but I'm already committed to learning to build my own trees fast.

20160122_173920.jpg20160122_173937.jpg
 
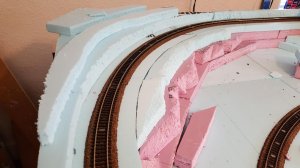
After I get done building up the face and rough carve it, the plan is to paint it with a mixture of acrylic paint, newspaper cellulose and white glue, which should allow for a fairly thick coat that will cling well to the roughed up foam surface. I'm using a serrated knife right now, when I get everything roughed in, I'll use a small brass wire brushed and sandpaper for touch up prior to painting.

20160123_141523.jpg20160123_141535.jpg
 
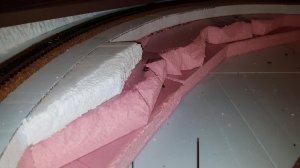
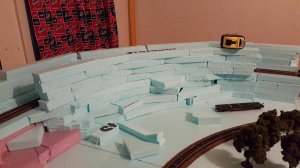
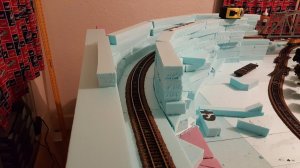
My original concept for the mountain end of things was to lay down layers of foam to build up contours, and then carving them down to what I wanted. That involved far more focus and concentration than I have but I did start that way... how it progressed was building up with small pieces and scraps in a haphazard manner to get an more random contour hopefully. As I moved along I tried to provide little platforms for feature trees rocks etc. And since I found I needed to have a little more height under the mountains on the right side for the control center, I've decided to add a tunnel to that side.

As a side note, the pink foam is a lot more firm than the blue, it doesn't seem to create as much "dust" and I like the way it carves better. I only had a few pieces of it left over from an AC project in my studio I used up for the layout and purchased the blue foam, the next layout will be pink board all the way.

20160123_220406.jpg
 
Looks like your making headway with the terrain. I'll bet you're starting to get excited with seeing some rough scenery in place. Keep posting. Grin.gif
 
I made progress today on the tunnel end, having completed the build up of the face and back wall. also started to layup support for the "roof" of the hidden area all the control gear will be installed in under the mountain.

20160124_230137.jpg20160124_230149.jpg20160124_230207.jpg20160124_230213.jpg
 
I have one comment. I don't see any access to the tunnels if there is a derailment. This could present a problem. Like the progress. Looks like you have a plan.


Back
Top