N
NP2626
Guest
Can someone outline using Radio Control (R/C) Servos for actuating turnouts? I've seen servo mounts for doing this; but, am unsure of how to wire and how to actually move the points with a servo.

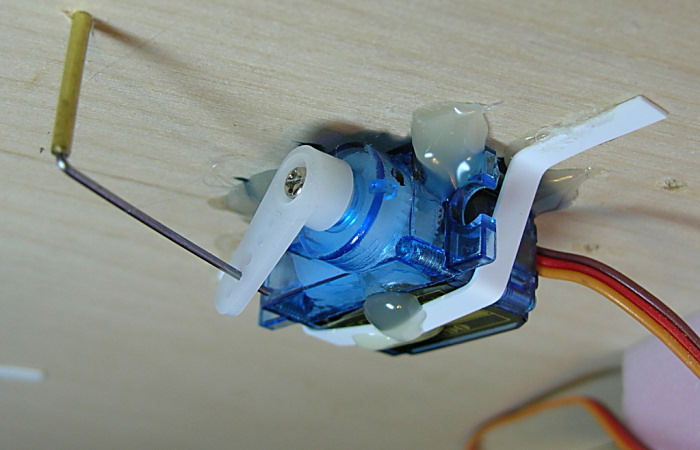
You need something to control the servo. I am using Arduino boards. They (the Arduino boards) are very inexpensive, less than $3 each. They are actually very simple to program. I am mostly using them 1 to 1: one servo per Arduino. The total cost per turnout is less than $5.00. They are no more difficult to install than a Tortoise machine.
Basically, you use a switch, push button, DCC decoder to tell the controller what to do. The controller then sends the necessary signals to the servo for it to shift from one side to the other.
I know there are a couple of commercial controllers to use servos, TAM Valley for one, but with the Arduinos as inexpensive as they are, I went that route. If you want more info, I'll be happy to go into it.
Got the kids at the house today so my replies will be kinda short. I have no problem posting all the info here, since, back when I was teaching, I knew that if one person asked a question, there were at least half a dozen others with the same question but just didn't want to be the one to ask.
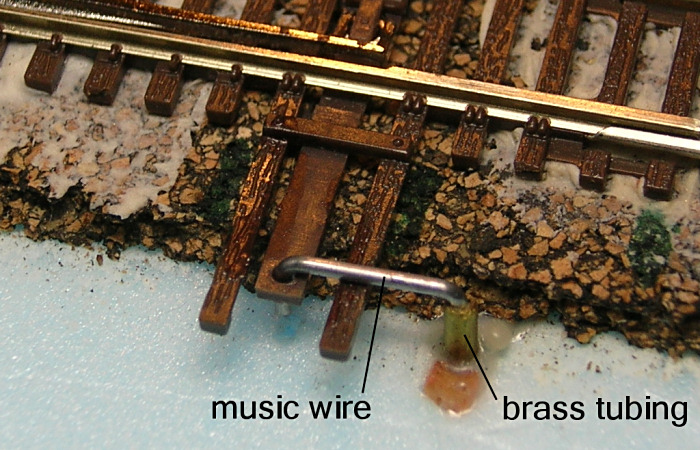
NP - you can't just hook a toggle switch to a servo. A servo needs to be told how many "steps" to move with each actuation. You can use a toggle switch to tell the controller which way to set the servo. You can purchase servo mounting kits, but it really is easy to make your own. We can turn this into a "Building Servo Turnout Controls" thread if you want or I can start another thread showing how to do it.
Back later.
")