Painting rock faces?


I am getting ready to paint my rock faces with a color to make them look more realistic (for my amateur skills) does anyone have a good way to do this to give good contrast, I obviously need a good base coat (currently dark brown, light brown 2 layered)

I just can't think of what would match the dirt color. :confused:
 
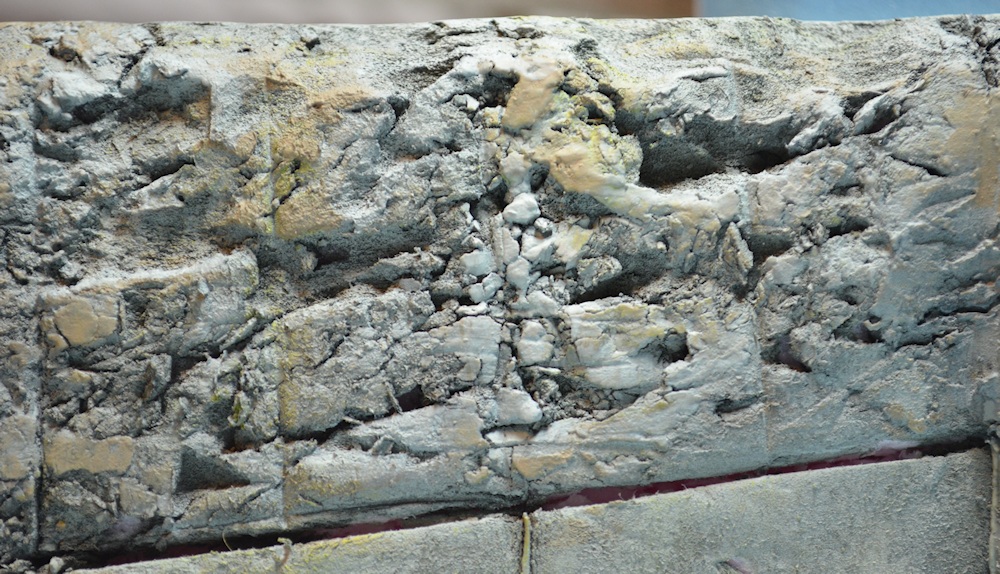
i would get some acryilc paint from walmart in the craft section. You will need some black, gray, burnt umber, burnt sienna, Dilute the paints with water, probably like 9-1

You can use spray bottles if you have them, they work really good.

Otherwise just make sure the paints are pretty watered down, and start at the top obviously and you can use a foam brush.

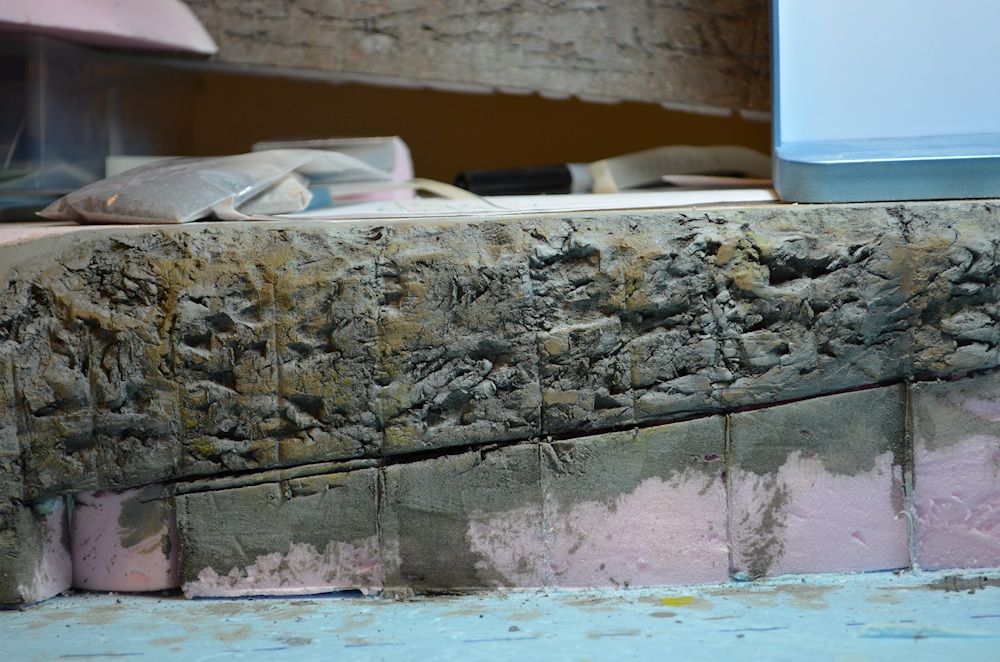
Start with some black/gray then switch off to some burnt umber/sienna, and just keep switching back and fourth, until it gives you the look your looking for.

You really cant mess up as long as you have a nice base coat of the black/gray on your rocks first.

There is a bunch of good how-to videos on youtube, i will try digging some up for you.

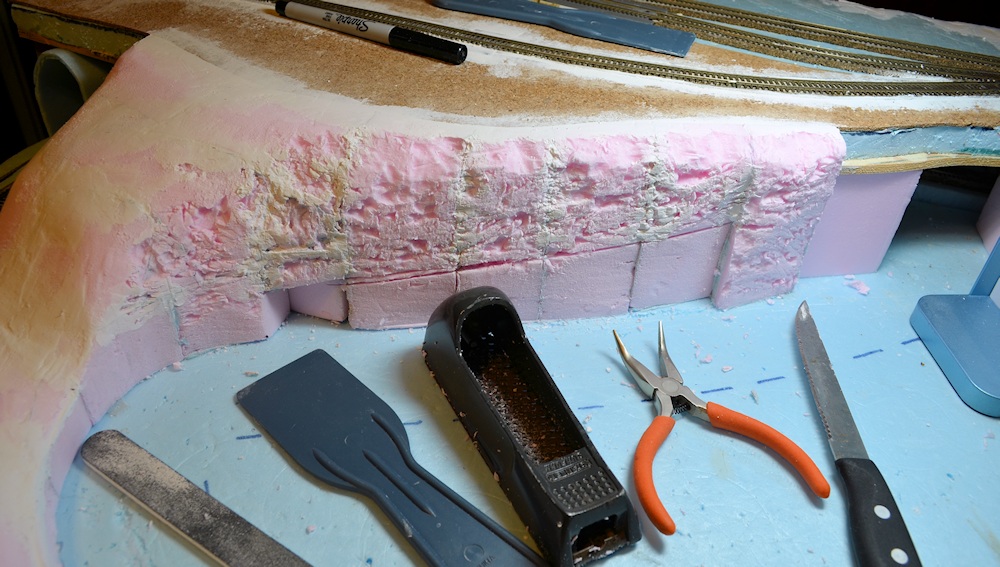
Heres the first one i ever did, not really knowing anything, and just winging it, its good to have some practice
photobucket-41188-1345328414191.jpg

photobucket-38918-1345328382917.jpg

photobucket-829-1345328400691.jpg

photobucket-35610-1345328325369.jpg

photobucket-1228-1345327519065.jpg


After doing one, you kinda know how to do the next one better, and what color to use more of and what to use less of, no biggie really, as long as it looks good to you thats all that matters
 
Last edited by a moderator:
This is what I did. Down and dirty, and quick. I took an old 2 ounce bottle of used thinner and brushed it onto these hydrocal castings. The thinner was a dirty black color and I tried it out on the back of another casting and the color looked pretty good.
 
I used rock molds on most of it. Just stuck them all close together and mixed in some mud alittle bit. Nothing to hard
Figured id take the easy way out on my first try...
 
I made a rock face using Woodland Scenics plaster moulds for my layout. Once glued into place, I sprayed over with grey car primer.Then using a spray can of matt black,brought out the highpoints.Finally a wash of acrylic burnt umber gave me the tones and shading that looked good to me.

Ron
 
Here is my first attempt at creating a rock face for my N-scale layout which is set in New Hampshire.

This started out as pink foam that I textured with a variety of tools -- steak knife, pliers, SureForm, etc., as shown below.

Carved_Rock1.jpg


I tried various painting techniques. In the examples shown below, I started by painting the whole rock face a medium gray, followed by dry brushing brown on selected areas, more or less at random.

This was followed by a wash of black India ink diluted with 70% isopropyl alcohol, which brought out detail but also darkened the rock a lot, more than I expected. With good lighting as in the photos, it does not look too dark.

The final step was dry brushing highlights with light gray. Below are the results.

Painted_Rock3.jpg


Painted_Rock1.jpg


The vertical features in the rock face are meant to represent the drill marks one often sees in rock faces that have been blasted.

I would appreciate all comments and suggestions. As I said, this is my first time attempting anything like this!

Thanks - Jeff
 
Last edited by a moderator:
It looks good to me.I would suggest that you put some greenery in the cracks to break up the grey. If you look at some real rock faces, you,ll be suprised at how quite large trees can grow out of seemingly impossible places.
Ron
 
Thanks, Ron. I certainly plan to add greenery. At this point, I just want to determine if I am on the right track with the coloring of the rock face. I am not an artist, so this does not come easily for me.

One thing I have learned is how helpful it can be to make photographs of scenery elements. The rock face looks quite different to me in photos than it does in person.

Good lighting really helps, too. I thought the rocks were too dark until I set up some lights for photography. The lights were nothing fancy, but they really brought the rock face to life.

- Jeff
 
I,m using the rockface at Horseshoe Curve for inspiration for my scenery, as you can see from the photo, even a steep rocky outcrop can get overgrown in time.
Ron


Back
Top