N-scale InterMountain SD40T-2 shell won't "click" onto its chassis! Any ideas?


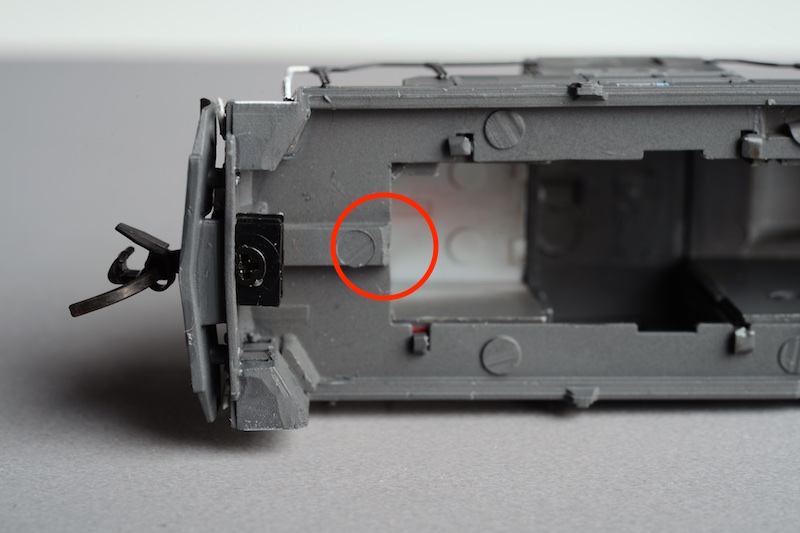
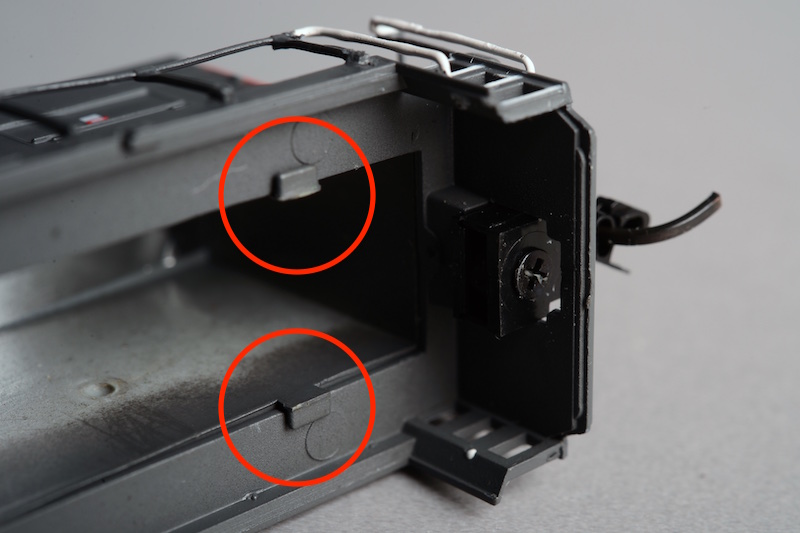
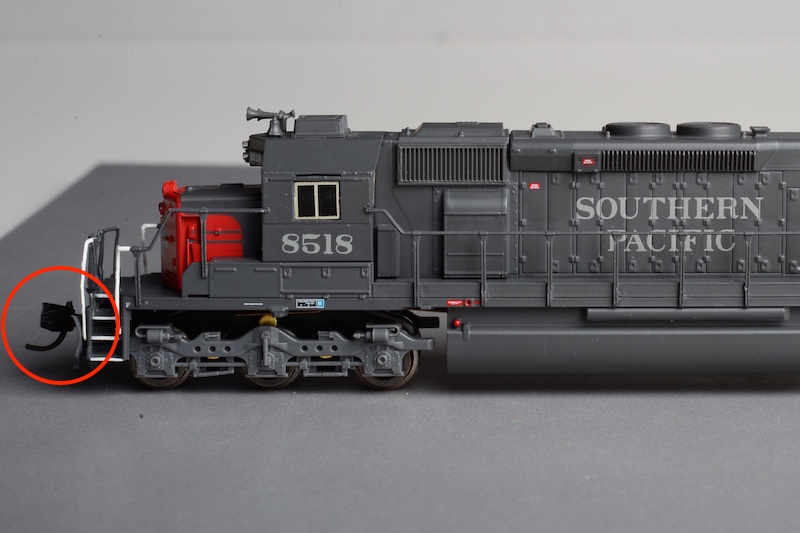
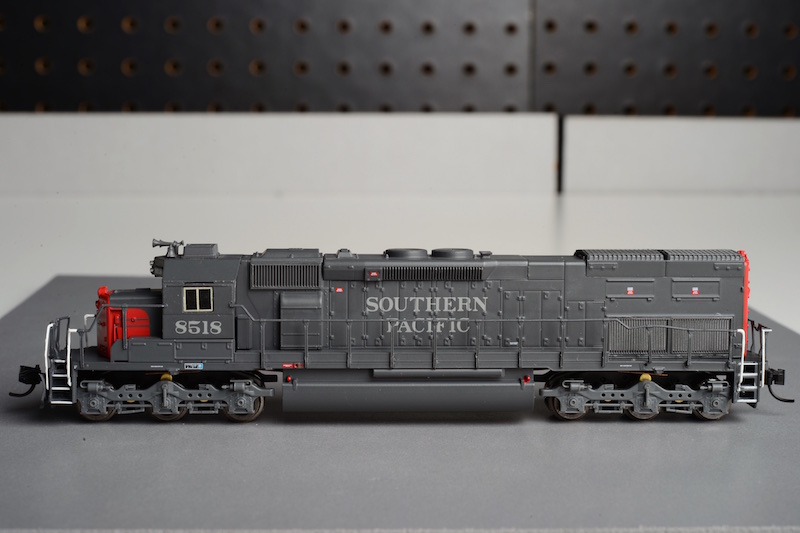
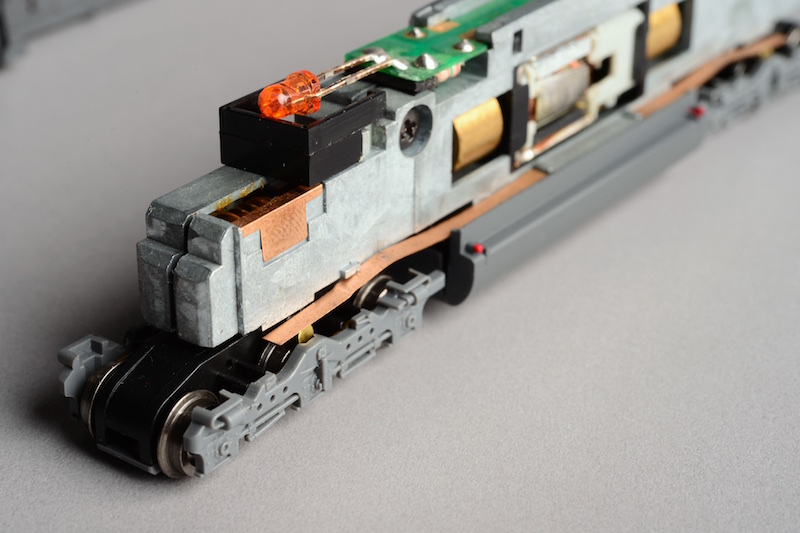
Hey, guys! I could really use your help here: I bought a used InterMountain SD40T-2, and the shell won't "click" onto its chassis! I set the light-blocking piece where I thought it should go (I don't know if that's placed correctly or not), but even when I removed it, I still can't get the front of the shell to "click" onto the chassis. The front of the loco is also "sprung" somehow. Also, the "nose" separates from the cab. Is this broken or is it supposed to do this?

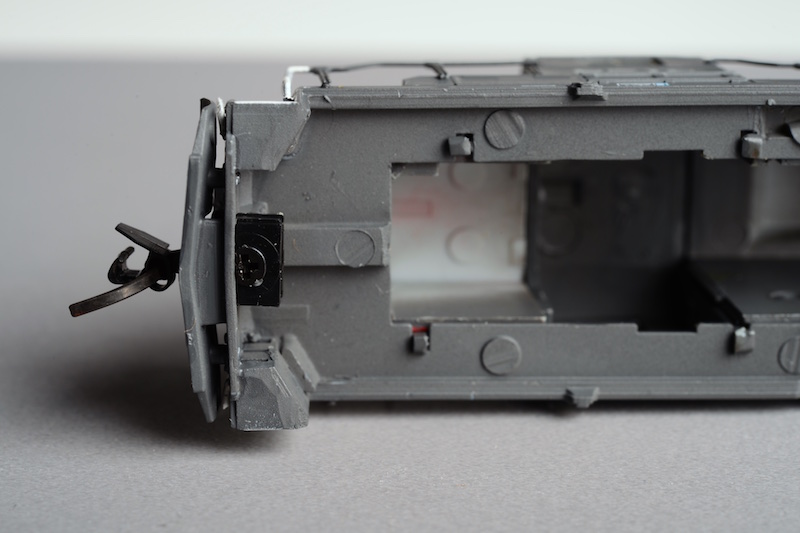
I first noticed that the front coupler was misaligned, pointing a bit "up." When I went to inspect it, the shell just popped off in my hands. Once I click the rear part of the shell onto the chassis, I can still move the shell back-and-forth about 2-3mm. It there a plastic tab or something missing or broken? I can take more photos if needed. If it is broken, any suggestions on "repair" would be welcome (I can either return it to the seller or keep it at a reduced price if salvageable). Thanks for any help!

SD40T-3.jpg


SD40T-2.jpg


SD40T-4.jpg
 
From the third photo, it looks like what once may have been a retaining tab, broke off (not sure since this is the only InterMountain loco I own). I contacted the seller and he's willing to do a partial credit. It's a beautiful loco, in a model I do not already own, so I would like to keep it. Any bright ideas on how to engineer a new tab? I was thinking of taking a soldering iron and melting a bit of the existing shell to form a small lip.
 
Wish I could help, but know nadda about N scale. It is a nice looking loco.
Are you talking about the 4 tabs that are shown on the bottom of the shell?
Where do they attach to the chassis?
 
Well, the seller replied to my request and was very considerate and is crediting my account for a fair amount. Ironic, since of all the new and used locos I bought on eBay, this one is my favorite (I wish I could've bought all of these locos brand new, but I missed these runs whenever they were, and was hell-bent on getting locos in my favorite roadname). The InterMountain locos are quite nice.

I think I can somehow wedge the shell onto the chassis somehow, or possibly epoxy a new lip, but I'm not sure how to re-align the coupler (it's pointing up, and can't couple to anything). I'm not even sure why it's pointing up. I suppose you would use some sort of shim since apparently there must be some play in the coupler pocket.
 
Wish I could help, but know nadda about N scale. It is a nice looking loco.
Are you talking about the 4 tabs that are shown on the bottom of the shell?
Where do they attach to the chassis?

Thanks for your reply. I'm not sure since this is the only InterMountain loco I own. I assumed there was a plastic tab here (circled below) that simply broke off:

SD40-broken-0.jpg
 
Thanks for the reply ... would it be possible to post a pic of the tab on the other end of the shell .. and a red circle on the pic of the chassis where the tab attaches?
How do you draw the red circle? I'm old and dumb!
Thanks
 
I'm guessing it's these:

SD40-broken-4.jpg


I'm on a MacBook Pro. In OS X, open your image in Preview, and click, "Tools -> Annotate." Choose "oval," and hold the shift button while using the touchpad/mouse to "draw" the desired diameter to make a circle. Also, make sure to select "no fill" (circled symbol), line-color, and line-width in the toolbar:

SDdraw.png


If using Windows, there should be similar tools available in "Paint."
 
Last edited by a moderator:
From what I remember of those engines, the shell was not really a snap fit, just friction...
The running gear was from another engine, posssibly Atlas SD50 or something similar.
 
Thanks for your reply, Terry. Hmmm . . . well, I thought whatever was preventing the shell from attaching securely to the front of the chassis was also causing the front coupler to tilt up (so, for now, I have to run it as the lead loco):

SD40-broken-3.jpg
 
Is the coupler made of metal or plastic? If metal, could you possibly bend the shank downward? (Not a permanent solution I know...)
 
Thanks for your reply, Terry. Hmmm . . . well, I thought whatever was preventing the shell from attaching securely to the front of the chassis was also causing the front coupler to tilt up (so, for now, I have to run it as the lead loco):

SD40-broken-3.jpg
Looks like the shell is sitting a little too far back. Try moving it forward a skoach.

Also, you should find the sunshades under the insert that holds the engine in the clamshell case. They should be brass, and the flat brass piece slips into the slot above the cab windows.
 
The coupler is a Micro-Trains 1015. I can't see anything that would cause it to be canted upward, but if everything else is looking good just take out the coupler and lightly file the coupler pocket so that it ends up level. You may have to use a small shim to replace height you filed off.

The light shield is on upside down in the original pics. The two small tabs go into the two small indentions in the frame, not on top and just sitting in the air. Not sure it'll make any difference in how the body sits, but if nothing else that keeps it from vibrating out of place.

I have messed with a number of these tunnel motors, both original and modified. The Intermountain bodies are comparatively delicate and will damage or fall apart easily in some ways. They can also get finicky about getting everything back in place just right. Be extremely careful of the handrails, because unlike other mfrs, once you pop loose an Intermountain tunnel motor handrail it won't just go back in by friction, and has to be glued back into place. The body does only go on by friction, and there won't be anything that actually "snaps" in place. It's just in place once the fuel tank meets the body right and the chassis is flush with the body's underside.

Be advised, at one time I was picking these up for as little as $15 on eBay because there was a seller that flooded the market with a TON of factory rejects. Incidentally, without telling anyone that's what they were, but most folks were like myself and kept them anyway for the price. The problems with mine were in the radiator grills on top, which didn't have all the holes opened up like they should have been. Poor casting. Once I ream out the individual holes in the grill and apply a little touch-up they were great. I also put SD60 body shells on a bunch of them. Still have three sitting around I can't decide what to do with. But anyway...if this happens to have been one of those that were rejected back then because of the body, that could very well be what's going on in that coupler pocket. A different flaw than the one I had to deal with. I'd at least take a look at the coupler pocket with the coupler removed and see if anything's looking out of place or cockeyed.
 
Last edited by a moderator:
Thanks for your reply. I'm not sure since this is the only InterMountain loco I own. I assumed there was a plastic tab here (circled below) that simply broke off:

No, there was never any tab there. None of mine have anything there. It's just some part of the casting, likely where a sprue used to meet the body or something.

Also, someone else said the body looked like it was too far back. It is not. That's exactly where all of mine sit also.
 
Thanks for that detailed reply, Mike! (I tried sliding the shell forward to no avail.) Again, the seller credited me a fair amount, but I'd really like to get this functional. I haven't even tried to re-mount the shell with the light-shield installed, but thanks for letting me know how it goes back in! That's odd about the friction-fit (every time I pick up the loco while trying not to touch its super-delicate handrails, its chassis just drops from the shell). I haven't tried to pull the coupler yet. I'll attempt your suggestions. Thanks again!
 
Thanks for that detailed reply, Mike! (I tried sliding the shell forward to no avail.) Again, the seller credited me a fair amount, but I'd really like to get this functional. I haven't even tried to re-mount the shell with the light-shield installed, but thanks for letting me know how it goes back in! That's odd about the friction-fit (every time I pick up the loco while trying not to touch its super-delicate handrails, its chassis just drops from the shell). I haven't tried to pull the coupler yet. I'll attempt your suggestions. Thanks again!

Yeah, it *shouldn't* be quite so loose that it just drops out like that, but I do have a few that are like that. Enough so that I had to get used to picking locos up by the fuel tank and just being very careful how I did so. It's not how it should be, but sometimes it's that way anyway.

I do wonder, though, if somebody had this thing put together wrong at some point and permanently sprung the body. Then your seller fixed it and put it in place, but the plastic is now warped. That might explain both the easy-off and the canted coupler pocket. The thing is, from your pics it doesn't visibly look like anything's warped or distorted. Heck, I'd offer you one of my bodies as a replacement, but I've only got Cotton Belt and no SP.
 
Thank you for your kind offer, Mike! I absolutely love this shell, so I guess I'll just tinker with it a bit more. I've almost completely destroyed the handrails due to sheer ignorance, and I only just now figured out to pick it up by the fuel tank as well. Heck, the way this shell sits on this chassis, I don't even know if it even belongs to it.
 
Interesting article in the March 1988 MR , page 124, about building an SP or Cotton Belt SD40T-2 from a Bachmann or Con-Cor SD40-2 and/or SD45-2's. I just happened to come across it this morning. If you would like -- I could try and scan the article and send it to you.
Might take me a day or two to get around to it.


Back
Top