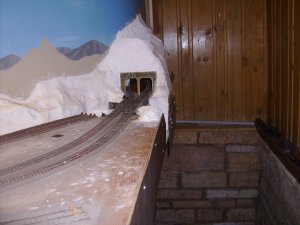
My Northern Pacific Butte Montana Layout.


Willie - Does the program advance where the car is; or, do you need to enter that information? What is the program's name and what did it cost?

Mark

Hey Mark! I missed this return post a couple of days ago, my apologies. Yes it advances the cars when you hit the update button.The program that I am now using is "Easy Model Railroading Inventory" by Bob Langer. He no longer updates it (moved on to other things in the programming world), but it is a freeware program now archived and available at http://pdc.ca/rr/freebies/.
I originally used one that I wrote myself in Microsoft Access, but this one is more professional.
Willie
 
HPIM7584.jpg HPIM7583.jpg HPIM7580.jpg

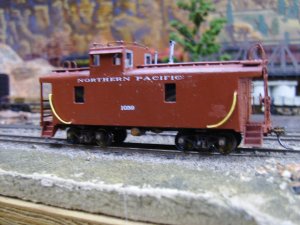
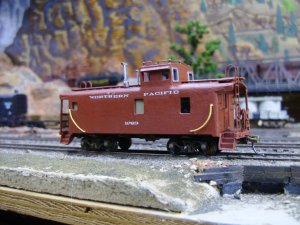
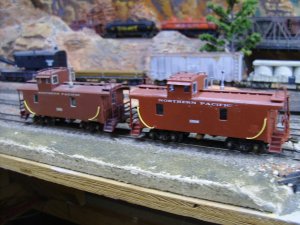
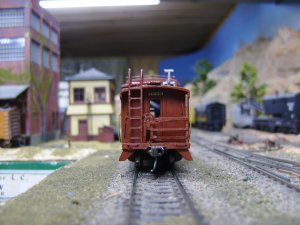
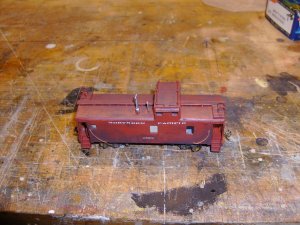
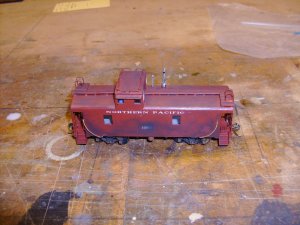
So, in post 208, on October 27th, 2016 I stated this build of a Northern Pacific 1049-1100 series Northern Pacific Caboose. The build almost took 2 months. However, I would not be truthful if I said that this was all I did, all day long. In fact, I did many different things along with building this caboose. Like I've said a few times before, I do this type of work only when the mood strikes me! To do otherwise makes the project into a job.

Photo #1 shows the right side and photo #2 shows the left. Photo #3 shows both Caboose # 1001 and Caboose 1063 for comparisons sake. Photo #2 shows that I pulled the shades down in the two forward side windows. I placed two men in the cupola and because the forward large window was too close to the cupola, one of the men's feet would have been showing in the window! The shade being drawn in the small window forward, was normal, as this was the bathroom on the caboose. Ihave to say that the height difference between 1001 and 1063 is not as noticeable as I thought it would be (there is one scale HO foot difference).
 
Last edited by a moderator:
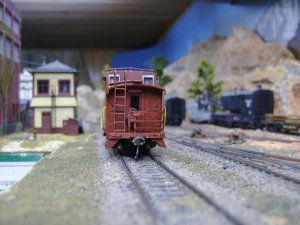
HPIM7577.jpg HPIM7579.jpg

Photo #1 is the back end of the caboose and photo # 2 is the front end. All photos to this point have been taken pre weathering.
 
HPIM7587.jpg HPIM7588.jpg

Photo #1 is the left side and photo #2 is the right. At this point, I feel the caboose is ready to be used on the Layout. Often, with weathering, I like to see a car in operation to see if I like what I've done. So to the layout she goes and we'll see if I want to do more. For all practical purposes this project is completed. Now, it's on to my other thread on 'Up grading old freight equipment".
 
Congrats on an excellent build. Really nice to see it on the rails.

I work pretty well the same way. I like to get some work done and wait for glue or paint to dry properly before moving on with the project, or sometimes just set it aside and work on other things before coming back to it.

Well done. appl.gif
 
Thanks Chet! Although I did get sort of tired of working on it, it will make a nice addition to my layout. I suppose the week I was sick, was a nice little break.
 
View attachment 59819

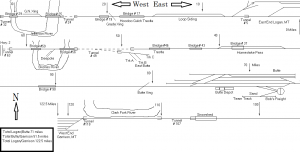
Here is a schematic of my layout, double click and it will get bigger . The drawing was done in MS Paint. It would have been nice if I could have shown it as a single line; however, in order to allow for any detail, I needed to scale it up. To follow along, start at the upper right and proceed left (West) from Logan. When you get to the end at the left of the upper line, drop down to the line below, move all the way to the right, then head west again. So on and so forth. You will pass through Butte Montana on the third line down and then get to Garrison, the end of the line for layout on the forth line. Some of the bridges and tunnels fit with what was actually on the line between Logan and Garrison, this is pure accident. Remember that all the track was down, tunnels and bridges in place, before I decided I was going to model the Northern Pacific in the Butte area! For me there is a certain amount of Serendipity in how this all worked out! On the top line and second line, to the left are areas that don't fit reality. The two rivers drawn are actually the same location on the layout which the track crosses twice. In reality the top track, does cross the Jefferson River a couple times, so maybe this is correct, but the Jefferson River was not a deep canyon as I have made it. Then, going down into Butte from Homestake Pass, the line does cross the Scones Viaduct which seems to cross a dry wash. I would guess in the spring water does flow here; but, whether Skones was ever considered a river, I don't know.
 

Attachments

  • Butte Shortline.png
    Butte Shortline.png
    23.9 KB · Views: 220
Last edited by a moderator:
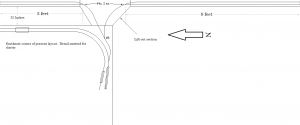
I have been considering over the last few years, adding staging tracks to my layout. I have six staging tracks now of varying lengths from maybe 48 inches to 72 inches that are difficult to reach into to re-rail a car or fiddle cars. I have determined that the average length of my freight trains is around 84 inches. So, I need staging tracks that are easy to access that will handle my freight trains. Looking around my layout to determine where I could add staging, I've determined that among other possible options, the easiest would be to extend off-layout from the Great Northern Interchange Track. I have 19 feet of wall I could cantilever off of, adding a 6 inch wide, 1/2 inch thick, 2 track plywood staging yard. The current thought is the G.N. Interchange track would split on the layout and cross over to the wall, via a lift out section with one track heading one way and the other going the other way. Per compass directions, one track would actually be going North and the other headed South. Both the North and South tracks would split again, providing staging tracks for four trains. The North staging tracks would provide two tracks five foot long tracks and the south would provide two staging tracks almost 10 feet long. I am in the process of designing this all out. I have ordered some of the things I need to do this; so, it looks like I am committed to this modification!
 
Last edited by a moderator:
Mark - Regarding staging tracks, you can never have enough. Model Railroader's Tony Koester had a simple formula for staging tracks which was 2n+1, where n was the number that you think that you need!

Willie
 
I've known that I was short staging tracks and that what I had for staging, was inadequate, for many, many years. Because I had two hobbies, R/C Airplanes and Model Railroading, I was willing to let this inadequacy slide. I am only interested in Model Railroading, now. So, it's time to do something about it. The best fix for my layout would be to install two helixs at the East and West ends of the layout and lengthen the staging yard to about 10; or, more feet in length. I would estimate that 10 inches of space between the staging yard and what ever is overhead of it, would be a vast improvement over what I have now. This much modification to my layout just isn't going to happen at this late stage in the game.

So, I have been thinking of other ways to build some staging. I had thought about staging on the West end. However, this would put the tracks right over our chest freezer. Yes, the freezer could be moved. However, available space in my basement is pretty limited. What I have come up with will be more accessible, easier to build and places the staging yard right over my off-layout car storage area. This is the best option from my point of view.

HPIM7308.jpg

The above photo shows what would be the Northern end (actual orientation) of where I'm talking about. The staging yard would be at the same level as the layout and be cantilevered 6 inches out from the wall on the right side in this photo. With the addition of the 6 inch wide shelf for the staging yard, this would leave the Isle 22 inches wide. Since this would be a low activity area of my layout, I will make due with a 22 inch isle. The present car storage shelf location is visible in the lower right of this photo.
 
Last edited by a moderator:
Depending on your stature, shuffling sideways with a bit of sucking in might suffice, perhaps :rolleyes:
 
FiddleYards.png

The above drawing shows the layout of the staging yards. Although the section coming off of the present layout will be a lift out section, for the most part it will be an easy duck-under. Although some dimensions are given, the drawing is not to scale.
 
Last edited by a moderator:
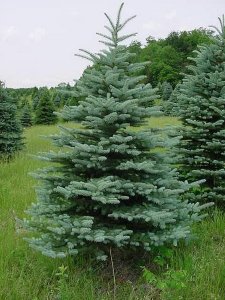
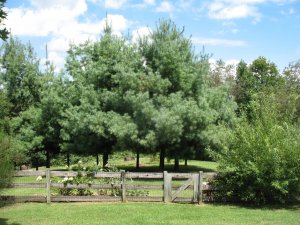
Something I have noticed over the years in viewing model railroad videos; or, even in the Model Railroading Press, is pine trees with what I'm going to call a "Bald Head".
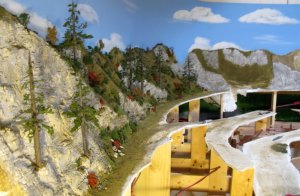
Pine tree.jpg

The photo above is from a fellow who has a very long running thread in the HO Scale topic here at Model Railroad Forums. This modeler does absolutely fantastic work and he has a 407 page thread there entitled Building the Pinacle Creek Mining & Timber Company RR. I have no doubt that he has helped many people with their layouts by demonstrating how to do many aspects of model railroading. I can appreciate all that he has done and I don't want to make this discussion about trees to be pointed at his work. He simply has copied what he has seen many other people do! I found an article back in the early 1950s where Jack Work was describing making pine trees. I don't know if this is where the "Bald Head" Pine Trees idea came from. I live in Northern Minnesota, we have pines up the wazoo here, I have traveled through-out states with pine forests, North & South Dakota, Montana, Wyoming, Colorado, etc. and I have to say that I have never seen much in the way of "Bald Headed" Pine Trees. I know what Jack Pine, Norway (Red) Pine, Eastern White Pine, Ponderosa Pine, Douglas Fir, Sitka and the Various other Spruce & Balsam species, Lodge Pole Pine, Junipers, Cedars, etc., etc., etc... look like and they mostly do not have "Bald Heads"!

So, what I'm I trying to say? It's this: The pencil sharpener ends of your pine trees need foliage to cover their heads!

I know I really shouldn't have said anything about this; but, why do such a fantastic job with your scenery, only to have trees that are never; or, very rarely seen in nature, be so prolific on your layout?

Off my soap box! Back to your regularly scheduled programming.
 
Last edited by a moderator:
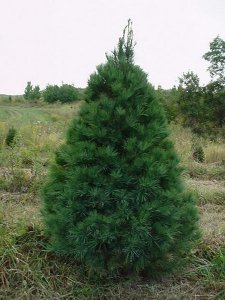
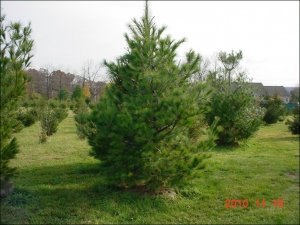
Not to start any arguments here, but bald-headed pine trees are common in Texas, Mississippi, Louisiana and Alabama. They also exist but are not as common in Tennessee. I only speak of states that I have been to. They are not actually bald, but the growth is so minimal that it can't be seen from the ground.

Willie
 
Do they look like the photo? Would you be able to produce a photo, so I can see an example? Do you know the species of these trees? I know they are not seen in the western U.S. I am not saying "Bald Headed" Pine Trees don't exist. I do not think there are forests of them and I think on our layouts, they just don't look right. However, if I'm wrong, once again I will be seen with egg all over my face!
 
Last edited by a moderator:
There are some trees that look like that. I would call them a bit stressed, probably being in a dry climate or when too many of them are very close together. I have thousands of acres of National Forest on my doorstep and am just 50 miles from Yellowstone Park and the trees are more like the ones in your photo.
 
Willie, The trees you showed, look like they could have been photographed here in Minnesota. Obviously what I've described as being "Bald Headed", did not get described very well! What I mean is the trunk of the tree slowly tapers down until the very top of the tree, then it looks like someone stuck the tip in a pencil sharpener and this tip part then sticks up above any foliage.

Now, if Chet says he sees trees like that out in Montana, then obviously I am wrong and how these folks are building their trees, is exactly correct.
 
Mark -
obviously I am wrong
You aren't wrong; there are different varieties and different growing climates that dictate what we see. I understand better what you are referring to now as well.
You northerners just have a different way of describing things!!! LOL

Willie


Back
Top