My new Layout


Catching up with where I'm at , sorry about the poor pic quality


IMG_20160215_162115_zpsrucgjmrb.png


IMG_20160215_162105_zpsv8wye7nd.png


IMG_20160215_162057_zpsufdkdgpv.png


IMG_20160215_162038_zpsu0vo5uur.png


IMG_20160215_162029_zpsqxnjf2am.png


IMG_20160215_162023_zpseyhsuthd.png


IMG_20160215_162015_zpsyvngqu7q.png


This is the new bridge I built


IMG_20160215_124714_zpsf1pvkzg7.png


and with the nbw's and supports


IMG_20160215_222132_zpskn23gkac.png


IMG_20160215_222158_zpsoljbzwrm.png


IMG_20160215_222214_zps4qtitjwz.png


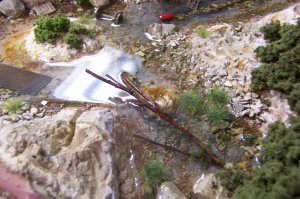
and cutaway for bridge , the blocks will be used for the brick work


IMG_20160216_145138_zpshtq8yoai.png


I'm using ME bridge track


IMG_20160216_155644_zpsaozsycqr.png


IMG_20160216_155658_zpsk5cidpff.png


You can get the idea with this pic
IMG_20160216_160024_zpsp1rx5hz5.png


And in place , this is the first time I've used scuptamold, sure is nice , also learned I can used my earth coloured paint watered down to colour the scuptamold


IMG_20160216_180753_zpse9epq9gn.png


IMG_20160216_210145_zpsn7zffndo.png
Wow Lynn , You are lightening fast.
Mike
 
Working really only allows so much time for working on the layout and building things for the scenes so as I go along I take pics and when I get time I visit and post, so not as lightening fast as you think.:)
 
Thanks guys ,catching up on the post...
After doing another cleaning I redid the water base
IMG_20160220_155902_zpsuggxijh8.png


IMG_20160220_155830_zpsipy4tfb1.png


IMG_20160220_155821_zpscyaiy3lj.png


and more ground goop


IMG_20160222_174124_zpsezmyqoyh.png


IMG_20160222_174130_zpsfh9cg1f1.png


and rocks


IMG_20160222_185351_zpsofkw1s9n.png


IMG_20160222_185407_zps2gukrkk1.png


Started working on the access to the Boat Repair via steps


IMG_20160223_160655_zpsm1mb5nxo.png


IMG_20160223_170028_zpsfw8qyu7y.png


and completed


IMG_20160223_202951_zpsdneg0rop.png


IMG_20160223_202958_zpsof1k3mzg.png


The water looks wet because again I added more paint after going over the edges again to make sure they were sealed.
 
That's a great transformation. That whole scene is blending together so well. What is you're water of choice?
Rick I've done so many experiments with different things over the past couple weeks and the bubbles in golden gels modge podge etc are unacceptable so looks like for now I will be using envirotex as you will see in the next group of pics, just did the pour.
 
Ok this post will get me pretty much to where I'm at as of today.


Gearing up for barnacles


IMG_20160224_115657_zpsrm3nu0nn.png


water and white glue same stuff I make up for scenic cement


IMG_20160224_115703_zps2y2wxfwx.png


And finally water is poured, river is very slowly seeping down into the port so port will be deeper than first anticipated but no big


Left to right top of river. You will also see a little fishing boat I've been working on in my spare time for the port.


IMG_20160224_143938_zpsnisjvpbp.png


IMG_20160224_143944_zpszglukctd.png


IMG_20160224_143951_zpsunum9aab.png


IMG_20160224_143956_zpsm9pg0sy4.png


IMG_20160224_144001_zpsgm8wgpil.png


IMG_20160224_144010_zpstsvps6gz.png


IMG_20160224_144019_zpsrqomnvfa.png
 
I love it. The reflections off the water are going to make for some outstanding photo opportunities. Can you do a double pour with that material if your not sure where your water level will be?
 
Looks great!!! How deep do you pour the Enviro-Tex?

I'm slow and only do a 1/4" at a time, but think I could pour deeper.

Thanks.

Greg
 
Thanks guys, for this round of pouring its turning out pretty deep in the port as I can see my docks starting to sit low , but I have poured in several layers before about 1/4 inch at a time.Greg I went to the dollar store and bought two of the biggest plastic cups I could buy and half filled each with resin and harder each and did this twice so there's quite a bit in there. I'm just happy I didnt spring any leaks. I spent a good amount of time shoring areas up from under the layout with plaster cloth.
 
Lynn:

Thanks for the info.

My last use of Enviro-Tex was for a spring type area, polluted by the debris off the trains that travel within a short distance. One mistake was not painting the bottom of the "spring" a darker color, like another area. And, I should of poured the water deeper to cover the debris to keep it from creeping up. Or, I may use Dull Kote to kill the shine. I may still do another pour if I can easily remove some of the plant life I added around the spring.

I do cover the fresh pours with newspaper to prevent and dust from falling on the "wet" water.

100_0785.jpg
 

Attachments

  • 100_0788.jpg
    100_0788.jpg
    256.9 KB · Views: 177
Greg once I pour I try to stay out of the room at least overnite. I wouldnt recommend covering, thats how mishaps happen. You can always give the top a dark wash , not full strength but a thinned out wash then pour again. Yours looks good.
 
That river scene is coming our AWESOME. I love the cave!

Looks great!!! How deep do you pour the Enviro-Tex?

I'm slow and only do a 1/4" at a time, but think I could pour deeper.

Thanks.

Greg

My experience with Enviro-tech is that about 1/4" is about as deep as you want to go. The bubbles that form when you mix it up can't make it to the top where they can be blown off if it is too deep. I've got a great little river scene that is full of really churned up water... that's my story to cover the bubbles... Multiple layers of the epoxy work just fine if you want a deeper level.


Back
Top