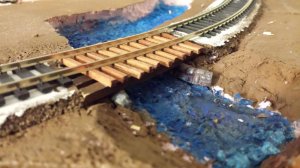
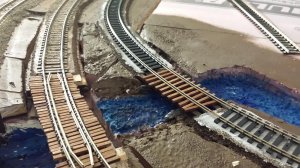
Molded My Own Retaining Wall, Not Too Bad


bklynman01

Active Member
So I have a small bridge that carries a track that leads up to a coal mine. Originally, I wanted to hand lay this entire line and really put the time and effort into it, but decided that my skill level at this point is not quite where I would want it to be. Not that I couldn't do it, but I would always want something better here. So I decided to just use flex track and focus on other smaller items that wouldn't take as long. This one being the retaining wall on either side of the creek that runs through town.

I went to Michaels and purchased a block of modeling clay. It was under $10, and a whole lot of stuff can be made with it, including casts. In fact, the reason I even picked it up was to be able to make casts of brick walls in the future.
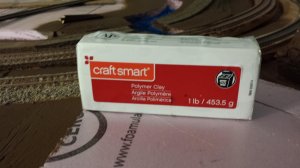
20150227_191855.jpg


I cut a very small piece off and made the rough shape in place.
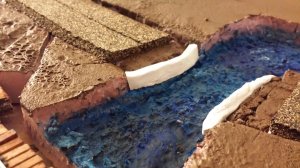
20150227_192202.jpg

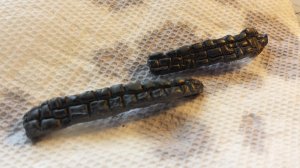
Then I removed the pieces, took them to my bench and "carved" in some brick faces. I used a small flat head screwdriver to press in the grooves and my fingers to smooth out the faces after. It took a little bit of work to get exactly what I wanted out of it. Once I was happy with the shape, I pressed it back into place to check the fit.
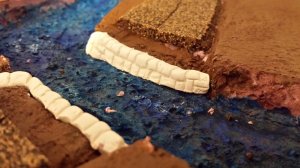
20150227_193418.jpg

Then I placed my runners down on the soft clay to make the impression for where they will sit after final assembly.
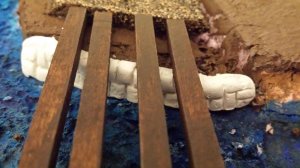
20150227_193531.jpg
 
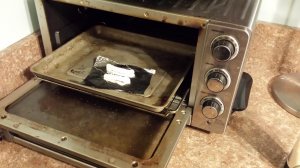
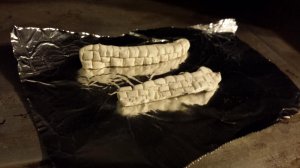
I then took the clay pieces out and baked them per the instructions on the package. It is supposed to be 375F for 15 minutes per 1/4" of thickness. You can see in the pictures, these pieces MAYBE 3/8" thick, but it still took almost 45 minutes of baking before they were hard. Could be because I used a toaster oven instead of an oven, but... lesson learned.

20150227_212314.jpg20150227_212319.jpg

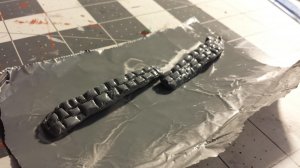
After hard, I hit them with a quick spray of Krylon Primer Spray Paint and let sit 24 hrs. The reason I let them sit for so long is that I wasn't sure how porous the pieces were and wanted to make sure the paint didn't soak in too much.

20150227_212704.jpg

To make sure they were still good and kept their shape, fit them in again to make sure.

20150228_092047.jpg

Looks good so far! On to the next steps...
 
Besides never having molded anything from scratch before, I also have never used india ink. So, why not just throw everything at the wall and see what sticks, right?

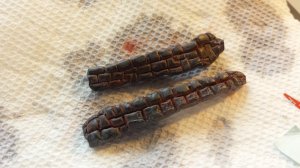
I took about 2.5mL of india ink (measured because I used a dropper that has the measurements on it. 2.5mL is a very small amount) and mixed it with about 1/4 cup of water (ish). I first ran the pieces under some water to get them wet (saw this tip in a YouTube video) to help the ink run when applied. Then applied liberally to the visible surfaces of the pieces.

20150307_163650.jpg

After that was done, I gave a quick spray of some dull coat (also Krylon brand). This allowed me to rub in some weathering chalks - a little red and brown seemed right.

20150307_163912.jpg

Once again, place them in and see what it looks like...

20150307_163947.jpg20150307_163957.jpg
 
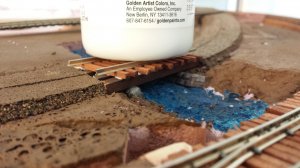
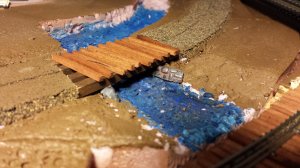
Apparently, I forgot to take a picture with the stringers only down, but I promise that I evaluated again. When putting them in, they fit just as snug as they did before. I thought about stopping there and just laying the flex track over the bridge, but there is a bridge next to it that uses hand laid rails, and I didn't like the look of the flex next to the nice hand work less than a few inches away. SO... I took the last of my stained ties and laid them with some extra spacing with some white glue. I put a couple of pieces of scrap rail and a heavy bottle on top to hold it down over night.


20150307_165349.jpg

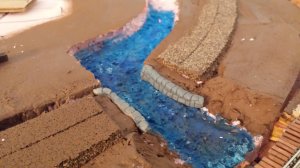
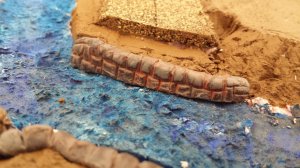
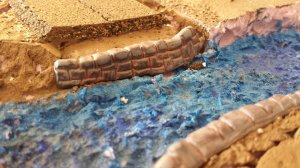
Removed the bottle and checked the appearance again. The rocks are hardly visible, but the little amount of color on them makes the blend well with the unfinished scenery around them.

20150307_192344.jpg20150307_192358.jpg
 
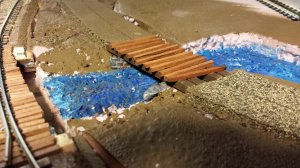
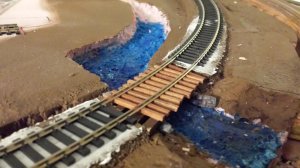
For the track, instead of cutting pieces that fit only for the bridge, I laid the flex track over the ties and marked where the bridge begins and ends. Then I cut the ties out from the section of flex and laid it over. This creates a situation where there is absolutely no kink or sudden change in elevation at a joint just before or after the bridge. It is a full 3' of rail with a bridge close to the center. I still need to put some spikes in it and add some ties on the edges (looks like too big of a gap with no tie between bridge and uphill side of bridge).


20150308_222809.jpg 20150308_222822.jpg 20150308_222846.jpg

Okay... now lets hear it! What do you guys think? Please pay no mind to the unfinished surroundings, as I am well aware that they do not look good as of now.

Thanks for looking!
 
The water, abutments, and elevations around the bridges look great!! wonder if you are going to center the ties under the track?
 
It looks good. My only "rivet counter" comment would be that it appears you have a couple of vertical seams where the "bricks" are not staggered. In real life that would cause weakness in the abutment.
 
So overall, is it a good experience working with that stuff? I've seen it and have considered buying it several times, and have even considered the air dry stuff. Did you get the result you were looking for?SC
 
lasm- When I put the stringers down, I placed them under the rails. Then when I put the ties down, I centered them on the stringers. The pictures are the result. Rookie mistake, not checking the alignment 14 times instead of 13.

OldGuy- after sculpting the pieces, I realized that some bricks were aligned. However, this is only one of many foul-ups on the layout that a rivet counter will see. I don't have any friends that are into this, so no one will ever point it out. The next wall, however, will certainly carry that detail!

S-C- I did get the result I was looking for. I'm very happy about being able to make a wall that fits perfectly into the space I need. In fact, I now plan to make a mold and use the clay instead of plaster. By using the clay, I can have one flat mold that I press the clay into. Then take it out and shape it to the area I'm working in and bake it hard. I did see the air dry stuff, but since I was buying a large block of it, I wanted to be able to keep it around for a while without concern of it curing.

Thanks guys for the kind words! I'll be sure to share my next experience with this stuff.


Back
Top