
You are using an out of date browser. It may not display this or other websites correctly.
You should upgrade or use an alternative browser.
You should upgrade or use an alternative browser.
Wombats N Scale Structure Builds
- Thread starter goscrewyourselves
- Start date
goscrewyourselves
I'm the one
Paul,
I've tried chalks in the past but when I have tried sealing them, what I use (dullcote) merely "blows" the chalk away.
I've tried chalks in the past but when I have tried sealing them, what I use (dullcote) merely "blows" the chalk away.
Iron Horseman
Well-Known Member
Right. Easy to redo and try again. Also just one method may not be the answer. Combining normal paint with washes and dry brushing is usually what I end up doing.Thanks guys. I'll give the "wash method described a go and see how it does go. Worse comes to worse I can "wash it off" and try again. I'll also take the advice and NOT use white paint as the wash. That could be part of the problem I'm having getting it to look right.
Sometimes I'll do one wash right side up and another upside down. That is wash light grey letting the wash settle more toward the bottom, then when that dries, wash with a dark grey and let it settle more toward the top giving a "shadow" look. Having said that, I've never tried this with N-scale. The "mortar" might be too small. After doing a wash sometimes I dry brush to give the final effect I'm looking for. If I don't like it I try again. One building took 6-8 washes before I got it to look like I wanted it to.
Last edited by a moderator:
goscrewyourselves
I'm the one
Thanks Horseman, sooner or later I will get it. I know I had the same issue with HO structures and think I only ever got one of them to look decent. You think I can remember how I did it though ... nope 
flyboy2610
Loveably weird
What works well for one person may not work so well for someone else. But with acrylic washes it is easy to wash it off and try again. You'll find something you like.
goscrewyourselves
I'm the one
What works well for one person may not work so well for someone else. But with acrylic washes it is easy to wash it off and try again. You'll find something you like.
That's the plan ... sooner or later I'll stumble onto something that I can get to work for me
goscrewyourselves
I'm the one
Lynn,
Rushing is not in my vocabulary for this layout. Had I been doing this 12 months ago, the bench work and track would have been laid ages ago. This one is being done "right" and with a great deal of thought and planning before I do anything at all.
Rushing is not in my vocabulary for this layout. Had I been doing this 12 months ago, the bench work and track would have been laid ages ago. This one is being done "right" and with a great deal of thought and planning before I do anything at all.
goscrewyourselves
I'm the one
Trackside Transfer Station
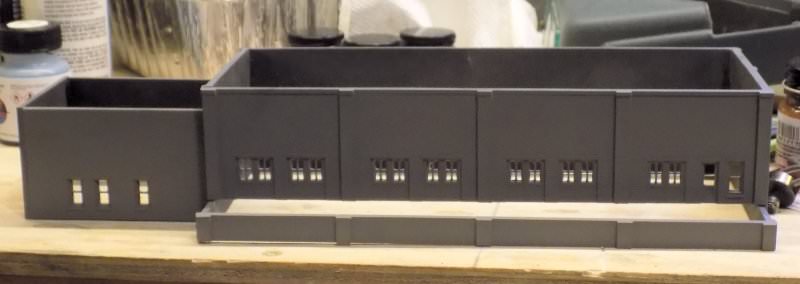
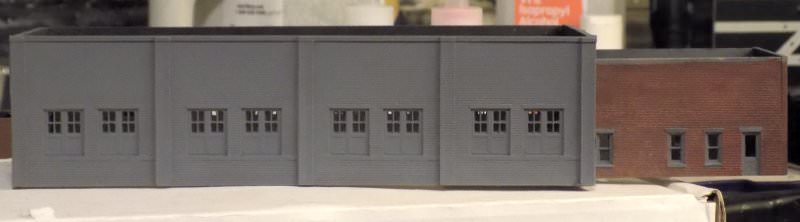
This is the third structure of 14 that I currently have, the DPM Trackside Transfer Station. This building will sit in the top right hand corner of the layout.
I have to admit I was surprised how big it was measuring 8.5" (L) X 4.5" (D). A little larger than I was expecting but very easy to assemble.
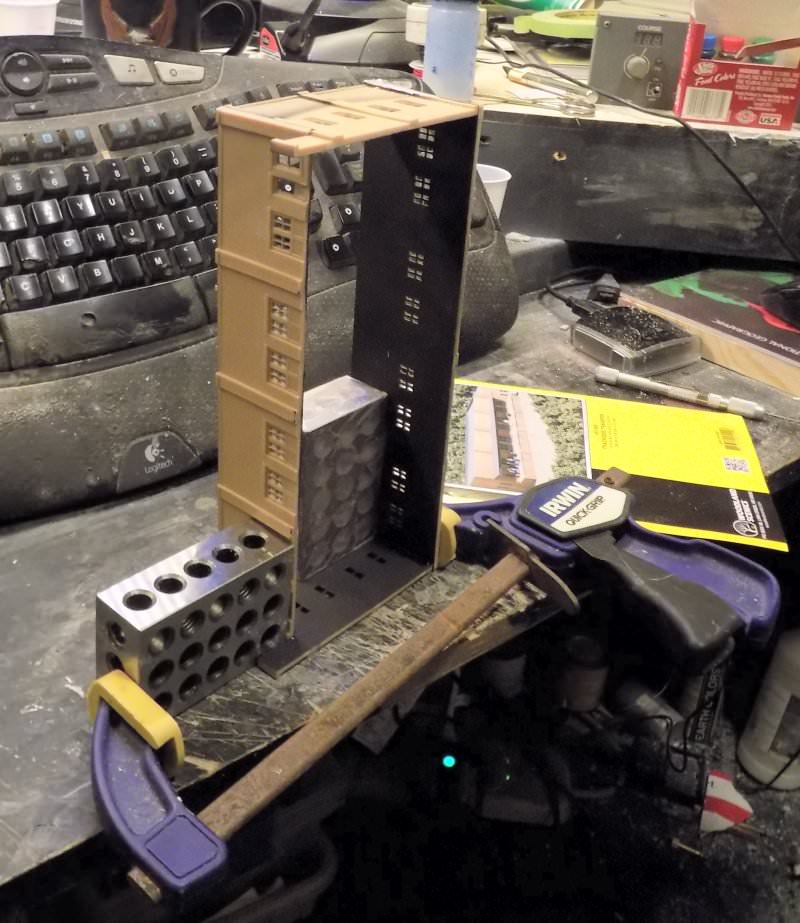
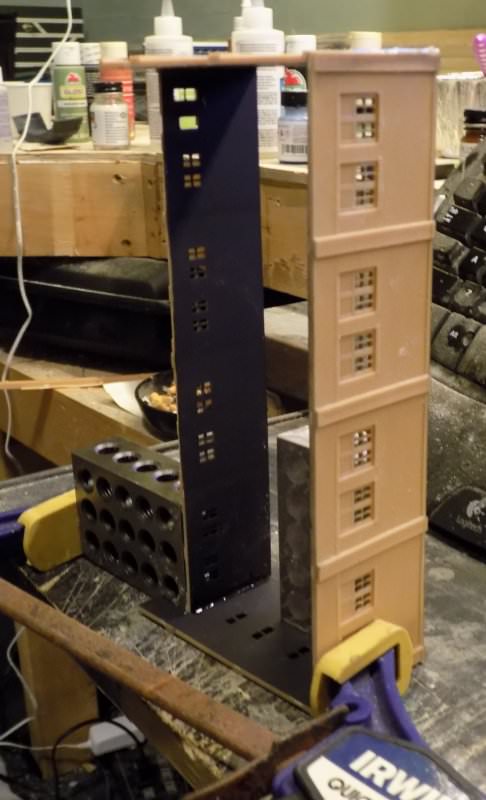
This where the 1-2-3 Blocks come in very handy as can be seen in the pictures.
This is the third structure of 14 that I currently have, the DPM Trackside Transfer Station. This building will sit in the top right hand corner of the layout.
I have to admit I was surprised how big it was measuring 8.5" (L) X 4.5" (D). A little larger than I was expecting but very easy to assemble.
This where the 1-2-3 Blocks come in very handy as can be seen in the pictures.
goscrewyourselves
I'm the one
Lynn,
So far I do like them. They are small but heavy and work very well for squaring kits up. For $13 (I think they were) they were a good investment for me.
So far I do like them. They are small but heavy and work very well for squaring kits up. For $13 (I think they were) they were a good investment for me.
goscrewyourselves
I'm the one
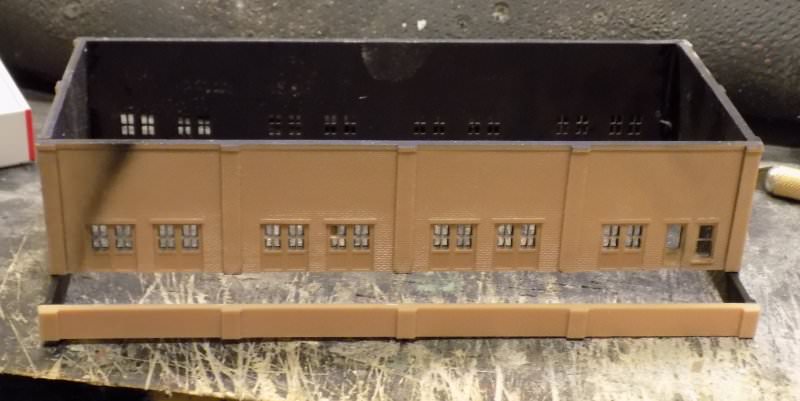
Trackside Transfer Station Update
Have done a little more to the Transfer Station as follows:
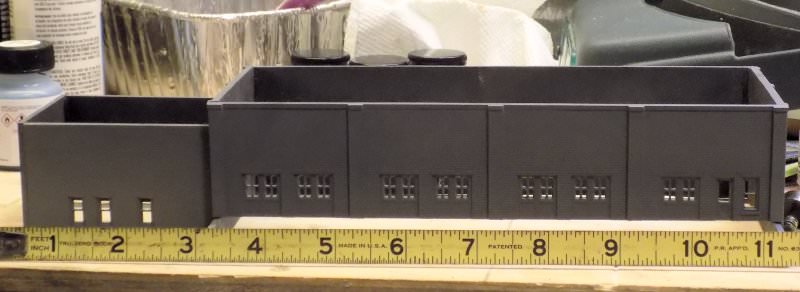
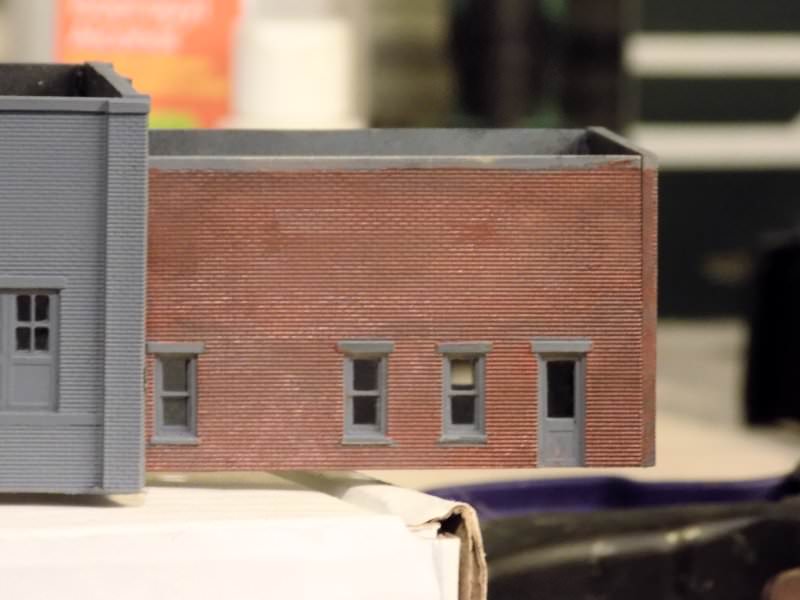
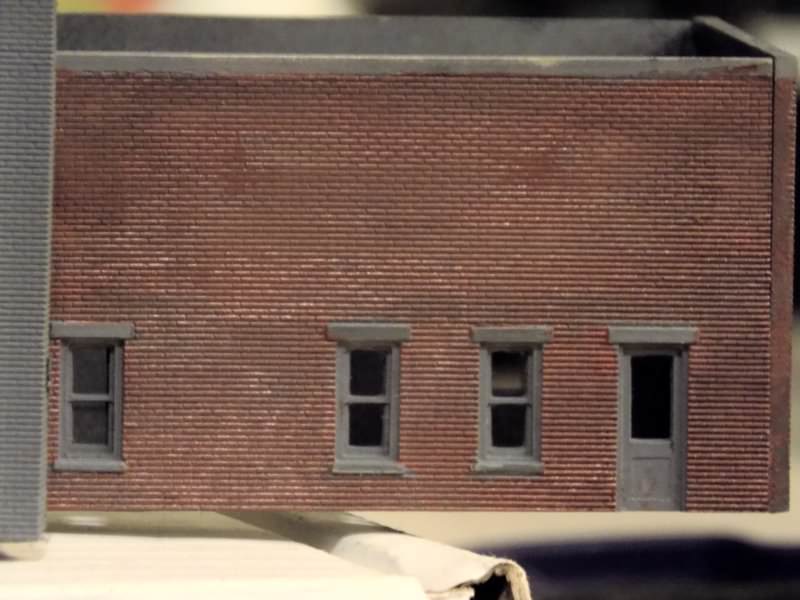
The "Office" is painted with "Tru Color Brush On Flat Brick Red" and has had a wash of Indian Ink/Water (1:10 ratio) which was rubbed off. The main section will most likely be sprayed just to make it a bit quicker, although doing so will will give the paint an even finish, something the hand painting doesn't do and why there are a variety of "shades" through out the wall.
Have done a little more to the Transfer Station as follows:
The "Office" is painted with "Tru Color Brush On Flat Brick Red" and has had a wash of Indian Ink/Water (1:10 ratio) which was rubbed off. The main section will most likely be sprayed just to make it a bit quicker, although doing so will will give the paint an even finish, something the hand painting doesn't do and why there are a variety of "shades" through out the wall.
goscrewyourselves
I'm the one
Thanks gents.
I think applying the same techniques for mortar lines will remain the same for both HO and N scale, although as you pointed out more care needs to be applied for N Scale for the reason you stated.
One thing I noticed about the Tru Color paint I used was if I put it on the wall from top to bottom (or visa versa) it tended to sit on top of the "bricks" rather than flowing down between them. Most likely because I put the paint on fairly sparingly. If that becomes the trend or the constant then I could give the wall a wash of "Mortar Color" before applying the brick color.
If the above works then I will have to hand paint everything to get the mortar look and that is going to be very time consuming but (possibly) worth the time and effort. If it doesn't work or I just fluked the result then I don't think I am going to worry too much about getting a mortar appearance.
Lynnb
Well-Known Member
The way I would try Tony is lay the build flat and flood the wall a concrete colored wash , leave it dry and using your thumb wife the color off the top of the brick, if mortar color is left on the brick simply drybrush over the surface. I've seen also where the wall as actually primed in the grey primer color and the brick surface drybrushed the final cover, bit extra work but as long as your just dusting the tops of the bricks you should get nice results.
Last edited by a moderator:
jdetray
Well-Known Member
Hi Tony -
I think the paint job on your brick building is excellent!
The downtown area of the small city where I live is full of old brick buildings. While the fronts of the buildings are nicely maintained, the sides and rear of the buildings have multi-color brickwork that looks almost EXACTLY like red brick building in your post #52 above. The various shades of red on the same building are very realistic, based on the old brick buildings I see every day in my town.
Airbrushing might make them look TOO uniform, though as you say, it would be a lot faster.
- Jeff
santafewillie
Same Ol' Buzzard
When I got into modeling about 40 years ago, a gentleman showed me his technique for mortar lines which was to paint everything either concrete color or off-white, and then go back the next day and drybrush the brick color on. I tried that on a single structure back then and haven't tried it since. It worked and I don't really know why I haven't tried it again.
Willie
Willie
flyboy2610
Loveably weird
That looks good, Tony! It looks nicely weathered.
