Using expandable foam for scenery


Raincoat2

Well-Known Member
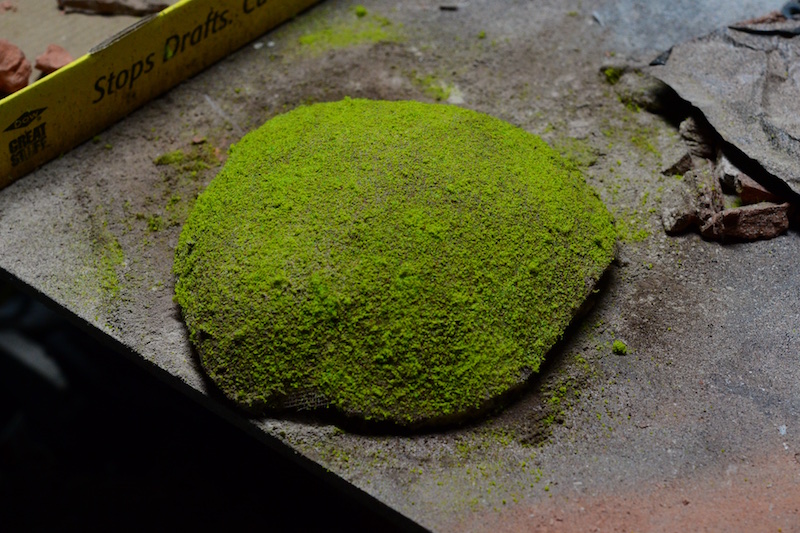
Have any of you used that expandable foam (like "Great Stuff") for scenery bases? Got to wondering the other day while wandering through my local DIY store - - what if you just sprayed some of this, let it expand, then shape it with a knife, box cutter, etc. to the base form of hills, mountains, whatever. Haven't tried it myself yet - just wondering if it's been done. It would be an alternative to the styrofoam sheets that many of us use.
Johnny (Raincoat2)
 
You would have to let it dry and then cut it like any other foam type product, getting it to "stay" where you want it while it expands may be a trick. I've used it for a few NON LAYOUT projects and it's ok but there are limits to what it can do. Also there may be "air" bubbles in it that will mess up your look if you cut it after it dries. I don't know, I've never cut it after it has dried. Try it on a small area or someplace "off layout" and see, let us know.
 
It doesn't lend itself to spreading with any kind of tool while it's still wet. For the price, you would be way further ahead using foam board.
 
KEN and NEW GUY - Yeah, I agree about the price - probably cheaper to buy the 4X8 Styrofoam sheets, or maybe scrap foam packing (if you can get a store to keep them for you). Still, I may try it on some small project, and see how it goes. Thanks for your opinions, guys.
Johnny
 
The foam packing that comes in packing is the wrong stuff to work with. It's basically little styrofoam balls all stuck together and doesn't work well for specific shaping. The styrofoam board is easier to work with and can be shaped easily to your intended design.
 
The foam packing that comes in packing is the wrong stuff to work with. It's basically little styrofoam balls all stuck together and doesn't work well for specific shaping. The styrofoam board is easier to work with and can be shaped easily to your intended design.

KEN - Thanks for your response. You're right about the foam packing pieces. I was thinking just stacking various foam packing pieces into some sort of shape that was roughly what you want, then glue the pieces together, but don't cut them - - glue quilt batting onto the shape, then paint and add scenery elements. Saw that technique in a YouTube video (https://www.youtube.com/watch?v=9C6aHEoUWYg)

Johnny
 
As far as glueing foam, most of the petroleum based glues will eat or dissolve the foam. Other glues like Elmers glue will take weeks or months to setup due to no air circulation. A way to get around that is to cut little blocks of plywood, i.e. 3"x3" squares and put those in between the foam layers. Liquid nails will work well with this application. Use 3 or 4 pieces of the plywood between the layers. Finish your scenery shape then cover it with window screen. Secure the screen to the foam base with nails. Just oush them through the screen, into the foam to hold it in place. Cover the screen with wall plaster, the kind you can get in the 5 gallon bucket. Add a flat paint coloring of earth tone to the plaster. Use flat paint so it doesn't shine.
 
I have used the Great stuff foam for some areas on my layout. It's okay. What I have discovered is that you will get out of your scenery what effort you put intoit. Making plaster rock molds will take much more time, but the end results will look better, too.

Oh, and it doesn't take thinned acrylic paint for crap.
 
Took some quick shots of spots I have used Great Stuff foam on my layout.
There's a learning curve, as with everything.

This is the first "Rock Wall" I ever made using the expanding foam and regular Styrofoam sheets.
AD79E617-DB4E-43C0-AED8-61B2F25045D5_zpsmeheqxf1.jpg

Used a little plaster to try and bend it in a little better. And stones are grey, right? So I painted it all grey.
This is one of those spots that will probably get redone one of these days.

I got better at blending in the bulgy-ness of the foam and used a heavier paint.
31067E6F-90D6-4660-B898-6B2E53A113B8_zpshqh0gqwe.jpg


Adding more medeas into the mix makes it a better base:
535D5911-73BE-49BA-86FA-A361E703392E_zps1e0lqbia.jpg

The upper rock ledge is packing paper and lower end in Great Stuff.

The entire center section in this photo is great stuff foam (the upper ledges were one of my first attempts at rock molds).
D889734C-AFED-4E67-BCA0-7D071E2073D8_zpsb4mwtcgd.jpg


So, can you use it? Yes. It take a bit more work to make it look good, but it can be used.
 
KB02 - Thanks for those great photos. They really show just what has to be done with the expanding foam and what the results will look like. Helps me a lot. I may play around a bit with the stuff but probably stick with more conventional landscape methods.
Thanks again.
BTW, whereabouts in Northern Vermont do you live - I was born and raised on Long Island but belonged to a ski club that drove up to VT every weekend each winter to ski, primarily in southwestern VT - Bromley, Stratton, up to Killington - that was our area. We bought our own ski lodge in East Dorset, and lived there every weekend. I still love Vermont, would probably live there if things worked out - have family in Vermont and New Hampshire, as well as NY (including Long Island).
thanks again.
Johnny (Raincoat2)
 
I live just south of the border. My house is just 20 minutes from Canada. I can also see New York State from my house, but due to the Lake, it takes me about 45 minutes to get there. :)
 
KB02 - A real northerner! I envy you the scenery in that part of the country. Thanks again for the photos.
Have a good day.
Johnny (Raincoat2)
 
Hi Kevin,

I used the expanding phone in several places on the layout. I found it worked really good when I used it to attach pieces of screen used in hillsides, also in irregular areas.

Like everything, it takes some practice. There are several different products that expand differently. I used one that expands about 3x.
 
I used some expanding urethane foam on my layout about 4 years ago. See, it's still stuck to my hands.
 
I experimented with making a Great Stuff mountain once. I stapled some aluminum screen to constrict the shape on top of a piece of Foamcore:

GSmountain-1.jpg
 
Last edited by a moderator:
Everyone - thanks for the photos and suggestions.
JazzDad - try a gallon of kerosene - works for me :)
I'm getting the idea that expanding foam is difficult to manage. Just for the fun of it I may experiment with it on some smaller scenes on our layout, but will probably stick with more conventional scene design approaches for most of our scenery.
Johnny
 
I used expanding foam for lower hill features.

After applying the foam, I covered the foam with a layer of plaster cloth. I then did scenery work as usual over the plaster cloth. It was easy to make holes for tree installation.

Worked with it several times, but will not in the future. Too expensive and not certain of what the final product of the foam will look like!.

Thanks.

Greg
 
As far as glueing foam, most of the petroleum based glues will eat or dissolve the foam. Other glues like Elmers glue will take weeks or months to setup due to no air circulation. A way to get around that is to cut little blocks of plywood, i.e. 3"x3" squares and put those in between the foam layers. Liquid nails will work well with this application. Use 3 or 4 pieces of the plywood between the layers.
Don't the water based chalks and adhesives work for gluing the foam blocks/sheets together?


Finish your scenery shape then cover it with window screen. Secure the screen to the foam base with nails. Just oush them through the screen, into the foam to hold it in place. Cover the screen with wall plaster, the kind you can get in the 5 gallon bucket. Add a flat paint coloring of earth tone to the plaster. Use flat paint so it doesn't shine.
Perhaps the plaster over screening would work in the 'rocky scenes', but why use plaster in the grassy areas where the 'glass batten' material over foam blocks seems a better idea??
 
All: check out this youtube video: https://www.youtube.com/watch?v=rnOegaOKu38&t=21s
A lady compares a dozen or so different glues to glue foam sheets together. If you don't want to watch the whole thing, you can start at 1:06 and watch for a while, then skip to 5:00. Or you can watch the whole thing and see the results with each different kind of glue. She gives the pros and cons of the better ones.
The winner: Glidden Gripper paint primer - - yeah, a paint primer beat all of the other products she tried. I plan on putting it to the test this week on my own layout.
Johnny


Back
Top