Track Cleaning Cars.


N

NP2626

Guest
A recent discussion on the CMX Track cleaning car made me think I should show my simple and cheap track cleaning cars and how I built them. I will not get into a discussion on the CMX car's high price,here, as I have already made my point in that discussion. First off, if you don't think you can assemble a simple "shake the box to build" kit, like the old Athearn Blue Box, Box Car, I would suggest you read no further. Or, if you want to challenge yourself and make building simple Freight Car Kitss in your "repertoire" of skills, continue on!

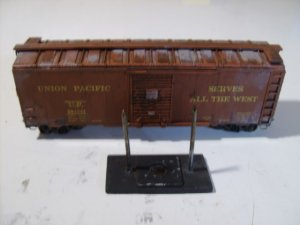
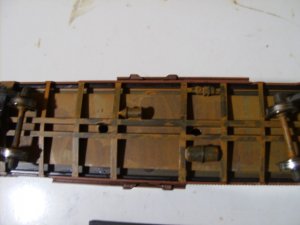
Here is a couple of photographs I have of one of the four track cleaner cars I use to keep ahead of the track cleaning chores on my layout. I did not design these cars, for the credit for design, we need to go back to John Allen's Gorre and Dephetid layout, where he used these car to clean track. I will build one of these cars for this thread, when I get my Blue Box kit to build.
HPIM7765 (Small).JPG HPIM7766 (Small).JPG
 
Last edited by a moderator:
If you would like to build along, you will need an Athearn Blue Box-Box Car Kit. Currently (Thanksgiving Day, 2017) there are 10 pages of Athearn Blue Box-Box Car kits available on Ebay. You want to find an unbuilt 40 foot Box Car. 40 foot because any longer than this will need a wider pad to clean the rails, because the middle of a longer car moves farther from the centerline of the track on the curves. Kit, because you need to make modifications before you assemble the car.
 
I will be doing something like this with the Masonite, or whatever it's called, and using the softer side. So I will be watching this thread. :)
 
And it doesn't need to be an Athearn kit; any kit will do, including Walthers' white box, Accurail, Atlas, Tichy or whatever. What matters is that it's 1) 40 ft, 2) a box car, because you need the interior space (unless you don't mind something weird, ugly, non-prototypical, etc. running on the layout), and, as Mark said 3) a KIT, because you actually have to build something.
 
I was also looking at these kits.


View attachment 63942

I will be describing how to make these parts yourself very easily and how to make the track cleaning car from a Athearn Blue Box-Box Car kit and not using the other cars that Kevin (Red Oak & Western) says you can use. Although you certainly can use other manufacturer's car if that is what you choose. I use the Athearn Blue Box-Box Car Kit as it is a very simple build and as the instruction show has the steel weight on the underside of the car body.
 
Good thread, Mark.

I just noticed that one f the old Ulrich cars just sold on Ebay for $15.00, and they work nicely too!
 
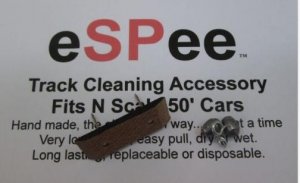
I'll be watching for it Mark, altho I'm getting the idea from looking at espee's kit.
I model in N scale, and will look to see if I can take apart any of my box cars to do this.
 
The product I know of as Masonite; or, hardboard, doesn't have a softer side. Sometimes the backside has a woven look to it, which would probably be the better side for cleaning the Railheads, as it is more abrasive. Other names for this type of Hardboard is: Quarterboard, Isorel and it probably has a few other names, too.

I will be doing something like this with the Masonite, or whatever it's called, and using the softer side. So I will be watching this thread. :)
 
Last edited by a moderator:
Double posted, for some reason!
 
Last edited by a moderator:
View attachment 63947

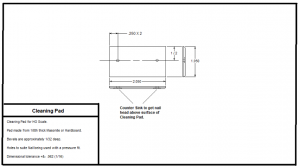
Here is a working drawing of the 1/8th thick Masonite or Hardboard pad we will use as the Cleaning pad for our track cleaning cars. Click on the image to make larger. Note that the 1/2 is not a dimension, it is a division of the part width by one half. If the part where to be made to the nominal dimension of 1.050, the 1/2 would equal .525. An attempt should be made to make the centerline for the holes as close to centered as you can.
 

Attachments

  • CleanPad (Small).png
    CleanPad (Small).png
    38 KB · Views: 162
Last edited by a moderator:
I see that my Ebay purchased Athearn Blue Box-Southern Pacific Box Car, which was bought last Wednesday, is in St. Paul, as of last evening and I think should be here either today; or, tomorrow. This is great as the project I've been working on will be finished today. So, I should be able to start this project very soon.
 
My Athearn Kit arrived about noon yesterday. I have been taking photos of the process of building a track cleaning car.

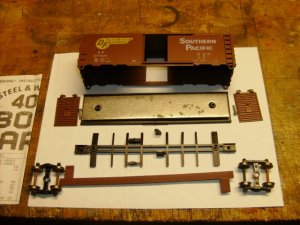
Photo # 1 show the unassembled kit. Note that I have already exchanged the plastic wheels for metal wheel sets, using Proto 2000 whell sets here.

Photo # 2 is another view of the unassembled kit.

HPIM7772 (Small).JPG HPIM7773 (Small).JPG HPIM7774 (Small).JPG

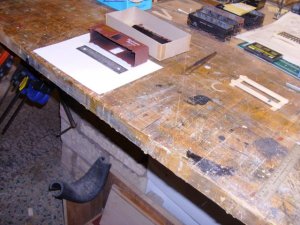
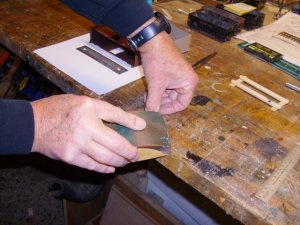
Photo # 3 shows my sanding the bevel to all sides of the cleaning pad. Please note: With the thumb nail photos, it is difficult to determine what I am doing in the photo, so the sequence the photos are posted might be off some.
 
Last edited by a moderator:
HPIM7776 (Small).JPG HPIM7780 (Small).JPG HPIM7781 (Small).JPG

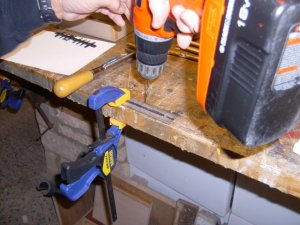
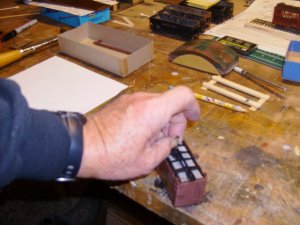
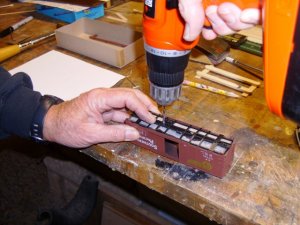
In photo # 1 here, I am drilling the holes for the Cleaning Pad's nails to go through and up into the car.

In photo # 2 I have drilled one of the holes in the cars floor, and am using one of the nails to nest the steel car weight to align the next hole.

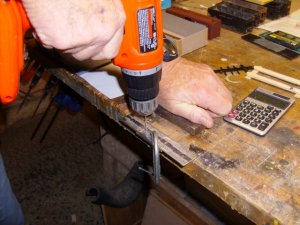
Photo #3 shows me drilling the next hole in the car floor. Doing it this way assures that the holes in the car weight and car floor are truly aligned.
 
Last edited by a moderator:
HPIM7782 (Small).JPG

In Photo # 1 here, I am using the weight as a jig to drill the holes in the Masonite Pad. It is important that all three holes are aligned to allow the Nails which become the guide pins holding the pad to the car. They need to be free so that they can slide up and down into your car and not lift the car as the pad goes over track irregularities. The guide pins (nails) keep the pad under the car at all times.
 
Once I got to thinking about making a Track Cleaning Car, I realized that it would be pretty hard to make without some type of Calipers to measure with. You need to know the diameter of the small nails you'll be using as the guide pins for the cleaning pads, for your car and how big to drill the holes. I was a Tool and Die Maker and have both a 0-1 inch Micrometer and a six inch Dial Caliper. Now days a person can buy an electronic caliper for a very reasonable price. What is nice about electronic calipers is you can switch from inch (Standard) to metric, with the push pf a button. Micro-Mark has two for under thirty bucks. Although I abhor spending $144.95 for a CMX Track Cleaning Car, less than $30.00 for a digital caliper is money well spent. I use mine all the time for almost every project I get involved with.
 
Last edited by a moderator:
I got a 6" caliper from Lowes that reads inch, mm, and fractions for about $35 I think, and so far it's working good. I was a machinist for a good many years, and retired as a calibration tech at an aero space company. My verniers I have trouble reading anymore, so the digitals are great.
Mark, I do appreciate your taking the time to do the pics. Thanks.

My Tool & Die days where as an owner of the company. I did it all, design, build, run the parts and pay the bills, too. I left the company, did some business as sole proprietor and didn't make much money; so, went to work as a Gauge Tech, calibration guy, too. I retired from that position. I have a very old Helios Dial Caliper that works as good as the day I bought it from my brother in law.


Back
Top