The Boss gets lit up too!


Aerojet

Active Member
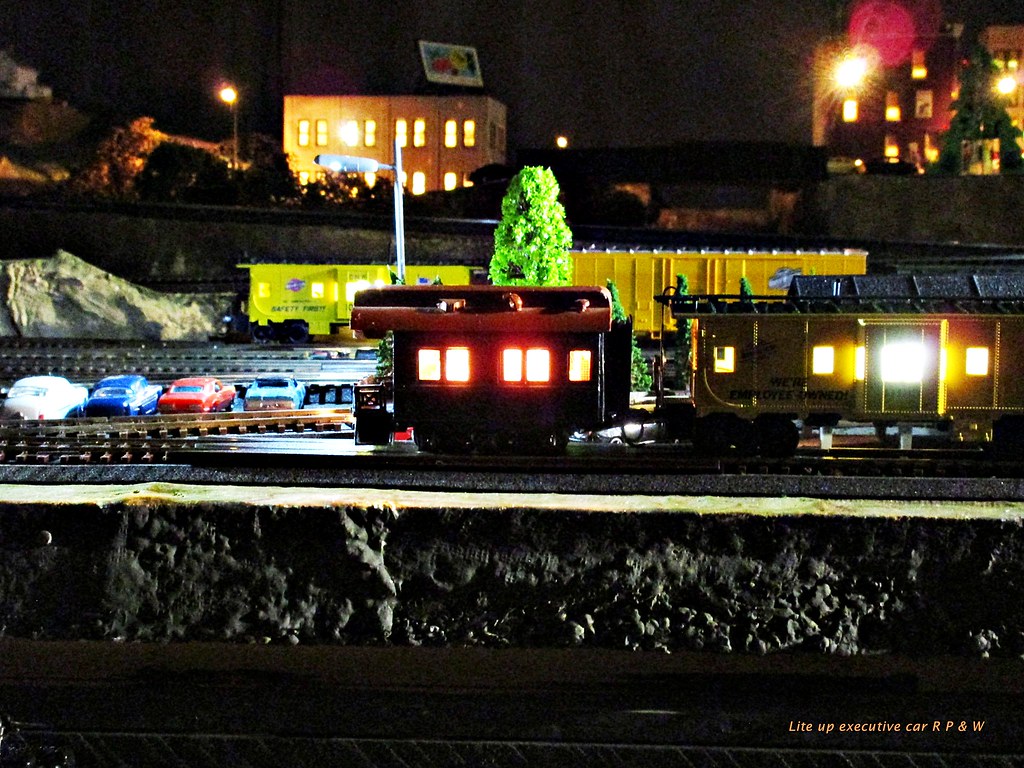
Well I have been Busy! Since I operate at "night" it helps to have lights in the caboose - you can find it in the dark where you left it....lolol.... So while was I going nuts putting lights in the passenger cars, and my four cabooses, i thought it would be fun to light up another car which has no way to light up ... sez here ...........

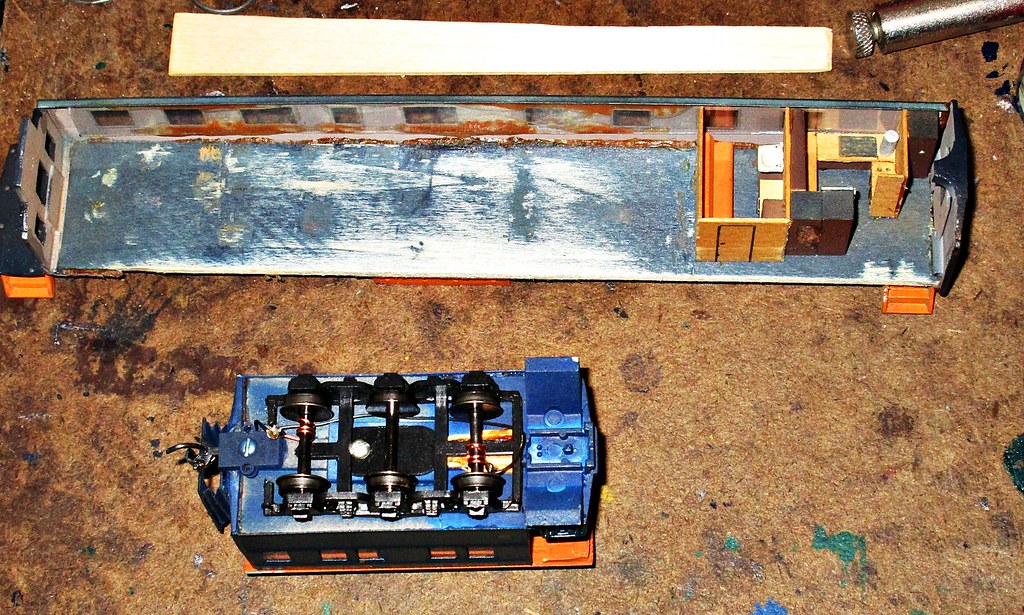
I built this Oscar over 35 years ago and now find I need to light it up. RIGHT! A Walthers craft kit, solid floor, solid ends -- what is a supervisor to do? Not to mention that there is only ONE truck under this thing! Now what?

Drill a small hole near the coupler on one end, and stuff in a 2.5mm bulb -- then -- change out the truck wheels to pick up type. One for each rail, and the center is an idler. Does it work?

33661632955_de8e0c49d6_b.jpg


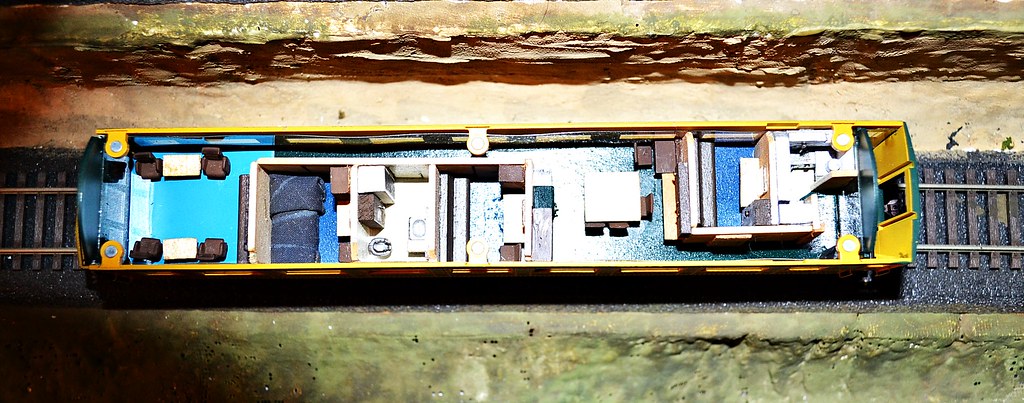
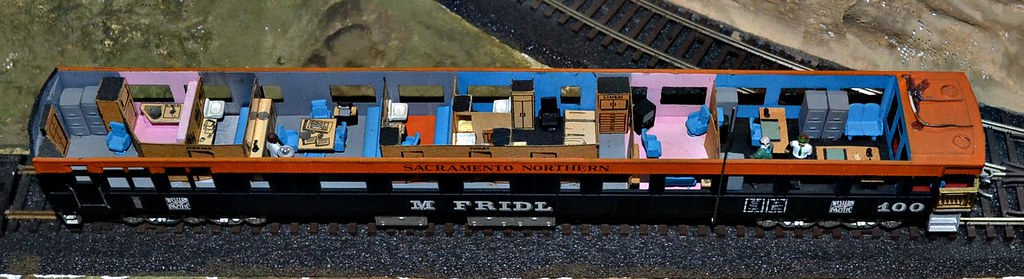
This is the final product. A very well lit up little car. you can see everything inside now. i added the glass to the windows and did some other final things to really finish this car off, including the light.

The bulb is high over the center with a piece of aluminum foil goo'd to the roof to act as a reflector. the bulb sits in the middle of the car right over the hall way as it was - and with the reflector lights the thing up completely. I only wish it was more "white" and not so much red, but that is an incandescent bulb.

Funny, the cabooses seen here also have a incandescent bulb but that are "blue" for what it was worth. I went over to Hiawatha and asked them if they have any more, and they do not make the blue any more ... grrrr.....

Well,here 'tis -- shortly I will post out another fun project.

After a super long while I finally found a piker on the net, NIB -- to replace the one I had which had a bit of trouble from a child. Never grab a craft car off the layout - and - worse squeeze the thing -- they blow apart.

Photos on that project as time allows and I get working on it...

Aerojet
 
Mark:

Which electrical pickup trucks did you use for your fun project? I need to add some markers lights to vintage SOO cabooses.

Greg
 
When I opened this thread, I half expected to see somebody's supervisor getting electrocuted...
 
Aerojet-- That really is some quality work - nice going!
The reflector really does a good job of lighting everything.
 
When I opened this thread, I half expected to see somebody's supervisor getting electrocuted...

I thought it was going to be a delicious tale of Karma coming back to bite one of these horrible bosses I've been hearing about...it'll happen.
 
Greg - I went over to Hiawatha and bought 36 inch micro scale wheels, ask Glen for them - then just put them under the car. You should have a Volt meter with a tone or diode setting to identify absolutely the wheel which is "hot" and which one is insulated. One hot on each rail. Next you need a pick up .....

33680203585_b113255ae6_b.jpg


In order to get power from the now powered wheels to something else, you need to get a wire wrap on each axle, like I did. This is #22 telephone station cable 22/4 which was stripped and then would on the axle. Next you see the little "tail" near the coupler? That is from the light. Solder this to the wire stub you left on the wire wrap. Light in car done!

This truck does not turn so that is not a problem. When you do this on a truck which turns, add more wire to the lead from the upper car to the wheels ...

I am sending you a PDF on lighting from about 15 years ago in Model railroader. Watch for it, it is not done yet....

As far as how bright they are, it is not all that intense, the camera does that when you shoot a long shot and the bright areas burn into the shot while catching the rest of the darker areas ....

Thanks for the comebacks ...

The Aerojet

PS.. Greg - i gave you a pass for the pike with my number on it on the back, stop over some time and see what's new --- that car behind the Oscar is a Walthers 60' Business Car from the 70's now undergoing a total rework. Coming soon to a web site near YOU!

AJ
 
In order to get power from the now powered wheels to something else, you need to get a wire wrap on each axle, like I did. This is #22 telephone station cable 22/4 which was stripped and then would on the axle. Next you see the little "tail" near the coupler? That is from the light.
How old is that car. You said 35 years. I noted it must be a kit from the 1960's or older because of the coupler pocket on the other side. Obviously designed for a Kadee #4, like my father used to use.
 
Last edited by a moderator:
After I got home from my exclusive and posh 2 year tropical vacation courtesy of my Uncle Sam, one of the first things i did was get into model railroading - like I had before I went overseas. only this time it was in HO. I still got most of the original Lionel O stuff from the 50's up in the junk room --- anyway - there was the problem of finding stuff to work with. There was Casanova's Train Shoppe, and I then found Walthers. Getting a catalog from them I thought it would be fun to build my first passenger cars out of kits.

What the HEY? What did i know at that time, when you are 23 and foolish you try almost anything! First kit I bought was the Piker. It went well and done up on brown roof and green body. next thing I bought was the Oscar. This is the car you see here, bought in 1974. Both cars were built with the "paper" inner walls. the wooden parts were papered with the stuff as shown in the instructions, and all was assembled with Walther's Goo. Which I still use to this day - best stuff to assemble materials of different compositions.

The next car I bought was the Walther 60' Business Car, less trucks and interior. Both had to be bought separately. That is the car shown above the Oscar which is currently being rebuilt. Bought new in 1975. Cost? The box sez $14.50 .... (033-6663) I left the stewards room and kitchen the same as they are on the left side of the car, and the rest of the thing will be done on the right side so it shows thru the windows. ALSO I ordered Palace Car interior parts which are plastic and should be in one of these days and will use those in this old car to replace the simulated wooden blocks which showed cabinets and the rest.

This is what happened to the original Business Car interior - I stuffed it into another 7o foot car to run on the current pike as the other one had deteriorated badly and I wanted to use the parts I had made in some fashion. if you look that 40 year old Goo is really bad, and one side had let go and other problems with the car I decided to stuff it back into it's box and store it until NOW.

30275766421_366e2fc468_b.jpg


Yup, I used real wood for the original walls and I will on the rebuild -- This is the original Business Car interior as i got it from Walthers with the exception I used balsa wood for walls. Everything else is their, except the bed which I made up here. The boss should not have to sleep on a folding bed ....

If you want to know what happened to the first Business Car interior, I stuffed that into a real beauty - a Riviosi Observation car and never used it on the pike, but it was on display up in the den ...

29731496364_5313e06d24_b.jpg


29730266463_8f2e8b886c_b.jpg


This is the original Walthers interior kit with additions. After building the two little units I thought paper would not work on a working road car, so i started to play around with wood walls -- and what to do with the original?

Make another Business Car -- This will only run on 22 or better curves, and so I built display case, made for it and my name on the side in Circus lettering, lolol... the Circus on Model 'Railroading.

AND NOW you know a lot about me, and how long I have been in the hobby...

I hope this inspires other railroad moguls to think about their own inspection cars and show off their prowess by roaming their own rails looking for problems and generally running the railroad. So let's see your Business Cars! Let's start a Business Car Club! have our own little private meetings much like the Private Car owners clubs.... just an idea...

The Aerojet


Back
Top