Scenic design: Possible framework materials for creating "rolling hills."


I need to craft some rolling hills to model a hilly section of Los Angeles which contains a field of oil derricks. I'm trying to think of a "dry" process which doesn't involve using plasters. My first idea was to construct some kind of framework onto which I could drape Woodland Scenics' vinyl-backed grass mat, which I could heat-gun into the necessary soft contours required. Woodland Scenics' product description says, "[You can] use a heat tool to form a hill, mound or valley . . . " using their grass mat. Not sure if the Walthers' grass mat product is also vinyl-backed and equally as malleable.

I was thinking of using some kind of wire mesh, possibly this "hardware cloth" from Home Depot. Either that, or some tightly patterned fencing material. I once bought some sort of fence material that I used in the backyard that would probably work; it has a grid pattern of approximately 1/3" squares. Ideally, the mesh would be easily formed, yet stiff enough to hold its shape. I would attach the mesh to 3/4" melamine board using counter-sunk wood screws. I also have some dimensional packing cardboard that could also possibly be used as a base. Any other ideas?
 
Well, I got a few ideas from reading the "plaster worries" thread, but I'm still trying to think of the easiest method for modeling rolling hills. That is, soft contours with smooth transitions from depressions to lands. I'm thinking of possibly using florists' foam, which I think is easily crushable, then covering that in a material which can be further smoothed using a heat-gun. Basically, I need a material that's easily malleable into smooth shapes. The area needed to be modeled is about six to nine square feet.
 
Florist's foam is indeed an "euasy"way to achieve that rolling landscape you are thining about.
But may be "styrisol"...it is a kind of yellow/white styrofoam but not that "strong" it looks like it is a combination of the florists' foam and styrodur you can use almost any woodworkingtool to modell that stuff ! and also easy to sand!

Jos
 
Wire mesh, even of the aluminum flyscreen variety, tends to kink as much as produce rolling hills, so you're likely to get ridges mixed in with the bumps.
 
After nearly finishing my layout I discovered the Woodland Scenics plaster cloth.

I draped it over a framework of rigid blue foam and cardboard, and covered it with a non shrink lightweight plaster product, can't remember the name right now. It was not very messy and set up very nice.

I tried about every technique under the book and found the Woodlands Scenics plaster cloth to be easy and not very messy. I used 4" wide pieces that came in long rolls and cut them into strips and applied up and down my hill areas.
 
What is that product that 'Ken in Maryland' is using. I have togo back and check it out. It was in some of his last few pages of his layout build. Some type of a paper?
 
The latest plaster type material that I have used is called Sculptamold. (only took 7 hours to remember that). You can mix it a variety of consistancies depending on what you are using it for.

After wetting and applying the plaster cloth, waiting a day, then adding water to the sculptamold and spreading that over the cloth. It produces a strong, no shrink shell. I think it took a couple days to dry on my layout, I spread it pretty thick in some places.

There are lots of products,however; I used regular sheet rock joint compound for 90% of my layout.
 
Hey, thanks for all the replies! I thought perhaps there was some super-secret technique to make this easier. I'm still trying to think of some sort of short-cut, but it looks like the XPS foam and pre-mixed patching compound seems a popular and less-messy approach. Perhaps I could try that, and still attempt to heat-gun the Woodland Scenics' vinyl grass mat over it to produce some smoother contours. Note that I'm sort of planning to produce all of my scenic elements on 1/4" board so that they're moveable, should I decide to change my track-plan at a later date.
 
I think I've figured out something that may actually work:

• Buy styrofoam balls of varying sizes.
• Arrange balls on a sheet of Foamcore anchored with steel T-pins (used for wigs).
• Lay Woodland Scenics' vinyl grass mat over the balls.
• Gently heat-gun the grass mat until it partially conforms to the balls' contours.
• Temporarily place appropriately shaped weights into depressions.
• Fill voids with expanding foam (e.g., Great Stuff).
• Remove T-pins.
• Attach Foamcore to my melamine layout base using a low-tack adhesive.
• Voila!
 
Well, I don't think that's going to work. See this Woodland Scenics' Amazon review here, and this Woodland Scenics' info-ad. The Amazon reviewer confirms what the photo in the info-ad may suggest, even though the info-ad reviews the heat-gun application positively (notice there's no "after" photo). I think the concept is good, but I need to find a more suitable material with the right melting properties (i.e., some sort of vinyl laminate or other plastic sheet material which deforms more or less uniformly under heat, yet holds its shape).
 
Aha! Apparently what I'm looking for is a "thermoplastic," or heat-formable plastic. Heat-formable plastics are used in the costume and props-making industries, and in other applications where one-off, custom plastic forms are required. Some of the trade names of various heat-formable products include: Fosshape, Wonderflex, and Worbla. There's also thermoformable ABS sheets, and low-temperature thermoplastic beads, known under trade names such as Friendly Plastic, Instamorph, and Polymorph, among others. I found an online supplier for a few of these products here. At first glance, it seems that Wonderflex may be the most appropriate for my application.

Note: I had linked the wrong page for the Wonderflex supplier above (now, corrected). If you Google, "Wonderflex," one of the first-resulting sites has much higher prices than "theengineerguy.com" (the online seller I linked above). It's $45.49 with free shipping for a 43" x 55" sheet of Wonderflex. Of all the available off-the-shelf thermoplastics, Wonderflex is the only one with a reinforced fiber-like backing which gives it improved dimensional stability.
 
Last edited by a moderator:
After a bit of Google-searching, Wonderflex seems like the right product for my application. It's described as an extruded thermoplastic synthetic polymer sheet material. Here's some of its benefits:

• Melts with a heat-gun at 150°-170° Fahrenheit to a completely malleable form.
• Non-toxic.
• May be re-heated repeatedly to re-shape.
• Structurally robust once cooled.
• Easily cut with scissors when heated.
• May be painted with any paint meant for plastics (e.g., spray-paint, acrylic, enamel, etc.).
• Accepts plasters.
• Hot-glue gun compatible.
 
So, with the discovery of this thermoplastic material, I can proceed with my original approach:

• Buy styrofoam balls of varying sizes.
• Arrange balls on a sheet of Foamcore anchored with steel T-pins.
• Lay a sheet of Wonderflex over the balls.
• "Paint-in" my contours using a heat-gun at low-heat until the sheet partially conforms to the styrofoam balls.
• Re-heat and re-form by hand as needed.
• Fill voids with expanding foam (e.g., Great Stuff) through small holes punched into the bottom of the Foamcore.
• Remove T-pins.
• Attach Foamcore to my melamine layout base using a low-tack adhesive.
• Voila!
 
I would go with Dave's (logandsawman) suggestion using plaster cloth and Sculptamold. You could drape the plaster cloth over the balls and fill in with the Sculptamold. I have not personally used this method, but have seen it used successfully on local layouts. I have used Sculptamold alone though. Why re-invent the wheel? It is a tried and true method. It takes a few days, but is easy to work with and produces excellent results.

Willie
 
Why re-invent the wheel? It is a tried and true method. It takes a few days, but is easy to work with and produces excellent results.

For my particular application, this looks easier, with more options for modifications after the fact. It's literally point-and-shoot! Using a heat gun and gravity, I should be able to mold subtle contours easier, possibly better than I could sculpt by hand (with less mess!). What I really like about this material is that if I don't like it, I can simply re-melt and re-form.
 
Why try to improve the wheel? Not to mention the added expense of all that stuff!
While $45.49 for a single 43" x 55" sheet isn't exactly cheap, there's no tax and includes free shipping. Again, I like that it's totally re-formable, so any "mistakes" can be easily remedied. This is where I think the product's real value lies: Unlimited "re-doability." Plus, I like that standard glues, paints (including spray-paint), and other materials can be applied directly to it.
 
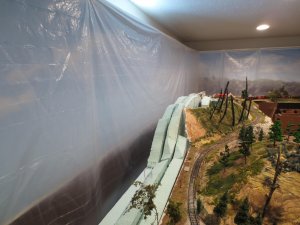
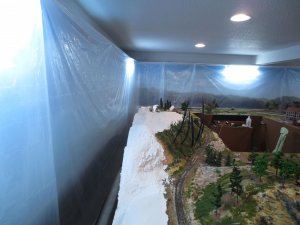
Here are some pics how I prepped the area for the plaster cloth and sculptamold. My problem was I added several inches to the layout and had to match the added terrain with the existing hill.:

I had to slide the train table out create an 8" extension:

scenery1.jpg

I made a framework of rigid foam. I draped the 4" wide strips over the foam, overlapping and criss crossing a bit:

Scenery2.jpg

after a day, I added the sculptamold. It is really something how rigid the plaster cloth set up!

Scenery 3.jpg

It took a few days for the sculptamold to get totally dry. Nice thing about that is no shrinking or cracking!

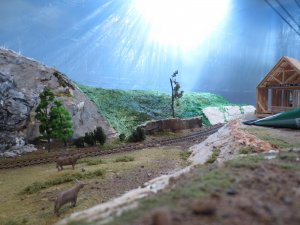
This last photo there is only paint on the sculptamold, trees and ground cover were added next. Where the sculptamold is white, I painted rocks and also did some shaping with a knife:

contest4.3 003.jpg

The area is on the left of the photograph, after painting the rocks and adding the ground cover, trees

(the second shelf behind the man was made with sculptamold, the one in the foreground right alongside the man is painted sheet rock compound)
 
Last edited by a moderator:
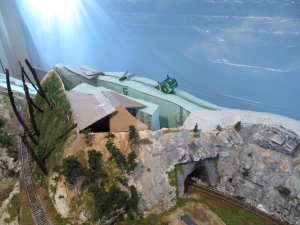
Here is another photo showing how bad things can look under the plaster. The soaked cloth was draped over the cardboard and old scenery.

Backdrop4 004.jpg

It bridged the couple inch gap without a problem. I would just put the cardboard in place where the gap was too big.


Back
Top