I have watched tons of you tube vids on scenery making and in the videos it always looks so easy . Now that I am starting mine , I am finding its not so easy as it looks . I have to hand it to those folks who have posted videos and all of you here that post pics of your layouts . Making something look good is a lot harder than it seems.

You are using an out of date browser. It may not display this or other websites correctly.
You should upgrade or use an alternative browser.
You should upgrade or use an alternative browser.
not so easy as it looks
- Thread starter jim81147
- Start date
goscrewyourselves
I'm the one
jim,
Don't look too deeply into it, it is easier than you might think.
Consider this, the ground is made up of two things (primarily) dirt and grasses. Dirt is mainly brown or grey and grasses are mainly green of some description.
Start you scenery by painting, staining or washing your foam, plaster or what it is you have your track work on "brown and green". Make it blotchy so it blends in with each other. Bingo, you have the foundation for the coverings you will put on it.
Starting out here, get some "base" ground covers from Scenic Express or Woodlands or whoever, a couple of shades of green and a brown and a yellow. I'd recommend Scenic Express as they have many more varieties to pick from.
Next, spray the area you want to cover with a 50/50 mix of elmers white glue and water then go crazy! Start with the brown stuff and sprinkle it around until you have a nice "thinnish" cover, then do the same with the yellow followed by the greens, lightest shade first. Don't put this stuff down too heavily though, you jut want to create a covering that lets the various colors show through NOT all one color all over.
This optional - you can let each "color" dry before you add the next but I like to put down at least 2 layers before applying more water/glue mix. Once you have a good cover and foundation, spray the whole area again with a "good" cover of the glue/water and let it dry "completely".
That will give you a good base to build up from with various other ground covers to obtain depth and a more realistic look.
If you are wanting to do rock faces and so forth, you have a couple of options. I use green foam (or similar) to create the base for my mountains, rock faces then cover that with plaster - the powdered, mix it your self type with a 20 or 45 minute cure time. The foam gives the base while the plaster gives you the rock look. All you need to do is "slap it on", shape it to how you want your slopes and faces to look and let it dry. Take a look around where you live for rock faces to give you an idea of how they should look.
Once the plaster has dried, I usually leave it 24 hours regardless, use thinned down acrylics or the stuff from woodlands etc to "wash" the area. For your mountains, hills, use a green and a brown wash and for your rock faces use a color that most closely resembles the color of the rocks in your area. Once yu have the coloring you are after, give the entire area a hit with the glue/water mix and let it dry.
Once your base color has dried, give your rocks and rock faces a wash with a thinned black acrylic or thinned Indian Ink. When you put that on, it will look dark but will dry much lighter. The idea of this is to get the black into the cracks and nookies to highlight those areas. You may have to do this a number of times before it actually looks black depending how thinly you mix the black.
Not sure if this helps too much, but hope it does. Good luck with your scenery and don't be afraid to be a little "heavy handed", if you go too dark or heavy, it can be toned down or covered with ground cover.
logandsawman
Well-Known Member
When I first started doing scenery I purchased a little book by Woodland Scenics for about $7. Best investment I ever made. I find it easier to learn from a book than the video.
Tony has a lot of great tips above, too.
Tony has a lot of great tips above, too.
Secondhandmodeler
All new now!
The best thing to remember is that nature is many shades of the same color. All you really need to have to do scenery work is a LOT of scenery product. Two or three shades of each thing, varied so it doesn't look like a toy. Try using washes over painted rocks to give it a more three dimensional, natural look. It's all about varied color and texture. Good luck!
thanks for the tips guys . I guess my point is , which is probably the same for many things , is that while it looks super easy in the videos I watch , in actual application its not . I think that there is some artistic talent there that cant be taught or described . You either have it or you don't . Its just a guess but I think that most of the folks that have outstanding scenery , have that talent . The scenery just comes out , they don't really have to work at making it great , it just is.... Don't know if that makes sense to anyone but me . Never the less , I will keeping moving forward and maybe my last layers will be nice enough to hide my first layers ") Thanks guys.
Thanks guys.
Thanks guys.montanan
Whiskey Merchant
Give yourself a little time Jim. Once you get your feet wet, you'll be suprised at how easy it will become.
A lot of good tips were given above and you'll find so many different ways to come up with great results with a bit of practice. It shouldn't hake long.
In my case, I am a bit partial to Hydrocal for hardshell scenery and making rock castings. I was lucky enough to have found a place that I could get it in 50 pound bags. I think Woodland Scenic products are probably at the top of the list for all of us for scenery supplies. When I started my layout, the idea of using foam wasn't very common, but looking at what people have been able to do with it, I wish it were around years ago.
What's so nice about this forum is the sharing of ideas among members. Usually all one has to is ask a question and someone on here can probably come up with and answer.
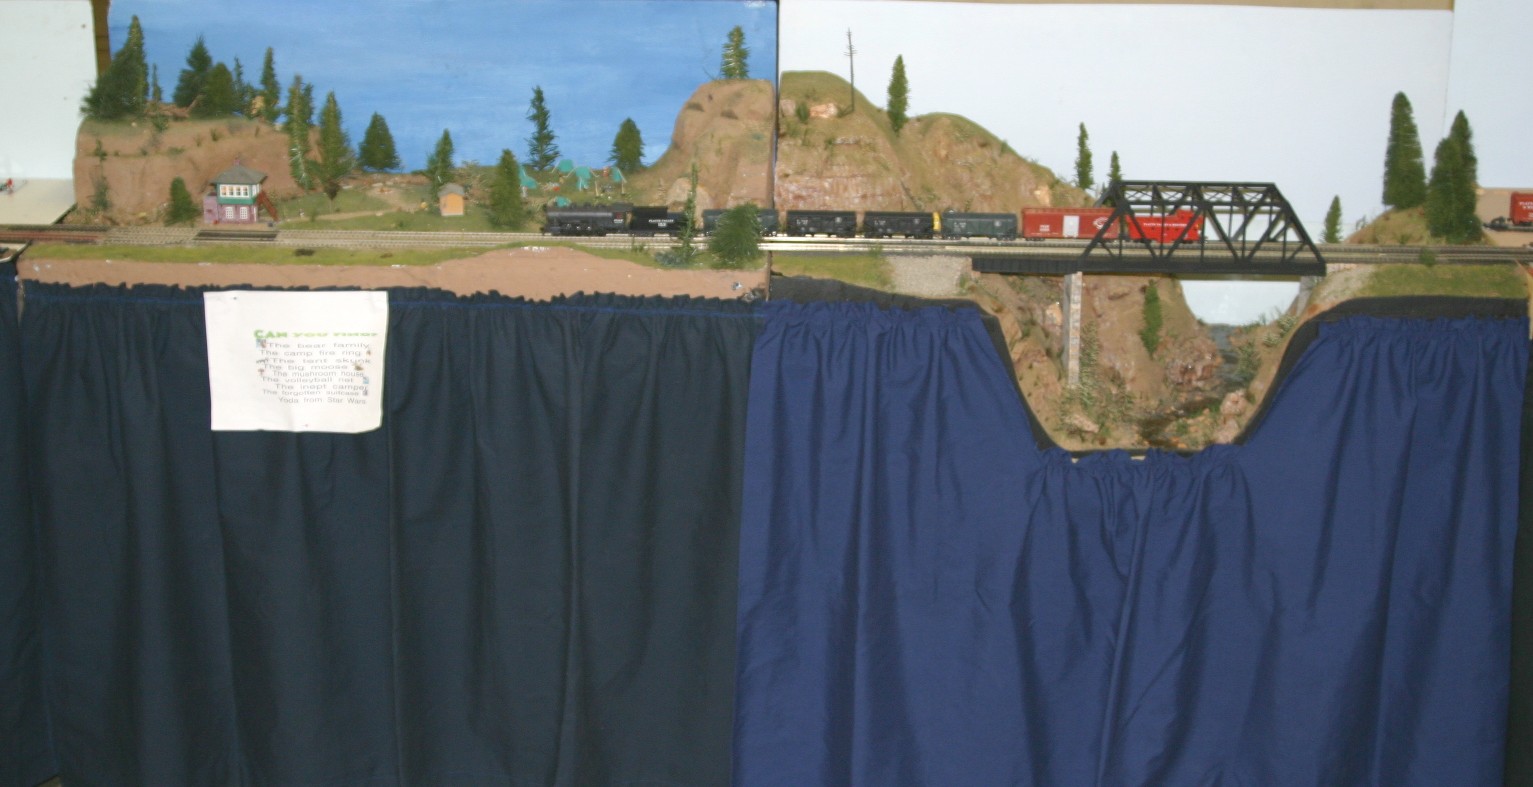
Iron Horseman
Well-Known Member
Hmmm, I delayed, put off, and otherwise avoided scenery for this very reason for about two decades. Then I finally bit the bullet when my children's Youth in Model Railroading decided to take their modules to the national train show. We decided it would be good to have scenery on them. As I was showing them how to do it (from what I had read in the books) I discovered it was so easy, I couldn't believe I hadn't broken that barrier before. My children took to it also. Got them done in about 1 week. Hmmmm looking for examples.... Here is one, I've posted often, of the modules that went to the NMRA national train show that year. This was taken many years later and they are showing the wear of being transported, set up. and taken down so often. (BTW I poured the water, which I thought was the hardest part. I still had it run off onto the carpet). Other than the rock castings the scenery base is 100% carved foam. The biggest mistake made was it was "glued" with liquid nails which doesn't carve well.I have watched tons of you tube vids on scenery making and in the videos it always looks so easy . Now that I am starting mine , I am finding its not so easy as it looks.
Are you having difficulty with some specific element of the process? What technique(s) are you trying to use? Perhaps just switching to a different method would be more agreeable. No one method is "correct".
Last edited by a moderator:
logandsawman
Well-Known Member
I wouldn't rule out trial and error when it comes to scenery. Several areas of my layout I have redone a couple times, and some areas bingo just turned out the first time.
Some may disagree, but I would suggest:
Pick a season. Summer, winter, or fall; or seperate your seasons somehow. I think summer is the easiest season to model.
Pick a time era. Some older structures do fit in with newer architecture, but if you are going steam or transition leave off the modern buildings.
Give yourself enough room. Iron Horseman has a good example above. Crowded sometimes works but may have to be more deliberate.
Iron Horseman
Well-Known Member
I certainly agree with that one. Grass & weed ground foam can hide lots of other mistakes.I think summer is the easiest season to model.
I am /did have trouble right from the start with making mountains . Some of it is probably ( most certainly ) my fault for not wanting to spend the money on "proper" materials . I was able to find a little casting plaster in a craft store 2 hours away so I picked that up to cast the rocks in the molds , But I just couldn't see fit to order 4-8 pound cans of hydrocal and pay the shipping , so I went with drywall mud . The mud and casting plaster , being different materials naturally took colors differently which doesn't look well . Attaching the molded pieces in a fashion that looked good and natural was a task well beyond my abilities too ! Then I tried some mountains out of all drywall mud thinking I would just carve the rock into it while still soft , I mean how hard could that be , right? Well it was easy to carve on it , but not easy to make it look like something real , or even impressionistic. My mountains look like a grade school child was playing in the clay ..... Then I thought , maybe painting a backdrop would be easier , I mean I have watched Bob Ross paint entire pictures in 5 minutes so how hard could that be ? I watched Chris Lyon's 5 part video several times and have to say THANK YOU CHRIS , not that my backdrop really turned out well but his instruction was invaluable to me for that type of painting . So then I figure I should try to make some trees and settle on Landel Browns method for furnace filter trees . They actually turned out acceptable , not near as nice as his but OK , so I cant complain a lot about the trees . They will probably be the best thing on my layout . Maybe I should just model a road DEEP ,DEEP in the forest.. Thanks for the tips guys . I will try to implement them as I can .
goscrewyourselves
I'm the one
thanks for the tips guys . I guess my point is , which is probably the same for many things , is that while it looks super easy in the videos I watch , in actual application its not . I think that there is some artistic talent there that cant be taught or described . You either have it or you don't . Its just a guess but I think that most of the folks that have outstanding scenery , have that talent . The scenery just comes out , they don't really have to work at making it great , it just is.... Don't know if that makes sense to anyone but me . Never the less , I will keeping moving forward and maybe my last layers will be nice enough to hide my first layers
Jim,
Ever read what is beneath my signature? If you have then you'll know that I couldn't agree more with you here and what you are experiencing with Scenery, I experience with Electronics.
By the way, can you say where you live? Even a state perhaps?
Tony , I live in the small rural town of Pagosa Springs in southwest Colorado . Although it is growing it is a long ways from being able to support a hobby store so almost all my shopping is online . Your sig applies to me as well , I can tell you how it is supposed to be done , but cant get it from my brain to my hand.
goscrewyourselves
I'm the one
Jim,
Was just thinking that if you were close to me I could drop over and give you some tips and a hand to get you started. Colorado is a little bit far to travel though
Was just thinking that if you were close to me I could drop over and give you some tips and a hand to get you started. Colorado is a little bit far to travel though
KB02
Well-Known Member
I am /did have trouble right from the start with making mountains . Some of it is probably ( most certainly ) my fault for not wanting to spend the money on "proper" materials . I was able to find a little casting plaster in a craft store 2 hours away so I picked that up to cast the rocks in the molds , But I just couldn't see fit to order 4-8 pound cans of hydrocal and pay the shipping , so I went with drywall mud . The mud and casting plaster , being different materials naturally took colors differently which doesn't look well . Attaching the molded pieces in a fashion that looked good and natural was a task well beyond my abilities too ! Then I tried some mountains out of all drywall mud thinking I would just carve the rock into it while still soft , I mean how hard could that be , right? Well it was easy to carve on it , but not easy to make it look like something real , or even impressionistic. My mountains look like a grade school child was playing in the clay ..... Then I thought , maybe painting a backdrop would be easier , I mean I have watched Bob Ross paint entire pictures in 5 minutes so how hard could that be ? I watched Chris Lyon's 5 part video several times and have to say THANK YOU CHRIS , not that my backdrop really turned out well but his instruction was invaluable to me for that type of painting . So then I figure I should try to make some trees and settle on Landel Browns method for furnace filter trees . They actually turned out acceptable , not near as nice as his but OK , so I cant complain a lot about the trees . They will probably be the best thing on my layout . Maybe I should just model a road DEEP ,DEEP in the forest.. Thanks for the tips guys . I will try to implement them as I can .
I think that I have at least three different types of drywall mud AND regular Plaster of Paris on my mountains (I couldn't justify the Hydrocal, either). You're right, they do take color differently, BUT, that can be a good thing! I can't talk for Colorado as I have never been there, but if you look at any rock ledge in the Northeastern US, it is really weird to see a section of rock that is consistent in color all the way across. There is a section if highway that I drive all the time and there are at least a dozen different types of rock than can be found in each ledge. I found the wash-paint technique worked great for me. Different areas got different color washes to make different looking ledges. So don't worry about the paint looking different, it actually helps make it look more real!
Another thing to keep in mind is this: Don't judge a project from the first, rough draft. The final product is what you are going for. I only have a couple of sections of my layout that I consider "Done" (until I can suck it up and start working on trees... I am about as apprehensive on trees as you seem to be on mountains) and there were many times that I thought they were going to look like complete crap. And yet they came out very nicely in the end. It's amazing how much the final touches, like ground cover, can make a difference.
AND (one final thing), If your trees are looking great, there is nothing wrong with modeling a heavily forested area.
Enjoy it. Learn as you go.
Iron Horseman
Well-Known Member
I've got a few memories of Pagosa Springs, and then there is the song "Wolf Creek Pass way up on the great divide, trucken on down the other side!" I had a co-worker who just retired to Pagosa. But enough babbling, It is just far enough away it would be difficult for me to get down to stop buy and work together for a while. Would probably have to take a weekend. Are you modeling the local RR and scenery or something else?I live in the small rural town of Pagosa Springs in southwest Colorado.
Greg@mnrr
Section Hand
Jim:
For me, scenery is one of the most enjoyable parts of the hobby and like others have said, almost foolproof.
I would suggest watching some of the videos on the Woodland Scenics web site for tips and modeling practices.
The scene below was done over several weeks, mainly because I was gone a portion of the time. But, I use Woodland Scenics material, oil dry, stones from a driveway and EnviroTex to complete the scene. Some of time was waiting for glues and EnviroTex to harden. The camera I used isn't the greatest, but I take photos to review what I have model and look for things that require correction that I may of missed when looking at the real thing.
Thanks guys for all the offers of help . I have to agree with a couple of the statements made about it looking better as it progress' . I have found that some of what I do looks better even after it just dries. I will keep plugging along and if I can ever figure out how to post some pics I will so I can get some constructive criticism .
goscrewyourselves
I'm the one
Easiest way to post pics Jim is to get yourself a "FREE" Photobucket account. Once you have that, all you have to do is upload your screen shots to Photobucket and then post the link to them in your posts in the forums.
Here's a link to the site if your interested:
http://s994.photobucket.com/
Here's a link to the site if your interested:
http://s994.photobucket.com/
