You are using an out of date browser. It may not display this or other websites correctly.
You should upgrade or use an alternative browser.
You should upgrade or use an alternative browser.
New Layout for LASM
- Thread starter logandsawman
- Start date
logandsawman
Well-Known Member
Hi Lynn, Thanks for checking it out! I could use some advice on the shingles/roof covering that would be appropriate. The structure is to be as seen around 1920.
Was thinking about those rolls of paper shingles that are made to look like shakes. From the photos it is really difficult to see what they had on there originally.
I am getting toward the end, no photos today but stained the deck also did a little trim paint this morning, just about to put the canopy on and glue the sections together.
logandsawman
Well-Known Member
Well I have some pics of the railing that goes around a upper deck porch, this was made by cutting up some scale 2 x 6 lumber.
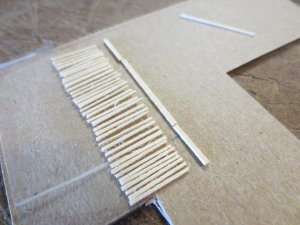
Only the bottom 1/8" is placed on scotch tape, the rest it is wax paper underneath,
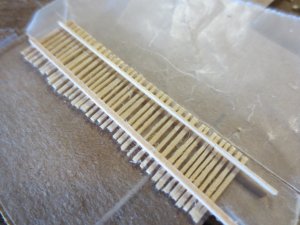
I used CA glue to attach the supports, also put 4 x 4's at the corners
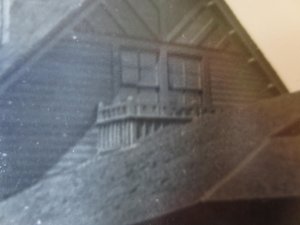
This is a blow up of the actual, which is a little fancier
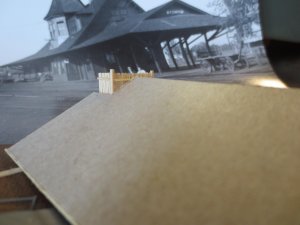
this is how it turned out.

Only the bottom 1/8" is placed on scotch tape, the rest it is wax paper underneath,

I used CA glue to attach the supports, also put 4 x 4's at the corners

This is a blow up of the actual, which is a little fancier

this is how it turned out.
Last edited by a moderator:
logandsawman
Well-Known Member
Here are the pics of the window pane instillation and the depot sign:
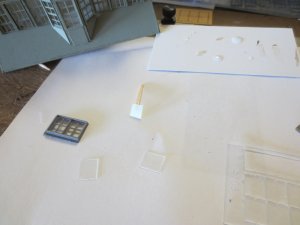
These are Tichy windows and the panes are included, however they turned out to be a tiny amount oversized. I cut them down with the knife and get the slightest amount of glue around a couple of edges...
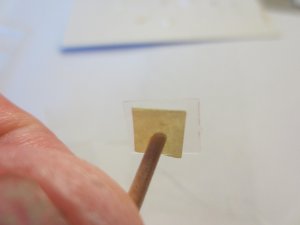
I made this gizmo to get the windows into place, used the 3m post it notes and glued them to a beveled tooth pick. The sticky note lets go easily when the window pane is in place.
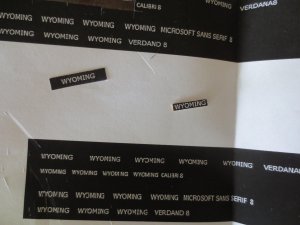
I made several signs using "paint" on the computer and picked the one that looked most like the original:
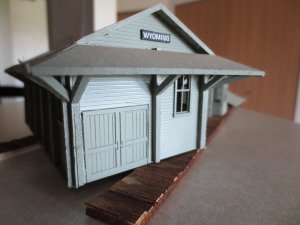
Here it is in place. I glued it to a scale 2 x 10 first, and went around the edge with a black magic marker. You can see I modified the depot building porch to be more like the original photo:

These are Tichy windows and the panes are included, however they turned out to be a tiny amount oversized. I cut them down with the knife and get the slightest amount of glue around a couple of edges...
I made this gizmo to get the windows into place, used the 3m post it notes and glued them to a beveled tooth pick. The sticky note lets go easily when the window pane is in place.

I made several signs using "paint" on the computer and picked the one that looked most like the original:

Here it is in place. I glued it to a scale 2 x 10 first, and went around the edge with a black magic marker. You can see I modified the depot building porch to be more like the original photo:

Last edited by a moderator:
logandsawman
Well-Known Member
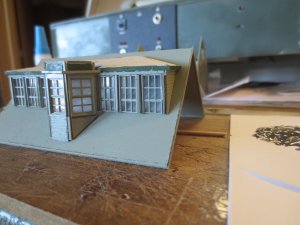
I have some pics of getting a part of the roof dormer attached to the main roof, used the JB weld. It has to be applied quickly to get the narrow bands that can lay smooth and fill in the space, while providing good adherence:
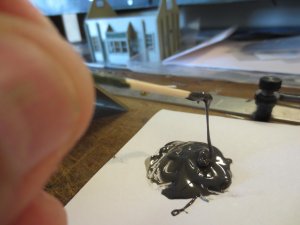
It has to be mixed thoroughly with a toothpick and layed into place in ribbons
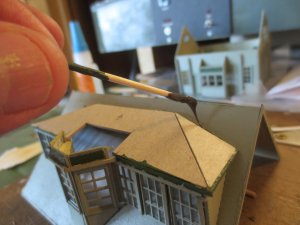
After it is put down, it can be immediately smoothed in in case it went on too thick
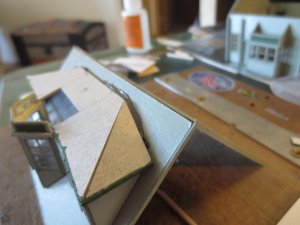
All the windows are in place and it is ready for the shingles and turret

It has to be mixed thoroughly with a toothpick and layed into place in ribbons

After it is put down, it can be immediately smoothed in in case it went on too thick

All the windows are in place and it is ready for the shingles and turret

logandsawman
Well-Known Member
Next the windows around the rest of the building are applied. I decided against using all the supplied Tichy brand windows as they came somewhat fogged new in the package. They give the illusion of windows that are a little dusty, however I decided to make some out of clear plastic.
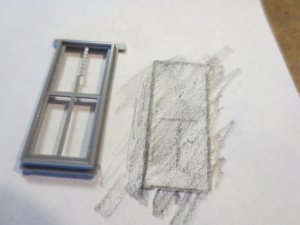
I would rub over a window to create a template which I will use to cut the clear plastic material:
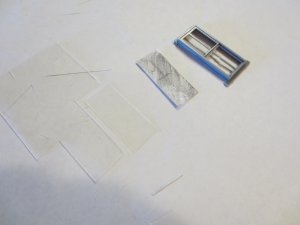
I put the template over the plastic sheet and using the sharp knife cut out the correct size on the first try:
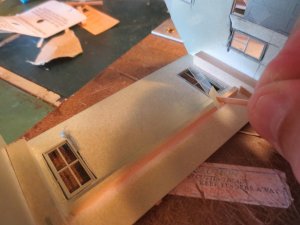
Here is putting it in place. A small amount of glue is around the perimeter of the plastic:
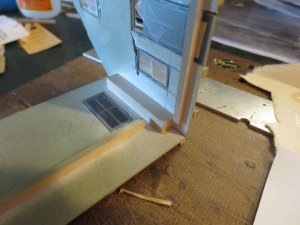
You can barely see it but it is a detail I do not see bypassing:
I would rub over a window to create a template which I will use to cut the clear plastic material:

I put the template over the plastic sheet and using the sharp knife cut out the correct size on the first try:

Here is putting it in place. A small amount of glue is around the perimeter of the plastic:

You can barely see it but it is a detail I do not see bypassing:

logandsawman
Well-Known Member
The building is really taking shape, just about ready to put the whole thing together,
I decided to do a bit of water india ink weathering to the freight door, something subtle but wanted to bring out some of the detail:
This is how it started
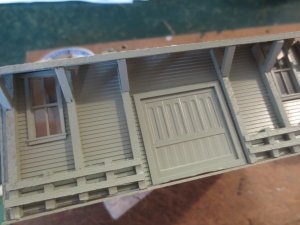
I mixed up some water with several drops of india ink, applied with a small brush as a first step
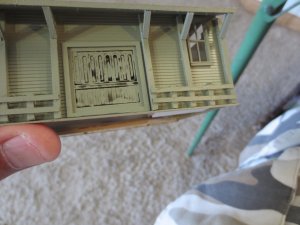
Then I soaked up a little with a cotton swab, tried to get it in several of the cracks:
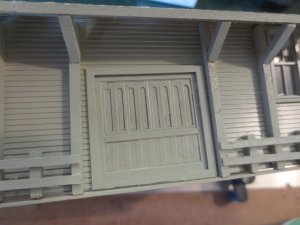
This is on the other door:
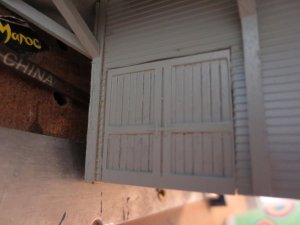
I decided to do a bit of water india ink weathering to the freight door, something subtle but wanted to bring out some of the detail:
This is how it started

I mixed up some water with several drops of india ink, applied with a small brush as a first step

Then I soaked up a little with a cotton swab, tried to get it in several of the cracks:

This is on the other door:

logandsawman
Well-Known Member
Getting a few more final details done before glueing the sections together and to the platform:
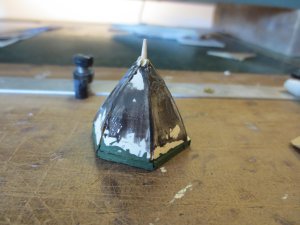
I had to close the gaps on the turret before applying the shingles, I used the jb weld product identified above, spread it on with a toothpick and smoothed it flat as good as possible, can be further shaved with an exacto knife:
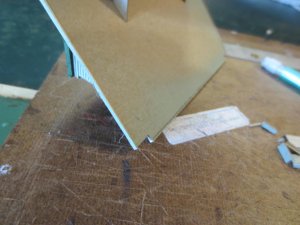
I had to cut a little notch out from the bottom of the eaves of the main building so the baggage section and the porch roofs could be attached:
I used the reinforced cardboard product for all the roofing, is sturdy; takes glue well, and can be cut pretty easily
[video=youtube;h7nK6IG1igg]https://www.youtube.com/watch?v=h7nK6IG1igg[/video]
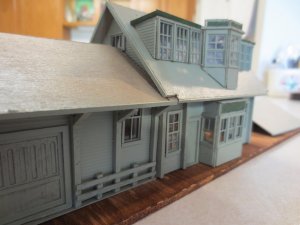
Here is how it looks just before attaching the buldings together. The main roof is yet to be glue down so it can all be adjusted at once. I will be using jb weld to attach these components:
The shingles will be applied to the turret before it is attached to the depot roof.
I had to close the gaps on the turret before applying the shingles, I used the jb weld product identified above, spread it on with a toothpick and smoothed it flat as good as possible, can be further shaved with an exacto knife:

I had to cut a little notch out from the bottom of the eaves of the main building so the baggage section and the porch roofs could be attached:

I used the reinforced cardboard product for all the roofing, is sturdy; takes glue well, and can be cut pretty easily
[video=youtube;h7nK6IG1igg]https://www.youtube.com/watch?v=h7nK6IG1igg[/video]
Here is how it looks just before attaching the buldings together. The main roof is yet to be glue down so it can all be adjusted at once. I will be using jb weld to attach these components:

The shingles will be applied to the turret before it is attached to the depot roof.
logandsawman
Well-Known Member
Thank you very much for the compliment, Yannis!
Chet, I missed your post on the 5th, thank you as well, and for following my thread!
Chet, I missed your post on the 5th, thank you as well, and for following my thread!
Last edited by a moderator:
logandsawman
Well-Known Member
Thanks, Chet-- Today I did a little fitting with the turret and also initially glued on the porch and walkway:
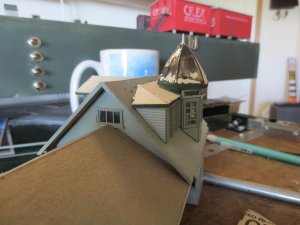
Here I formed a piece of manila folder to back the base of the turret also fill the small gap behind the top of the windows, I painted it the dark green before glueing it into place:
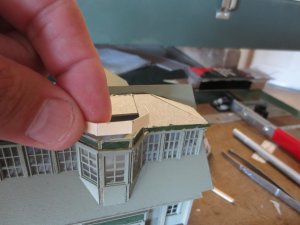
Here the turret is glued onto it and these are in their final resting place. The shingles and maybe some "roofing asphalt" will fill in any gaps:
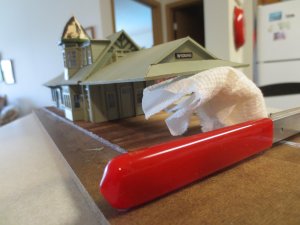
Here I have it affixed to the platform, also just glued on the porch. There will be several supports which will be fitted after the glue dries where the porch is stuck to the wall.
The paper towel is to help support the porch roof while the glue is drying:
Here I formed a piece of manila folder to back the base of the turret also fill the small gap behind the top of the windows, I painted it the dark green before glueing it into place:

Here the turret is glued onto it and these are in their final resting place. The shingles and maybe some "roofing asphalt" will fill in any gaps:

Here I have it affixed to the platform, also just glued on the porch. There will be several supports which will be fitted after the glue dries where the porch is stuck to the wall.
The paper towel is to help support the porch roof while the glue is drying:

logandsawman
Well-Known Member
Here are some final touches, the supports for the porch roof, lining the supports up, cutting them and putting them in place; just about ready to put the shingles on!!!
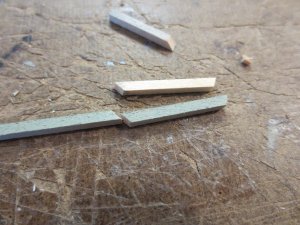
I use a scrap piece to get the dimensions right on, and carve up until it is the correct length; then make copies that will take their place on the building:
I just put a drop of CA glue on each end and hold it up there with the tweezers. If I don't like it, I take it off within a couple minutes. Some of these pieces came off and on a couple times:
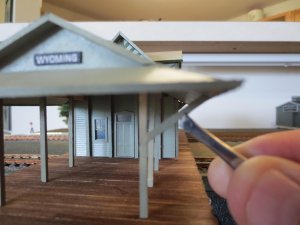
I try to get the angles the same on each so they line up:
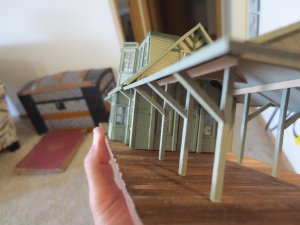
Here we are with the supports around the corner of the porch like the prototype,
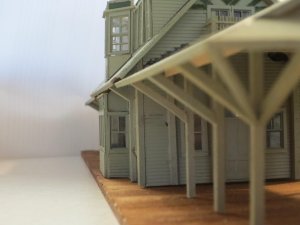
I use a scrap piece to get the dimensions right on, and carve up until it is the correct length; then make copies that will take their place on the building:

I just put a drop of CA glue on each end and hold it up there with the tweezers. If I don't like it, I take it off within a couple minutes. Some of these pieces came off and on a couple times:

I try to get the angles the same on each so they line up:

Here we are with the supports around the corner of the porch like the prototype,

logandsawman
Well-Known Member
Here are a couple of pics of the floor under construction and prior to staining, from above you can see after staining. I just used your hardware store wood stain, it goes on really easy and fast; I used a piece of paper towel:
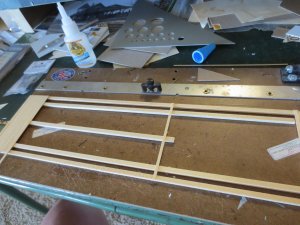
I used some thicker pieces for the main supports, then glued on scale 2 x 10 and some 2 x 8 lumber for the boards, I also reinforced it with JB weld around the corners, etc.

I used some thicker pieces for the main supports, then glued on scale 2 x 10 and some 2 x 8 lumber for the boards, I also reinforced it with JB weld around the corners, etc.

I just put a drop of CA glue on each end and hold it up there with the tweezers. If I don't like it, I take it off within a couple minutes. Some of these pieces came off and on a couple times:
So.... were they more on than off, or more often on?
Hawkesburytrain
Well-Known Member
Hey Dave, that is one heck of a nice building
How long have you been at it?
Great details, I like very much
How long have you been at it?
Great details, I like very much
flyboy2610
Loveably weird
Very nice indeed!
logandsawman
Well-Known Member
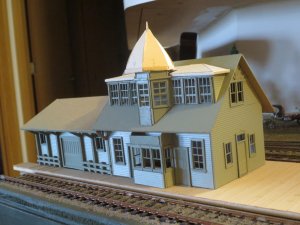
Hi guys, THANKS for all the comments of support with this project; adding another photo of the building prior to shingles, also some additional photos of the bottom side and one photo of the shingles I will be adding:
Toot-- the jig was the dimension of the shortest strut, they varied by up to 3/16" because the roof and floor are not "perfect". I would say 1/2 of them were cut perfect the first time, others required a little shaving. There were no left over pieces so I did not over do the trimming process.
Hawkes-- going back on posts, it was 5/22 when I began scaling down the photographs, that would be post 900.
Here is the building before attaching shingles:
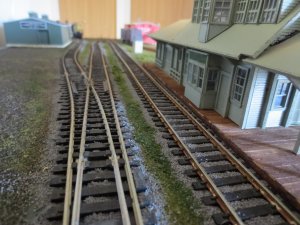
Here I added jb weld to the platform attaching the buildings securely, I wanted this strong enough to be able to resist some rough handling.
I spread it out with a toothpick when it was freshly mixed and easily workable, I used the jb kwick, the dries in 4 hour product as opposed to the original which takes about 24 hours to cure:
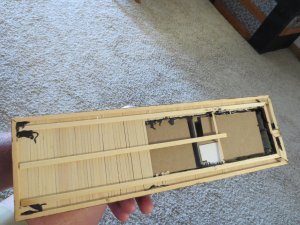
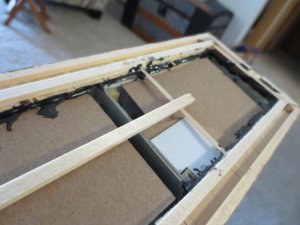
Here are the shingles I chose. From the photos, the entire roof appeared to be asphalt and not wood, except the bottom of the turret which was a small area of wooden shingles. I do not think I will be doing this part prototypical, rather leaving that area the way it is.
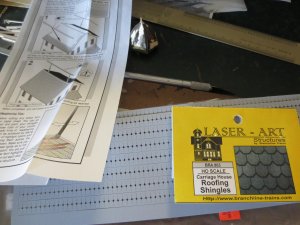
I will be first painting the shingles with brown paint and then adding some gray drybrushing before attaching with white glue.
Toot-- the jig was the dimension of the shortest strut, they varied by up to 3/16" because the roof and floor are not "perfect". I would say 1/2 of them were cut perfect the first time, others required a little shaving. There were no left over pieces so I did not over do the trimming process.
Hawkes-- going back on posts, it was 5/22 when I began scaling down the photographs, that would be post 900.
Here is the building before attaching shingles:

Here I added jb weld to the platform attaching the buildings securely, I wanted this strong enough to be able to resist some rough handling.
I spread it out with a toothpick when it was freshly mixed and easily workable, I used the jb kwick, the dries in 4 hour product as opposed to the original which takes about 24 hours to cure:


Here are the shingles I chose. From the photos, the entire roof appeared to be asphalt and not wood, except the bottom of the turret which was a small area of wooden shingles. I do not think I will be doing this part prototypical, rather leaving that area the way it is.

I will be first painting the shingles with brown paint and then adding some gray drybrushing before attaching with white glue.

