Ho, Brass Knapp (pre Bowser) 4-8-2 Mountain Restore Project


I painted the boiler last night. I just removed the masking tape. I am very pleased with the results, especially since this is the first project that I am using an airbrush. It’s not perfect but I am very pleased with the results so far.
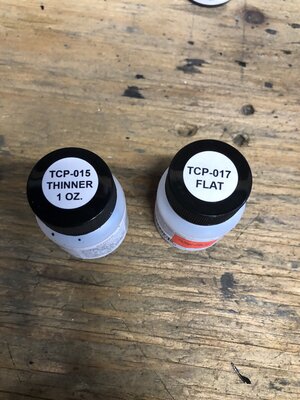
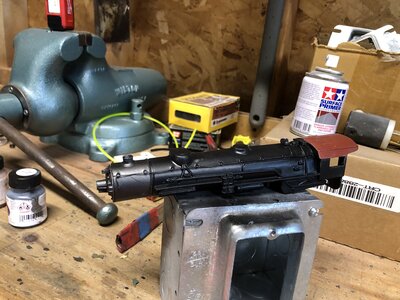
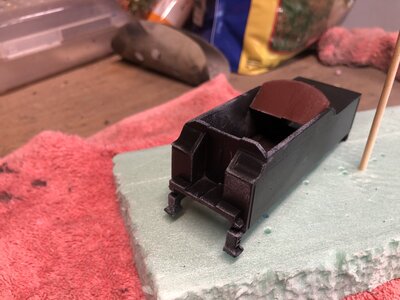
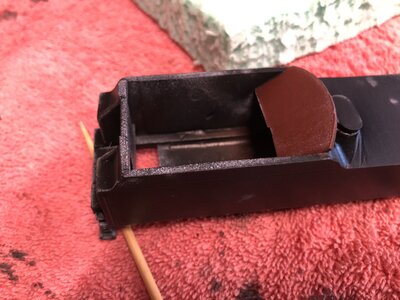
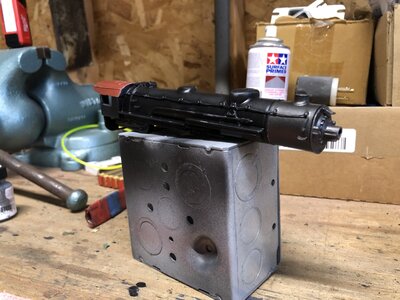
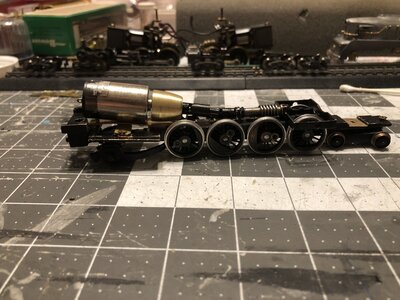
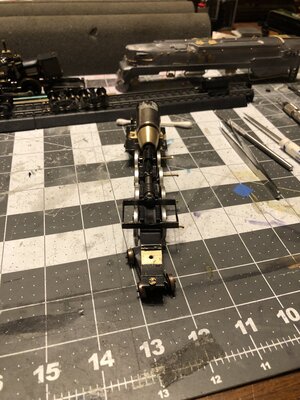
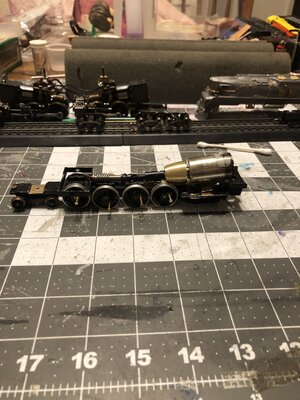
What color did you use for that smoke box? Looks like "gun metal to me.
 
For a first time airbrush project that looks really good! 👍 👍
One thing I have found helpful when airbrushing is to first paint the nooks and crannies of an object. For example, the corner where a walkway meets the cab. Give those areas a couple of light coats, then paint the main areas. Otherwise, trying to get paint into the recesses while painting the main areas will likely result in paint runs from too much paint.
Thank you. I will keep the tip in mind for the next project, a pennline/ bowser t1, but more on that later.
 
Early this morning I applied a clear coat of Tru-color flat. It was too thick so I thinned it out with Tru-color thinner. The boiler came out fine but the tender has these white patches. Does anyone know why they developed and what can I do to prevent it in the future. I still need to apply more coats of clear but I’m nervous about applying more coats.
Also I ran out of thinner. Can I use mineral spirits or should I stick to the Tru-color thinner?
 

Attachments

  • IMG_2162.jpeg
    IMG_2162.jpeg
    432.3 KB · Views: 46
  • IMG_2161.jpeg
    IMG_2161.jpeg
    470.8 KB · Views: 44
  • IMG_2156.jpeg
    IMG_2156.jpeg
    483 KB · Views: 45
  • IMG_2157.jpeg
    IMG_2157.jpeg
    350.4 KB · Views: 47
  • IMG_2158.jpeg
    IMG_2158.jpeg
    352.6 KB · Views: 44
  • IMG_2159.jpeg
    IMG_2159.jpeg
    379.8 KB · Views: 42
  • IMG_2160.jpeg
    IMG_2160.jpeg
    418.3 KB · Views: 43
The $10,000 question… Can I use alcohol or some type of solvent to remove the contaminated clear coat or will have have to go all the way back to bare metal?
I hope I can just remove the clear coat but I have a feeling I’ll be taking it back to bare metal.
 
The $10,000 question… Can I use alcohol or some type of solvent to remove the contaminated clear coat or will have have to go all the way back to bare metal?
I hope I can just remove the clear coat but I have a feeling I’ll be taking it back to bare metal.
I don't think any thinning solution is prejudiced if both paint and clear coat have the same base. You can always weather the locomotive at the end and that will hide any paint imperfections.
 
I haven't had to thin the Tru-Color, but I am using their type that is airbrush ready. Important to have a really clean painting surface, I usually use alcohol. You could try cleaning with alcohol, once you have cleaned it you can see what sort of surface you have, probably can shoot a color coat. With the tru color I make many many light coats. For a protective clear coat I use a Krylon Matt which seems to work well. As I am applying stripes and lettering of very thin vinyl (Cut with a Cameo machine) a shot of this matt helps secure them.

Good luck!
 
It’s been a while since I worked on this locomotive. I has a few hours today so I installed the can motor.
To mount the motor I drilled a tapped a piece of brass flat stock to mont to the motor and frame. The alignment isn’t perfect but close enough.
The fly wheel and universal drive shaft is from an Athearn PA1. I had sand the fly wheel down to make it fit.
Next up is to install the new drive wheels. The original are 62“ (18.2mm) the new ones are 71” (20.95mm). I was able to find 62” drive wheels on eBay but for $50 I just couldn’t justify it. The larger ones also come from ebay. The seller didn’t have an exact measurement but said they were about 3/4” of an inch. The seller was asking $12 with shipping so I took a shot. I would have loved to use 62” drives but not at $50 plus shipping. Hell, I paid $50 for the locomotive and to spend more than I paid for wheels doesn’t make sense to me. The existing valve gear will work so that’s what I will use. I do need to grind a small area from under the boiler. The larger drive wheels are in the pictures below.
 

Attachments

  • IMG_2236.jpeg
    IMG_2236.jpeg
    431.5 KB · Views: 45
  • IMG_2237.jpeg
    IMG_2237.jpeg
    490.2 KB · Views: 44
  • IMG_2234.jpeg
    IMG_2234.jpeg
    470.7 KB · Views: 42
It’s been a while since I worked on this locomotive. I has a few hours today so I installed the can motor.
To mount the motor I drilled a tapped a piece of brass flat stock to mont to the motor and frame. The alignment isn’t perfect but close enough.
The fly wheel and universal drive shaft is from an Athearn PA1. I had sand the fly wheel down to make it fit.
Next up is to install the new drive wheels. The original are 62“ (18.2mm) the new ones are 71” (20.95mm). I was able to find 62” drive wheels on eBay but for $50 I just couldn’t justify it. The larger ones also come from ebay. The seller didn’t have an exact measurement but said they were about 3/4” of an inch. The seller was asking $12 with shipping so I took a shot. I would have loved to use 62” drives but not at $50 plus shipping. Hell, I paid $50 for the locomotive and to spend more than I paid for wheels doesn’t make sense to me. The existing valve gear will work so that’s what I will use. I do need to grind a small area from under the boiler. The larger drive wheels are in the pictures below.
I'm confused with the wheels. Originally those Mountains have from what i measured 66" wheels. The ones you have on those last pics sure have very few spokes, what size are they now?
 
I'm confused with the wheels. Originally those Mountains have from what i measured 66" wheels. The ones you have on those last pics sure have very few spokes, what size are they now?
The original wheels measure .722” which I covert to 62”. The new wheels are.825”, 71”.
The flanges on the original drivers are falling apart. I would have preferred to keep them but they are not salvageable. For economical reasons I am using the larger wheels.
 

Attachments

  • IMG_2240.jpeg
    IMG_2240.jpeg
    531.6 KB · Views: 39
  • IMG_2241.jpeg
    IMG_2241.jpeg
    398.9 KB · Views: 40
  • IMG_2242.jpeg
    IMG_2242.jpeg
    427.6 KB · Views: 36


Back
Top