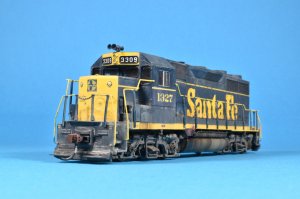
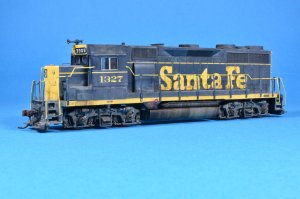
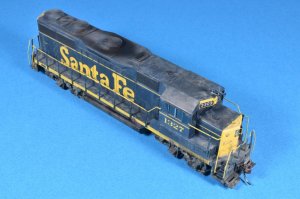
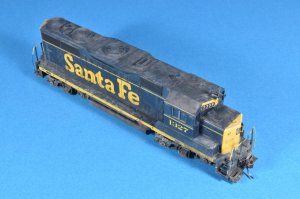
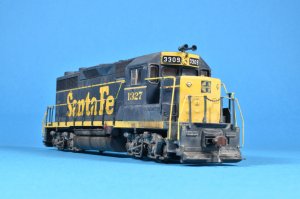
GP35 ATSF Phase I, Weathered. (HO, Athearn RTR)


Yannis

Active Member
Hi all,

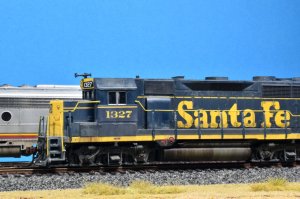
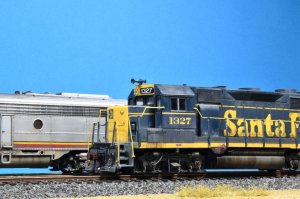
I recently finished weathering an Athearn GP35 (RTR) as a prelude to some Kato GP35 units that are in line for detailing/painting/weathering. I kept the factory paint since it matched Microscale's yellow decals (i renumbered it to 1327 from 3309, but haven't had the chance to change the numberboards yet). I also need to add lift rings, mu hoses, change couplers etc...

I pushed the weathering process towards a very tired and weathered locomotive in the mid to late sixties. Most probably i ll tone it down for the Kato units even though i have seen GP35's in such a condition.

I hope you like it and thanks in advance for your time.
Yannis
GP35rtr6.JPG
GP35rtr5.JPG
GP35rtr4.JPG
GP35rtr7.jpg
 
Last edited by a moderator:
Looks great Yannis, love the exhaust soot!
Yes it looks like it's payed for itself all right!
 
Yannis:

Like the others have said, "Nice Work".

Please share with the Forum the methods you used to weather the locomotive.

Thanks.

Greg
 
Yannis:

Like the others have said, "Nice Work".

Please share with the Forum the methods you used to weather the locomotive.

Thanks.

Greg

Thanks Greg! Here are a few words on the weathering part.

The sides / lower part of the locomotive /trucks were weathered using enamels / oils using a brush. Various layers of dust / grime colors (AK and MIG enamels)

Exhaust stains done using the airbrush and a mix of Tamiya smoke with some black paint added, in various layers following the airflow of the exhaust fumes towards the rear part of the locomotive.

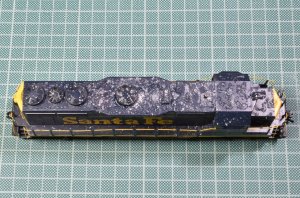
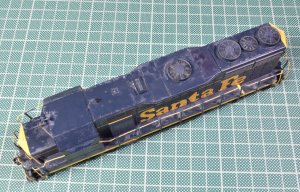
Rooftop and other horizontal surfaces using the salt weathering technique. In a few words, you use salt grains as tiny masks. The surface is first sprayed or brushed with water. Then salt is sprinkled on it, grains will stick where water is. After this is dry, i airbrush a mix of matte clear with a few drops of a color, chosen depending on what kind of weathering i am going for. Here i opted for light tones such as Sail color or Tamiya Buff. After painting with the airbrush using this weathering mixture I then remove the salt. The result is an uneven patchy surface with the original color showing through from where the salt grains were. After many layers and blending with oil colors / airbrushing extra filters, you end up with this:

This is the roof before adding exhaust stains.
GP35rtr2_zps88vyft5y.png
 
Some more "work in progress" photos that i have not included in the original post, that show elements of the salt weathering process. Uploaded here this time.

GP35rtr2.jpg
Salt22.jpg
Salt23.jpg
 
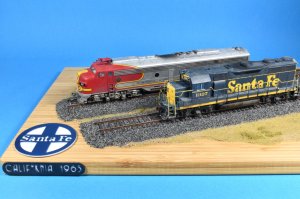
After some time, i finally renumbered the numberboards to match the new roadnumber. I also added mu-hoses and handmade bronze coupler cut levers. The loco can be seen on a recently finished small diorama base alongside an E8m, depicting "somewhere in California, back in 1965"

I hope you like it, and many thanks for your time.
Yannis

GP35rtr10.JPGGP35rtr11.JPGGP35rtr12.JPG


Back
Top