CL&W Subdivision Scenery Blog


IronBeltKen

Lazy Daydreamer
Hi gang, I’ve decided I should just have one dedicated thread for all the scenery work I’ve been doing rather than creating a bunch of short ones.

First, a brief history: I began construction on this layout in the summer of 2010, after having demolished my previous pike. My main focus was on getting the track laid and wired, then test-running trains to ensure smooth operation. I reached this milestone in the spring of 2013 and held an operating session to celebrate. Then I figured I should have a few more op sessions to be really sure that my trackwork was sound. [Truth be told, I really was just having too much fun playing with the trains!:rolleyes:]

Fast-forward to March 2017: Even though I’d temporarily replanted most of the structures that were used on the old layout, I still hadn’t done any scenery work beyond ballasting the track. So I made a commitment to get some “natural” terrain and trees on the southern peninsula before hosting any more op sessions.

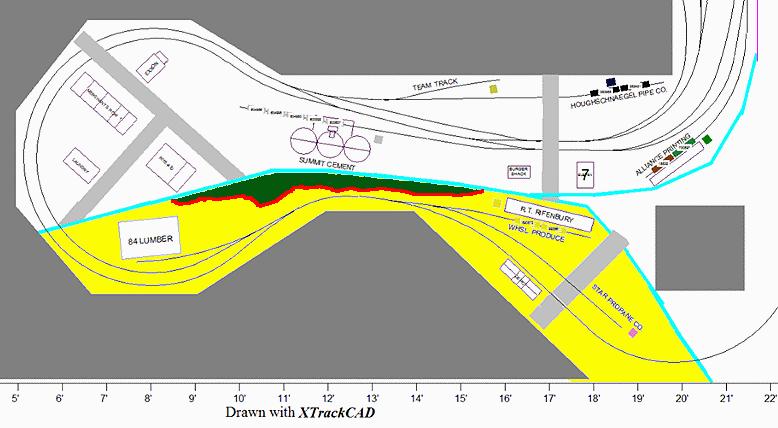
My plan was to start with the southeast corner and work my way westward (timetable "northward") from that point. The diagram below shows the area [highlighted in yellow] that I’ve been working on in recent weeks:

CLW_South_Peninsula_Map01.gif


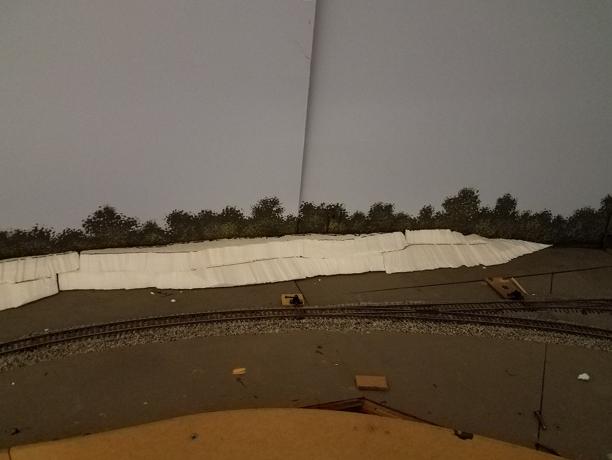
The first thing I wanted to do was eliminate what I considered an eyesore, where the backdrop abruptly ended ~15 inches from the edge of the benchwork and the main line just passed around it.

BrookPark_01.jpg


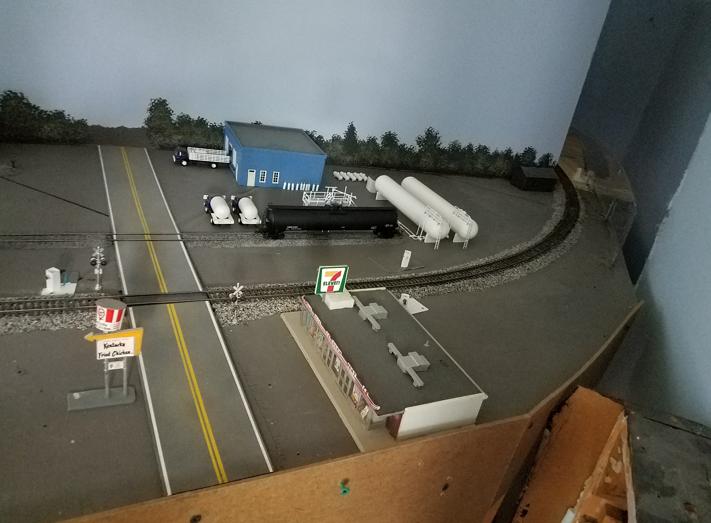
I started by extending the backdrop to the end of the benchwork, cutting out a hole large enough to allow my hi-cube boxcars and auto racks to fit thru. Originally I was just going to put a tunnel portal around the hole, but several forum members convinced me to disguise it with a highway overpass – since there really aren’t any mountains around the Cleveland metro area that my pike tries to loosely replicate. I’ve already posted about that task and I don’t want to be redundant, so the link to that thread can be found at:

http://www.modelrailroadforums.com/...Corner-Camouflage-Project-on-the-CL-amp-W-Sub

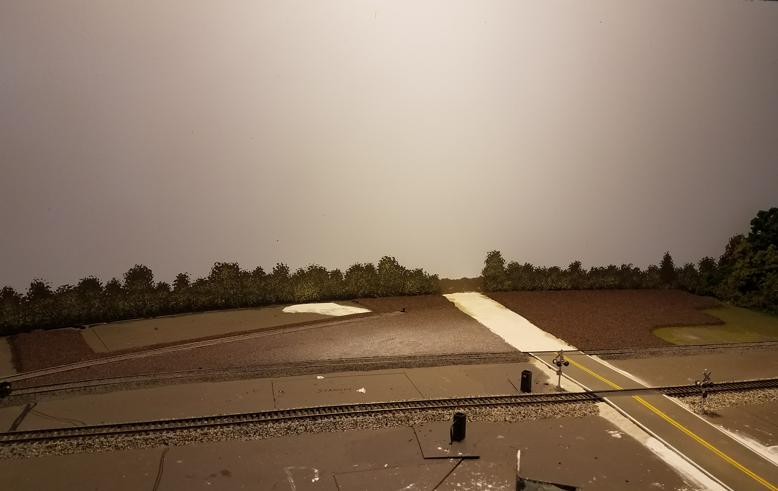
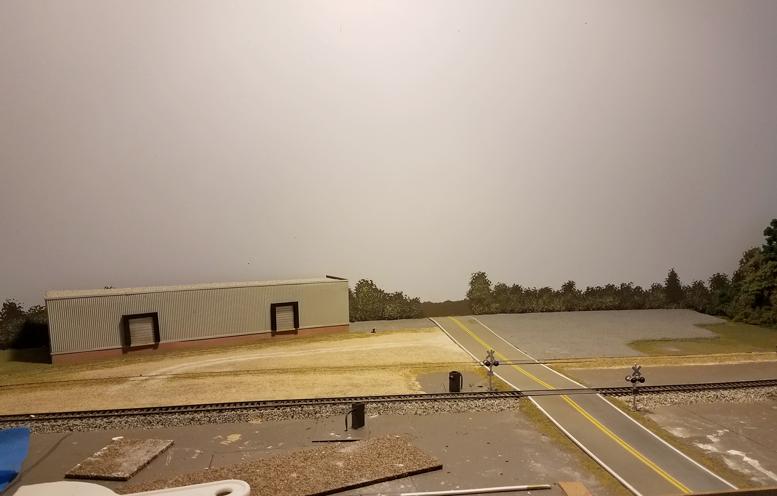
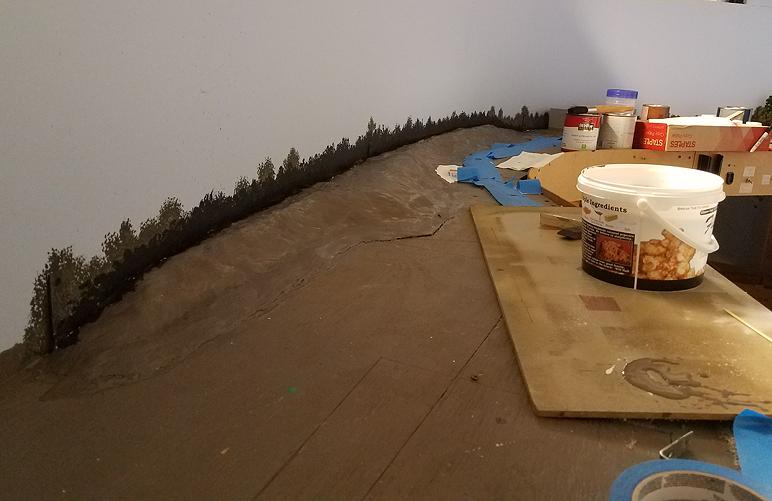
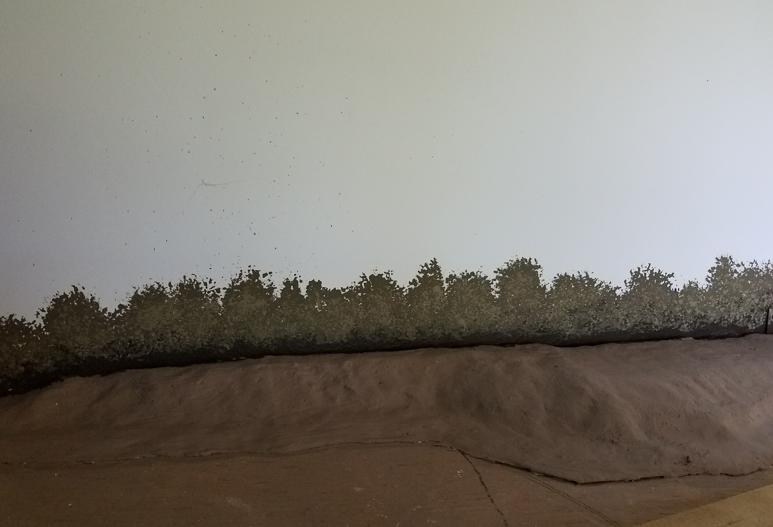
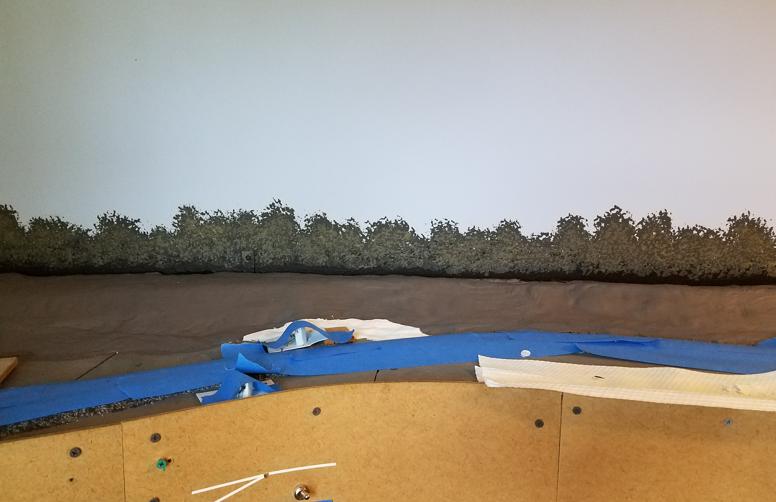
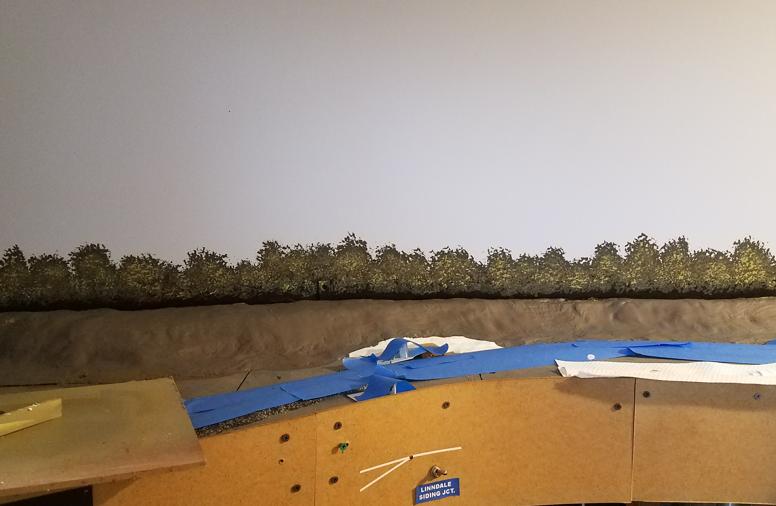
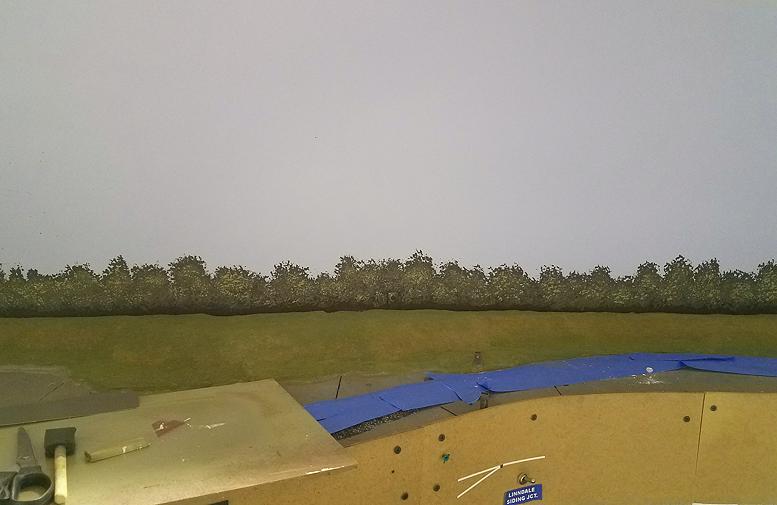
Here is what the southeast corner looked like after I got some terrain, trees and static grass around it:

AsLaidAsItGets_OperatorsView.jpg


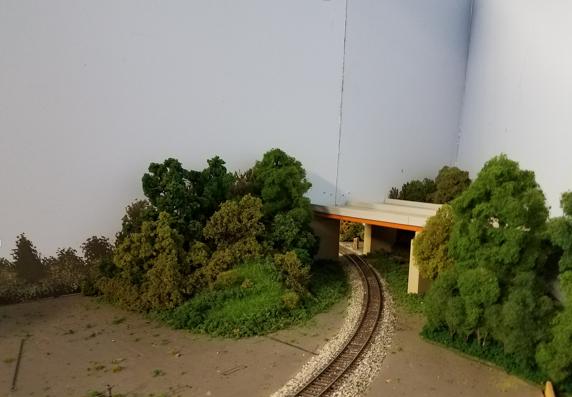
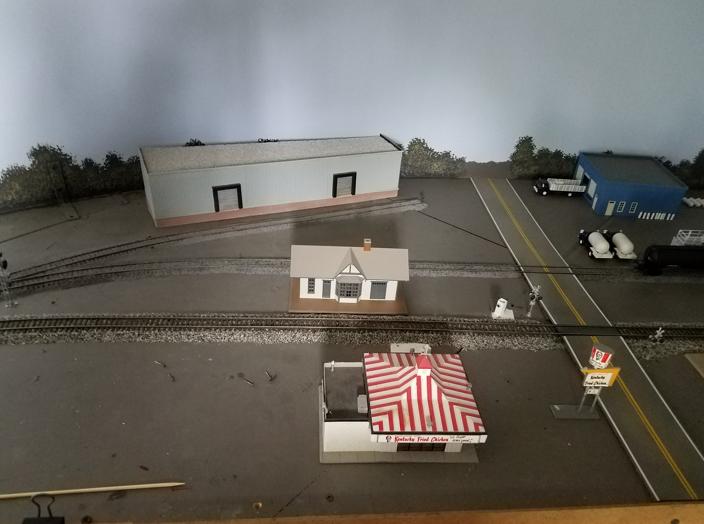
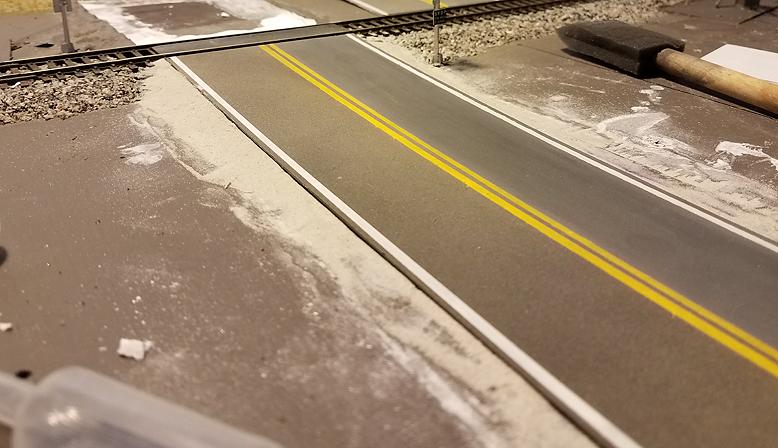
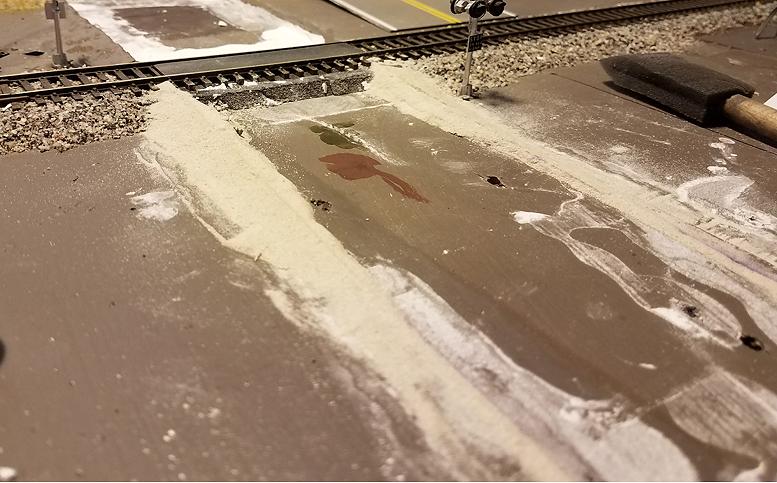
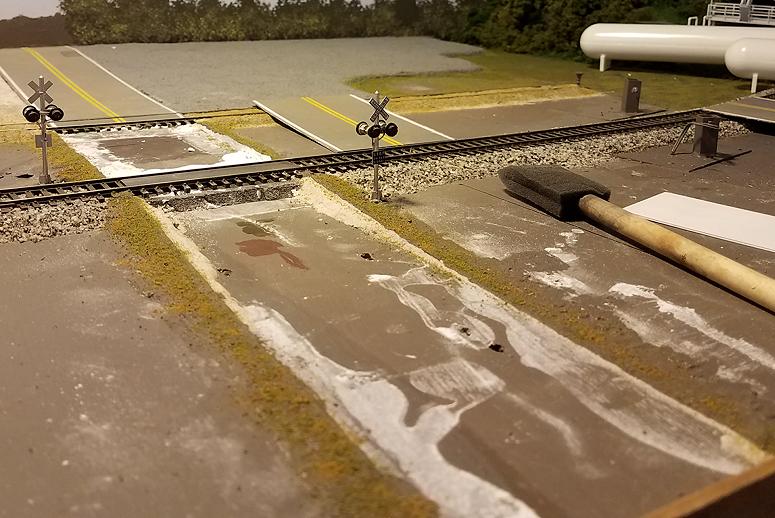
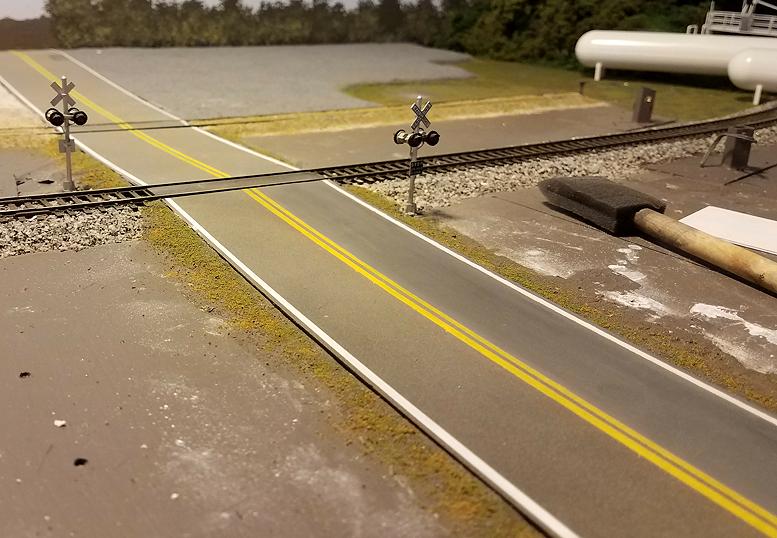
I wanted to get this area looking as close to “finished” as possible, since it is extremely difficult to access. This got me ready to tackle my next challenge: improving the surfaces of the town of Brook Park.
 
The Lineside Industries of Brook Park

Moving away from the southeast corner, the first place you encounter is a grade crossing and a few trackside industries named for the town of Brook Park, OH. I say “named for” because it bears no resemblance whatsoever to the real Brook Park, I simply named it such because it is one of the towns along the prototype CL&W Sub.

Here is the “before” image, showing sheet styrene road surfaces, structures and vehicles on a painted [but otherwise bare] plywood surface:

BrookPark_02.jpg


As the photo shows, the spur tracks still sit significantly higher than the surrounding surfaces. This doesn’t jive with what I’ve typically seen of small rail-served businesses, where the rails are barely even visible; so my first goal was to raise to level of the adjacent ground up to the level of the spurs’ railhead. After agonizing a few days over how I could possibly accomplish this, I remembered that I still had a sizable stash of aluminum oxide sand leftover from simulating iron ore stockpiles on my steel mill. Its texture has the same level of granularity as Woodland Scenics N scale ballast, so – once painted – it would serve perfectly as a gravel-covered industrial lot.

The following pic shows where I poured the aluminum oxide up to the level of the spur tracks. The diluted white glue mixture hasn’t dried in front of the frozen foods warehouse, whereas it has hardened on the side with the propane supply business. With the drying time being as slow as it is, I was able to pat it down to a level surface. I had to be really careful to leave enough clearance on both the inner and outer sides of the rails, so the trains would roll smoothly over them.

BrookPark_BuildingUpGradedAreas.jpg


Pay no attention to the white hydrocal roadbed visible toward the rear; that was a mistake which I spent several hours working to remedy! I found a much better way to accomplish the desired [roadbed] effect which I’ll explain in my next post…
 
Last edited by a moderator:
Developing Workable Asphalt Roadbeds

Before I starting filling-in the graded areas of the Brook Park lineside industries, I tried using hydrocal to elevate the [sheet styrene] asphalt road surfaces…BIG mistake! When I placed the asphalt sections back on their designated spots, I discovered that in the places where they rested against the rails, the styrene protruded about 1/16th of an inch above the railhead…NOT good! This would surely cause any locomotive with a plow pilot to snag it.

First I tried shaving-down the hydrocal to make room for the styrene sheet to fit flush with the rail. But after several cycles of grinding, shop-vacuuming away the debris, test-fitting the road surface and trying again, I determined that the only valid solution would be to chisel up the hydrocal and use a different approach.

I found that by resting the sheet styrene road surfaces over the railroad ties, I could stuff wet texturing sand underneath the road slab and shape it into a slope on the outside edge…

BrookPark_TexturingSandUnderStyreneRoadSurface.jpg


Next I pulled away the road top and soaked the sand with 91% ISO alcohol, then poured on a 1:1 mixture of water and white glue to permanently hold its shape (same thing I do with ballast):

BrookPark_TexturingSandWithRoadSurfaceRemoved.jpg


Before restoring the road surface, I painted the sand roadbed with latex earth color and covered it with ground foam…

BrookPark_TexturingSandRoadbedPaintedWithTurf.jpg


…and once I restored the roadbed, it lined up perfectly with the rails and finally looked the way I wanted it:

BrookPark_TexturingSandRoadbedWithRoadSurfaceRestored.jpg
 
Thanks for the post Ken. The sheet styrene has also worked for me for streets. Looks really good. Keep the photos coming, and perhaps more photos of the reat of the pike.

Well done.
 
Thanx for the encouraging words Chet! I'll try to keep a steady stream of new photos coming on here...
 
Brook Park Lineside Industry Plots - Semi-Finished

I didn't have a photo of what the Brook Park graded areas look like after painting, because I had piled up so much stuff on that surface (paint cans/brushes, mixing bowls, etc.). I finally cleared everything off temporarily so I could get just one pic to share with you all:

BrookPark_GradedAreasFullyPainted.jpg


I'll finish the area in the foreground later, I'm focusing on all the farther-back places first for obvious reasons.

I spent most of the weekend putting in a ridge along an otherwise bland stretch of main line just west of Brook Park. Got several pics, but haven't had time to edit them or write them up. Will do that tomorrow...
 
Linndale Ridge

Today I’ll describe how I added a ridge to the long, narrow segment of main line just west (timetable north) of Brook Park. This is represented by the red-bordered section of dark green in the diagram below:

CLW_South_Peninsula_Map02.gif


First, I needed some Styrofoam for structural rigidity. A hot wire foam cutter was the perfect tool for carving these pieces into shape:

LinndaleRidgeSouthEnd.jpg


The next step was to place some Rags-In-A-Box (heavy-duty painters’ paper towels sold at Home Depot) towels on top of the Styrofoam base, and pour hydrocal over them:

LinndaleRidge_HydrocalFreshlyApplied.jpg


Installing the ridge had the unfortunate effect of covering the line of painted-on background trees, so these needed to be redone. First step was to apply the black base "shadow" coat:

LinndaleRidge_TreelineBlackUndercoatApplied.jpg


While the black paint dried, I covered the hydrocal with earth-colored paint:

LinndaleRidge_BaseEarthColorPaintApplied.jpg


…then I applied four shades of green paint with a stippling brush, starting with the darkest color first - followed by progressively lighter colors:

LinndaleRidgeBackgroundTrees_FirstLayerOfGreen.jpg


LinndaleRidgeBackgroundTrees_SecondLayerOfGreen.jpg


LinndaleRidgeBackgroundTrees_ThirdLayerOfGreen.jpg


LinndaleRidgeBackgroundTrees_FourthLayerOfGreen.jpg


3-D trees will eventually go in front of these painted-on trees; their primary purpose is to absorb the shadows cast by the overhead light on the “physical” trees.

Final step before placing the model trees, was to apply some ground foam cover - “earth” on the steeper slopes, green on the flatter areas:

LinndaleRidge_GroundCoverApplied.jpg


All of this is destined to be covered with trees, shrubbery and static grass. More on that later…
 
Ken: Great job. really looks good.

Minor point, when you put your LPG siding back together, do not put the main storage tanks behind the siding. FD wouldn't like that. Scooch them the short distance toward the backdrop to clear the siding. Heavy free wheeling railcars such as LPG tankers, sometimes balk at stopping and bumping blocks usually don't hold :rolleyes:, so they are not trusted. Things happen.

Who said you can't do scenery?????
 
Ken - That is really looking good. I agree with Joe, you can do some very nice scenery. Do you have your entire track plan available to post????
 
Ken - Thanks for the information regarding the ridge. Looks great. That did give me an idea for a troublesome narrow spot on my pike. Good advice from Joe regarding the LPG tanks by the way.

Willie
 
Ken: Great job. really looks good.

Minor point, when you put your LPG siding back together, do not put the main storage tanks behind the siding. FD wouldn't like that. Scooch them the short distance toward the backdrop to clear the siding. Heavy free wheeling railcars such as LPG tankers, sometimes balk at stopping and bumping blocks usually don't hold :rolleyes:, so they are not trusted. Things happen.

Who said you can't do scenery?????

Thanks Joe. I'll modify the propane facility to avoid having the tanks in any position to be T-boned, glad you caught it!
 
Ken - Thanks for the information regarding the ridge. Looks great. That did give me an idea for a troublesome narrow spot on my pike. Good advice from Joe regarding the LPG tanks by the way.

Willie

Willie - thanx for the kind words, glad you found some info that you can use!
 
Thanks for the PDF. I thought I may have seen it before. It looks like there are some staging tracks, or possibly through tracks behind a scenic backdrop. Do you have good access to these tracks? Really like the plan and appreciate you starting this thread. Looking forward to updates. Looks like a lot of switching to be done on the layout.
 
Cheap, Quick, Quality - Pick Any Two

I figured I probably ought to post something on here, to keep the thread from dropping off the page to oblivion. I haven't been able to accomplish anything worth photographing during the past week, because I'm stuck trying to learn how to do these Scenics Express Super Trees.

Last weekend I went to MBK and got the Super Trees Starter Pack, because I figured it would have everything I need. Big mistake; all it had was the Norwegian sagebrush material, matte medium, spray bottle and some clump foliage. Their instructions said nothing about how to make the trees straight, and they insist on using matte medium for everything. OTOH, the 3rd party how-to videos generally say I should use a spray adhesive to attach the foliage, then seal it with a coat of hair spray.

All the youtube videos I watched have different ideas for getting rid of the curved tree trunks. One says to soak the trees in matte medium solution for 3 minutes, clip weights to the tops, then hang them upside-down on a clothesline to dry for 24 hours. That didn't work for me, when I went out the next day they were all still crescent-shaped. So I tried somebody else's suggestion of strategically burning the trunks with a soldering iron to bend them into a straighter shape. The bending part worked, but in many cases I also burned away much of the surrounding thin-limb material.

I followed the youtube directions for covering the armatures with spray adhesive. In the video that worked perfectly, yet when I did it, the foliage barely even stuck when I sprinkled it on; I had to press it on firmly with my fingers, and even then much of it fell off. And blasting it with the hairspray blew away still more of the foliage. The cumulative ~6 hours I've spent on this task netted me roughly 20 sad-looking trees, suitable only for background use. [In fact I may even end up discarding them.]

Of the three measures of desirability [cheap/quick/quality], obviously the missing one is "quick"; Super Trees are very time-consuming and labor intensive. And until one develops the necessary skills to do these things properly, the end result will be mediocrity rather than quality. I'll write this off as a learning experience and give Super Trees another try, perhaps trying SE's method of sticking foliage onto matte medium soaked branches - after hot-bending all the trunks to a somewhat-straight shape. And if that doesn't give me any better results, I may have to reconsider just purchasing pre-built trees. Life is too short to be spending all my time making scraggly trees!
 
Ken,

I have the kit also and I have no problems at all

- For straitening the trunk, I hold it over steam from a kettle for about a minute while stretching it (kind of) and then holding it for about 30 sec. away from the kettle.
- I use Camouflage spray paint from Krylon for painting the trees and then leave it dry for 24 hrs.
- I use hair spray before and after for the leafs.

To make different looking trees, I remove branches here and there and even add more branches on the branches.

Making those trees takes lots of time and patience, that's why I'll do a bunch at the same time per step.

Hope this helps
 
...
- For straitening the trunk, I hold it over steam from a kettle for about a minute while stretching it (kind of) and then holding it for about 30 sec. away from the kettle.
...
Seems like that method could work, if it softens the trunk enough...thanks Lloyd for sharing it!


Back
Top