Building the Whistle Stop RR


Well, it seems that a bunch of updates are getting posted to layout threads. It's been a while since I have updated this thread. Not a whole lot to update everyone on, though. I've got a few more trees planted above the waterfall and a little more ground cover and ballast here and there, but my two wheeled hobbies (and job) have been taking up a great deal of my time.

I did get this little mini-scene completed though:
F5DE40EC-6689-4FEB-A0E8-AF34E4B19384_zpsmrta9thk.jpg


Some nice ledges for the train to cut through just before the creek, complete with a few more of Jim's trees.

BA3CCA11-9F4E-4716-BFEC-57CA6D3246E9_zpsefwbjopd.jpg


If you look closely, you can see where the porcupines have been chewing on the bases of the pine trees. (That's my story and I'm sticking to it!)
 
I like the rock ledges against the wall and in front.

I have been wondering what you have been up to! Thanks for the update!
 
Leading up to that ledgy area will be a small swamp that will be preceded by a mountain. The mountain will have a window in the side so you can watch the trains run through the tunnel that will be there. At least that's the plan right now. That should effectively decorate that long, narrow run down that wall pretty well. I posted a thread in the scenery page for some modeling tips.
 
I say leave the booze where it is. This will be your hobby room wet bar !!
 
Wow. Nearly a year and a half since I updated this thread. With the impending death of Photobucket, most of the photos will disappear in July. Too bad I don’t have the time or patience to move all of them to a different host site.
 
I tried Imgur, but when I went I couldn't even get an account established. I kept getting an "Our servers are too busy right now" message. I guess Business is booming for them right now. I ended up going with Flickr. Seems to be working good so far.
 
Been nearly a year, time for an update to this thread... (can you all still see the pictures?)

Let's see, I finished off my turn around area with a swamp and scratch build round house...
http://www.modelrailroadforums.com/...-swamp-a-roundhouse-lights.30348/#post-437436

Then I added an extension off of that which has become a ladder yard (of sorts)...

Now It's time to continue the trek around the room. Here is where I have ended:


I built a simple shelf to hold the track along the wall:


Then a drop in piece to bridge the corner:


I kept this as a drop in piece as the section that is against the concrete (white) wall is all removable as well. Just in case I need to get to the window for any reason. Plus, I think I have managed to take care of the drainage issues that were plaguing my basement with water every spring, but it will be nice if I can easily move sections of the layout if I need to instead of ripping them up completely.

Next, I printed out the track plan and laid it in place:


This is actually the second track plan. One of the benefits of printing out a plan: It might look good "on paper," but when you actually get it laid out, sometimes it just doesn't fit quite right. The first plan, while similar, just didn't work. Even this one needed a bit of altering.

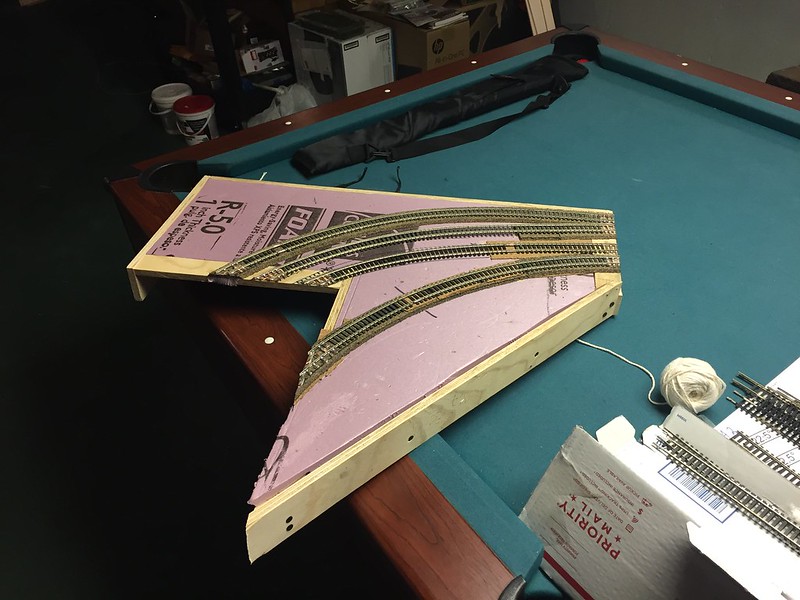
Now it is time for laying roadbed and track... and the obligatory mess that goes with it...
 
As the lift out section will have to, well, lift out, I'll need to make sure the rails stay in the same place. Securing some PC ties with gorilla glue then I'll solder the rails down to those. once the track is laid, glued and soldered down, then I'll cut them.


The other side is a bit more tricky. The curves are a bit more gradual on this side:
 
Well, the glue is curing on the last two sections as we speak. We'll see if it works later this week (hopefully). Should be able to start lying some track tonight.
 
Tracks have been laid and soldered down. Almost didn't get there. My good soldering gun stopped working. Makes me sad. BUT, the old back-up one came through.


As you can see I tested them out with some trains. Now the trick will be cutting the rails and seeing if they'll still line up.
... and powering them... it appears I managed to skip that step. one step forward, yada, yada, yada...
 
And with a few cuts carefully made, the corner is out!


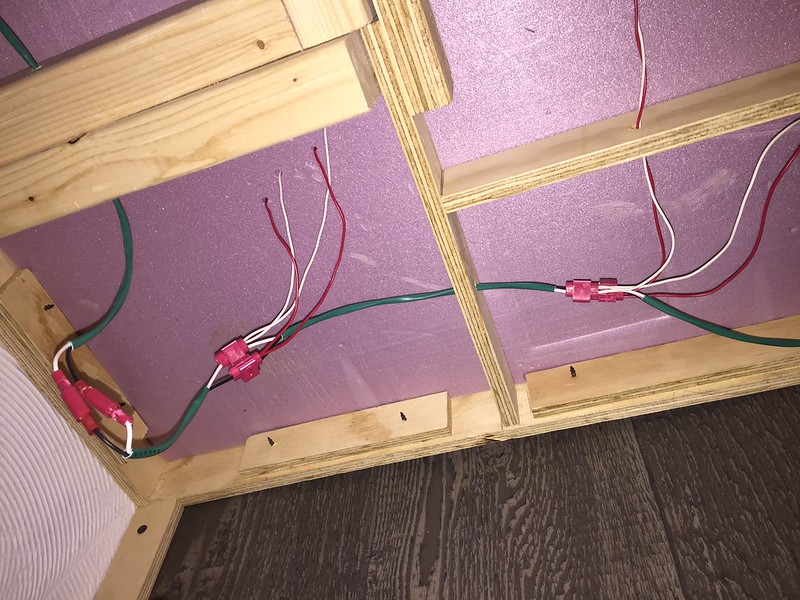
After reinstalling it, I only had one rail that seemed slightly out of line, and that was a simple elevation issue. Easily solved. Next will be the wiring, which should be fairly simple, then I can continue down the track. Need to build another turn out first, though. Which means I'll need more PC board. I ordered some on ebay for cheap, but since it is coming from China, it should be here sometime between early February and mid march. :rolleyes:

-----------------
Next on the agenda will be a little bit of rail protection. I have this dart board, you see. My original though was a slide-shed type of structure, covering the tracks. As it will end up covering two turnouts, though, I'm thinking just some kind of hinged cover might be better? What would you all think? I just want to protect any trains that might be in the area and the tracks from wayward darts that might not hit their targets.

 
Wired and running! well... after a little work...
I got all the tracks wired up and the realized I have wired them all backwards. My buss line now gets reversed as it comes into the corner. I'll just have to remember that I continue working down the track.


Back
Top