
You are using an out of date browser. It may not display this or other websites correctly.
You should upgrade or use an alternative browser.
You should upgrade or use an alternative browser.
Building the Whistle Stop RR
- Thread starter KB02
- Start date
KB02
Well-Known Member
I think the thing that sucks the most in building a layout is waiting for things to dry. I am too impatient! I want instant satisfaction!
Pics to come. I have applied and sealed up fascia boar to the edge of the river as well as sealed up the river on the back wall (above the falls) and even have the waterfall itself (The water portion) drying on the kitchen table. I've got two-part epoxy waiting to be mixed together once I have the falls in place.
Just...
....too....
.....damned.....
......IMPATIENT!!!!!!
I also have a new, curved, turnout coming to replace one of my problem-children on the layout. The curved turnout should work better than the snap track that is in place now. I'll have to pull up and un-ballast a few sections of track, but in the long run it will be worth it. Going with Peco on this one.
goscrewyourselves
I'm the one
KB,
Know EXACTLY what you mean - welcome to the "I want it done by yesterday club...!"
Know EXACTLY what you mean - welcome to the "I want it done by yesterday club...!"
goscrewyourselves
I'm the one
That certainly appears to have "fast motion". What are you using for your water KB02?
KB02
Well-Known Member
For the riverbed, top and bottom, I am using the two part epoxy. For the falls itself I am using "clear" caulk (using the quotation marks because it not drying as "clear" as I had hoped. Should have gone with a better caulk. Live and learn). Most of the White you see is Mod Podge. That should dry "clear" as well. I'll need at least one more layer of epoxy for the top river, but I think I might be okay on the bottom with just one layer.
KB02
Well-Known Member
Bottom part of the river with Two-Part epoxy applied:

Mod Podge applied for wave action:

After a day and half of drying:

And a closer look. I think this is going to look great when it is fully dried!

The upper part of the river is still in un-waved form. I am debating if I want to add a third layer of the epoxy or not. I have two layers on right now (only one on the bottom side) and with the natural leveling action of the epoxy being what it is, the water is not quite coming up to the head of the falls. Kind of hard for water to flow over something if it is not even at the top of it. I would just drop down another layer but that means I have to buy more epoxy and the Whistle Stop RR's Parent Company's CFO is already on a spending hold for the time being.
I did stock the river, though. In between layers of epoxy, I painted a couple of big fish swimming along behind the rock. If you look close you can even see their shadows below them. It'll look great with waves on top. If I do a third layer of epoxy, I'll paint on a couple more fish first . I think that would really help create a great sense of depth to the river.

Mod Podge applied for wave action:
After a day and half of drying:
And a closer look. I think this is going to look great when it is fully dried!
The upper part of the river is still in un-waved form. I am debating if I want to add a third layer of the epoxy or not. I have two layers on right now (only one on the bottom side) and with the natural leveling action of the epoxy being what it is, the water is not quite coming up to the head of the falls. Kind of hard for water to flow over something if it is not even at the top of it. I would just drop down another layer but that means I have to buy more epoxy and the Whistle Stop RR's Parent Company's CFO is already on a spending hold for the time being.
I did stock the river, though. In between layers of epoxy, I painted a couple of big fish swimming along behind the rock. If you look close you can even see their shadows below them. It'll look great with waves on top. If I do a third layer of epoxy, I'll paint on a couple more fish first . I think that would really help create a great sense of depth to the river.
logandsawman
Well-Known Member
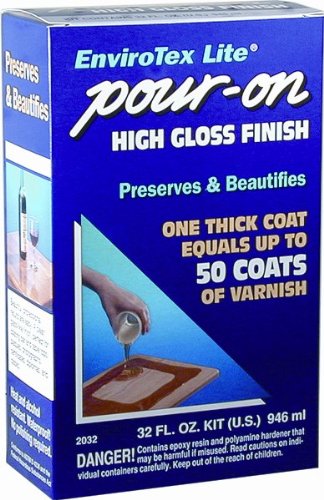
What is the two part epoxy you are using? can you photograph the product container? Thanks
goscrewyourselves
I'm the one
Looks good KB02 and nice idea using the epoxy as well. Is that a type that doesn't require hardener by any chance?
KB02
Well-Known Member
It's two part. Mix equal parts resin and hardener (and mix together for at least three minutes) and pour where wanted.
--------------------------------------------
Spent a little more time on this little rock ledge. Looks better with surface board painted and track laid on roadbed. Next step is fascia board, ground covering and ballast and this little section is (mostly) done.

--------------------------------------------
Spent a little more time on this little rock ledge. Looks better with surface board painted and track laid on roadbed. Next step is fascia board, ground covering and ballast and this little section is (mostly) done.
KB02
Well-Known Member
The mountain finally stated that it needed attention and, as my son was home from school today, it seemed like the perfect day to do it.
Here it is in bare form when I first started putting the cliff face on:

Cliffs painted and river banks installed as well as a road for cars to get down to the head of the falls:

River painted. Sandy bank on the left and a richer soil bank on the right:

More cliff and background painting, the first layer of water in the river bed and falls being cemented into place:

And finally ground cover applied.

The lighting is terrible and the ground cover is still wet from the wet water & glue, so you can't even see the road anymore, but I think it came out pretty good as a whole. I need some trees and some people having a bonfire on the beach, but those will happen with time.
Here it is in bare form when I first started putting the cliff face on:
Cliffs painted and river banks installed as well as a road for cars to get down to the head of the falls:
River painted. Sandy bank on the left and a richer soil bank on the right:
More cliff and background painting, the first layer of water in the river bed and falls being cemented into place:
And finally ground cover applied.
The lighting is terrible and the ground cover is still wet from the wet water & glue, so you can't even see the road anymore, but I think it came out pretty good as a whole. I need some trees and some people having a bonfire on the beach, but those will happen with time.
logandsawman
Well-Known Member
looks great, nice update!!
KB02
Well-Known Member
Got back to work on my back corner. I figure the sooner I get this corner done, the sooner I don't have to crawl underneath the layout to get to my pop-up whole anymore.
When last we left...
Apparently I didn't take any more in progress shots of this (I thought I had), but after this dried, I added on some home-made rock mold (tin foil) formations and plastered them in place. Then it sat for about a month as a huge, white eye-sore in the back corner of my layout. After carving down most of the hard edges with a dremel, some wash painting (yellow, grey, blue, brown and black, in that order), ground cover and ballast and we have this:

A closer shot:

Just gotta figure out how to hide the wire to thr turnout motor, but other than that, I think it's looking pretty good (and yes, I need trees).
When last we left...
Started by taping off the track and adding a tunnel (interior is ALREADY painted this time... I AM learning.)

Then I added some screening to build the mountain structure:

I screwed up and had forgotten that I should have used Aluminum screening and not the plastic kind, so it didn't come out as strong as I would have liked. But I put thin coat of that pink plaster stuff on (mixed with some black paint) and then let it dry:


Apparently I didn't take any more in progress shots of this (I thought I had), but after this dried, I added on some home-made rock mold (tin foil) formations and plastered them in place. Then it sat for about a month as a huge, white eye-sore in the back corner of my layout. After carving down most of the hard edges with a dremel, some wash painting (yellow, grey, blue, brown and black, in that order), ground cover and ballast and we have this:
A closer shot:
Just gotta figure out how to hide the wire to thr turnout motor, but other than that, I think it's looking pretty good (and yes, I need trees).
logandsawman
Well-Known Member
Those rocks turned out really nice, good job!
")
