
You are using an out of date browser. It may not display this or other websites correctly.
You should upgrade or use an alternative browser.
You should upgrade or use an alternative browser.
Building the Canyon Diablo Bridge
- Thread starter D&J RailRoad
- Start date
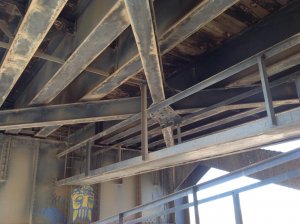
That crossbeam appears to be a flat panel rather than an I beam with angle iron bracing riveted to it to stiffen it. Wonder if it has the same on the other side, or is just flat. Oddly the lower walkway that passes under that crossbeam seems to be directly beneath the upper one, so what happens where they intersect? The lower one, where it truncates below the crossbeam then, going by the previous photo, has a stepway that goes downward at about a 45deg angle to somewhere.
D&J RailRoad
Professor of HO
Toot - This picture is standing at the very end of the bridge looking toward the other end. The walkway on the bottom follows the lower arch of the bridge and eventually turns into a stairway that you can see in other pictures that Ron previously posted. Ron was probably standing on the end support concrete when he took this picture. I think the lower walkway is just this side of the upper walkway where they come up against the bulkhead wall at the end of the bridge, just behind where Ron was standing to take this picture. There is a ladder going from the lower walkway to the upper walkway just to the right of where Ron was standing here.
You can see in the picture below the ladder going from the lower to the upper walkway.

You can see in the picture below the ladder going from the lower to the upper walkway.
Last edited by a moderator:
The lower walkway is just under the upper walkway. The same latter is used to access both. You have to duck (probably get on your hands and knees) to access the lower walkway at this point. Very crude, but serves its purpose.
dang it, posted sideways! I don't know how to fix that!
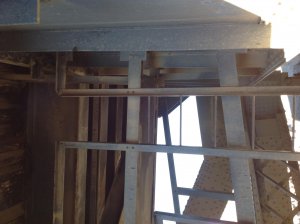
Toot- those are actually I Beams.
dang it, posted sideways! I don't know how to fix that!
Toot- those are actually I Beams.
Attachments
That was a bit convoluted to get that back on here for me anyway. Had to copy and paste to my computers photo album, edit it to turn it right way up and then copy it into a photobucket album (wouldn't directly copy and paste from my computer) and copy and paste to the Quick Reply.
Hey look! Someone missed some rivets! Send them back.
LOL, good eye i didn't even notice that! Thanks you Toot.
You'll worry about them now, every time you cross.
D&J RailRoad
Professor of HO
Ron did mention that the bridge shook quite a bit when a train crossed it. Probably because those rivets are missing.
Ron did mention that the bridge shook quite a bit when a train crossed it. Probably because those rivets are missing.
There's a little detail for you to model

Interesting how the side rails on that ladder oppose each other. I wonder if there is a reason for this?
D&J RailRoad
Professor of HO
The rungs of the ladder needed something to attach to. I would only think the orientation of the angle piece was one way or the other coin flip.
D&J RailRoad
Professor of HO
Got motivated to do some more work on the bridge tonight.
Installed the upper cross beams in the end section. I'll have to do this across the whole bridge before I can install the upper walkway.
The first picture gives you an idea where I am working on it.
The second picture gives you the details of it. There are attachment plates at each end of the cross beams, top and bottom. And another plate where the cross beams meet in the middle.
Once again, this has to be done with the bridge upside down.
Last edited by a moderator:
D&J RailRoad
Professor of HO
This past week has been very busy. Not to much attention to the bridge until today. Got a little more work done on it.
One of the problems I'm having is bending over slightly to work on it. My back is killing me by the time I get two of the upper cross bracings done. This is almost to the half way point. The next feature will be the walkways. I'll install the upper walkways first then the bridge can be turned right side up so I can install the lower walkways.

One of the problems I'm having is bending over slightly to work on it. My back is killing me by the time I get two of the upper cross bracings done. This is almost to the half way point. The next feature will be the walkways. I'll install the upper walkways first then the bridge can be turned right side up so I can install the lower walkways.
Last edited:
Going to be a real masterpiece when this is done and installed. Such a focal point for the whole railroad.
D&J RailRoad
Professor of HO
Going to be a real masterpiece when this is done and installed. Such a focal point for the whole railroad.
Actually, there is a mountain range that is over 25 feet from end to end and over 7 feet high. Another primary feature is the operating signal system, then there is the intermodal facility that is about 50 feet from end to end. Yeah it will fit right in.
I'll take bets on the bridge, especially from the knowledgeable modellers.
As Pierre – the dehydrated Frenchman - would say, “It is grandiose” !
Here's some prodding!
https://youtu.be/yD_PZfNLUGc
Just don't look right without a caboose on the tail!
https://youtu.be/yD_PZfNLUGc
Just don't look right without a caboose on the tail!
