Building an HO "Central Valley Model Works" Stock Car Kit.


No, the photos I'm referring to where in Post 18, they went missing when I went back to the website to check if they were still there! I had feeling that the website had blocked the photos, so I went back to check and found that my intuition was correct. So, I will remedy this problem by posting a word post between when I post photos.
 
Last edited by a moderator:
Here are some updates on my progress.

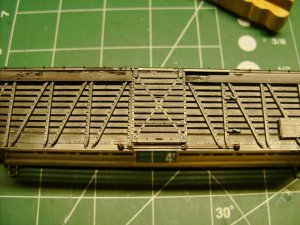
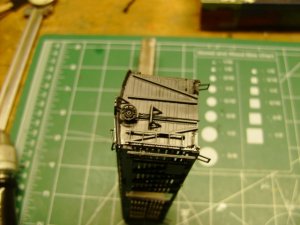
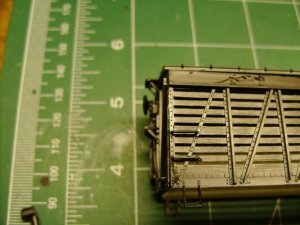
HPIM7835 (Small).JPG HPIM7834 (Small).JPG HPIM7836 (Small).JPG

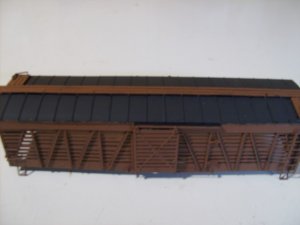
In photo #1 the door has been installed. I'm unsure whether the details will show very well; but, CVMW has used a length of .020 diameter brass wire as the guide for the lower edge of the door.

Photo #2 shows the B end of the car with the brake wheel and platform the ladders and grab irons on the end.

Photo #3 shows the same portion of the car but from the side, also showing the grabs on the side of the car.

CVMW uses plastic grab irons which may not be completely molded; or, might break when you cut them from the sprue; or, break when you handle them. However, they give you enough of them so that even with the losses you will have enough to complete the car anyways.

There isn't much point in showing the A-End of the car as it's the same, less the brake wheel and platform. So the next job in the process will be painting the car, after I assemble the body to the under-frame and have added weight to the car to get it up to NMRA RP-20.1.
 
Last edited by a moderator:
Wow, my photos are still up!

I will take some photos of adding weight and adding the body of the car to the under-frame. Assembly is pretty much complete.

Did we all get model railroad gifts for Christmas? I didn't and didn't give any to my Grandson who was also interested model railroading, before he got into Girls and Cars. We'll see if he comes back to the hobby after this part of his life.
 
I built several of those kits. CV does really nice stuff. The 150' Pratt Truss bridge is great as well. Yours are turning out great!!!
 
Although I have never built one of Central Valley's Truss Bridges, by looking at the finished product, you can easily see that they are very high quality! If Central Valley Model Works has a problem fitting into today's model railroading world, it may well be that they only produce KITS and people seem to lack interest in building kits, anymore!

There are discussions going on as I write, right here on the Model Railroad Forums about: The decline in the number of model railroaders? and Waning interest? Although waning interest in the hobby may happen to us all, if we focus too hard on the an aspect of the hobby, tending to make that aspect into a job. Also, exposing how simple the hobby has become and it can lack depth, because everything is done for us, can also reduce our interest! I've said, many times, if I could not actually build my models, this would never be a hobby I would have interest in. Unlike most Model Railroaders today who seem to think that the goal of the hobby is a finished and operating model railroad, the goal for me has been to enjoy the process of building my model railroad! I think I have demonstrated my ideas on the hobby in most of my posts, which are about building projects, model building contests and simply how to do things. This thread is an example of attempting to get people to build their models and that building models is very rewarding and keeps the interest levels high!
 
I had a major malfunction while loading weigh onto the car. I build a couple floor less boxes to load my shot BBs into, using the floor of the car as the boxes floors. While gluing the BBs in place on car floor, some of the Zap-A-Gap leaked along one of the truck mounting screws. This locked the truck to the under-frame and I could not break it loose. Needless to say the under frame in attempting to break the truck loose, both the truck and the bolster and frame in the area was destroyed. So, I need to buy a floor, under-frame and set of trucks for the model and start over with that assembly. I am painting the car boddy and will put on my decals and weather while waiting for my parts.

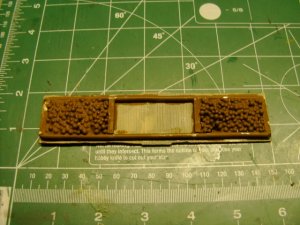
HPIM7842 (Small).JPG

The above photo shows the floor with the boxes I built to contain the Shot BBs. I painted this Roof Brown to tone down the metal pieces of solder along the sides and the BBs.
 
Last edited by a moderator:
I was very surprised that the Zap-A-Gap leaked through, as I took precautions. It would have taken multiple layers of Goo to secure the BBs. The Zap-A-Gap works great for this and I would do it all over again; but, would make sure to seal around the screws a bit better. Only one of the screws leaked.
 
HPIM7844 (Small).JPG

Above shows the body after brush painting with Micro-Lux Grimy Black and Acrylicos Vallejo Box Car Red.
 
Last edited by a moderator:
These Stock Cars where built in six batches from 1930 to 1936. They were built at 3 locations, the Ryan Car Shops in IL, The Como Shops in MN and the Laurel Montana Shops. The first cars where built at the Ryan Car company and they seemed to have built the cars backwards in Road Numbers, in other words in 1930 Ryan built 83250 to 83499 and 81750 to 81999. The Como Shops built 82750 to 83249 and 81250 to 81749 in 1931-32 and the Laurel MT shops built 81000 to 81249 and 82500 to 82749 all in 1936. So, they are not built in consecutive numbers and you need to pick a batch to choose a number from. I'd of thought they would start with the lower numbers first. Shows you what I know about being organized!
 
I've had some trouble with the Decals for this car. I have many Microscale Decals sheets and the sheet I am using is obviously not Microscale as the decals seem like they are old and brittle and come off the carrier in pieces. At one time I think a fellow named Rick Leach was producing decals for the Northern Pacific Railway Historical Association (NPRHA) and I think these are likely his. They where great when new; but, obviously fail when old. My Microscale decals are considerable older and have stood the test of time. So, anyway, I now have to place individual numbers from Microscale on the car, which is taking some time. Mr. Leach's decals where wonderful and had grouped numbers for the Stock Car with data info. for the data boards and small numbers with N.P. above for the end walls.

This problem with decals is certainly not a new trial for me. I will stay with Microscale Decals if they have what I need.
 
Great build Mark!
Yeah I've had old decals fall apart too, I once did an N scale RDC spelling British Columbia railway in individual letters! My eyes and hands were much better back then!!
 
Rico and everyone else, I remembered a way to recondition decals so they will hold together when they've had a tendency to break apart. This certainly isn't my idea and I have to relate that it may have been from my R/C airplane days, where I heard of this fix. That is to coat the decals with a thin coat of clear varnish, let that dry and then cut the decal out and dip in water per the normal procedure. The last two decals I needed to put on my car where from the batch that I had had problems with and this idea worked for me. Give it a try! I used water based acrylic varnish, thinking this would have less of a chance to damage the decals.
 
Last edited by a moderator:
I'm expecting the under-frame to show up at my door today; or, tomorrow, at which time I will continue on with this build. Other than the hiccup I had with gluing one of the trucks to the underframe, this has been a fun build!
 
HPIM7851 (Small).JPG HPIM7853 (Small).JPG

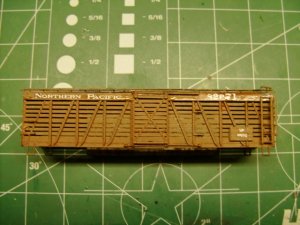
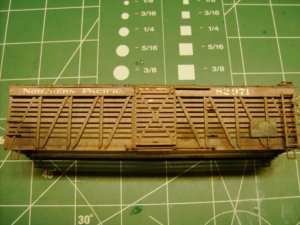
Photo #1, Although glare dulled the contrast in this photo, this was taken after I had applied all decals. In photo #2 I have done some weathering.

Lately, instead of spraying the entire model with a gloss coat previous to applying decals, I have instead brushed on some Acrylic Gloss Varnish only in the locations where decals are going to be applied. Then, after I have applied the decals and done a bit of weathering, I use my rattle can of Dull Coat to dull the entire model. The second photo shows the model with some white weathering powder applied to all the car's siding and ends, with some Grimy Black powder at the ends of the car. I may leave as is or, I may add more weathering, unsure at this time.
 
Last edited by a moderator:
HPIM7860 (Small).JPG

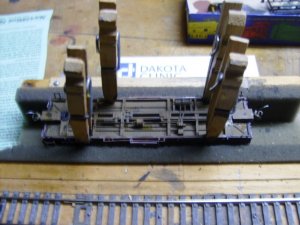
The above photo shows the car with the floor and under frame finally installed!

I know that most people here would not relate that they have had problems with a build. However, believing that failure is all a part of the process of living, I feel it is important to relate when things just don't go right! I have told the story about having to destroy the under frame and one truck, because the process of gluing my weight to the car allowed Zap-A-Gap to leak down onto the bolster and glue the truck to the frame. Well, the story continues: I ordered a frame and floor kit from Walthers. Incidentally, this Frame and Floor kit provided me with three complete floors and frames kits, for less than $7.00. I could use them as flat cars, or the underside of other 41 foot cars. To continue: I assembled the frame to the old car floor and attempted to mount in the car. The glue joint between the floor and frame failed in the process, not once, but three times! I just could not get my Testor's Liquid Cement to bond the two parts together. Finally, I gobbed on some Duco plastic tube cement along the glue joint, clamped the two parts together and they have held together long enough to get the floor and frame mounted in the car body as you can see in the photo above.

So, as the saying goes, "If at first you don't succeed..."
 
Talking about failure, made me think of the fact that one of the best learning tools is "FAILURE"! Still as MEN involved in a hobby and wanting to present ourselves as competent model railroaders, doing this hobby for the most part by ourselves, the opportunity to cover-up our screw ups is pretty easy to do! Our egos tell us not to explain how we screwed something up and to glaze over the mistakes.; or, never mention them. We all would like to present ourselves as pretty close to perfect. However, we all also know that mistakes happen. Sometime our mistakes can be very funny!

I guess what I'm saying is that being a bit more truthful about life's little miss steps is really sort of a catharsis and helps you get over it, knowing that we are not perfect.
 
I "cringed" when I read about your Superglue mistake and then shortly afterwards had a chuckle too!

The "chuckle" was aimed at myself for some of the mistakes I have made - and will continue to make.


Back
Top