flyboy2610
Loveably weird
I originally created this build thread over at Model Train Forums. I used links to my Photobucket account, but when they launched their extortion scheme and broke all the links, the photos disappeared. I tried to rebuild the thread by using MTF's photo uploader, but something just isn't working right and the photos keep disappearing. So I am going to re-post it here, and I'll add a link to it over there. This was originally started on 6-21-15.
======================================================
Not sure if this is the right spot for this, but since it does apply to painting I decided to put it here. (Mods, if you feel it should be else where feel free to move it.)
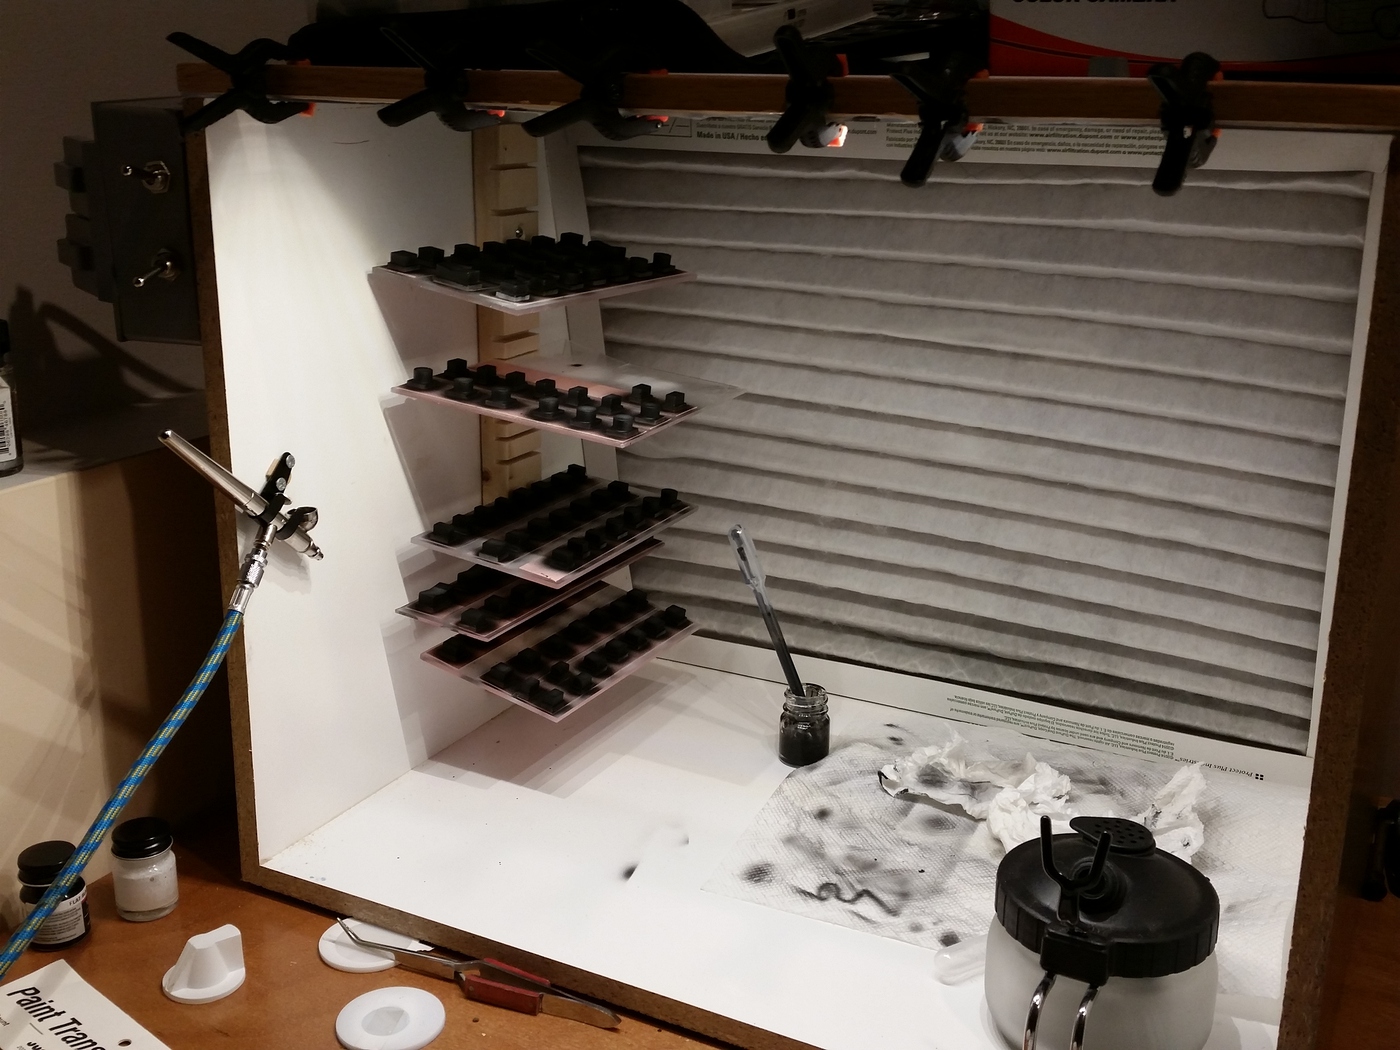
I am going to be building a paint booth for my airbrushing activities. I will be using ONLY acrylic paints, no solvent based paints for me anymore. (I'm weird enough as it is, don't need to make it worse. Knowhutimean, Vern?) The booth will be 27" wide, 18" high, and 18" deep. It will have a 24" single bulb fluorescent light, and ventilation will be a 50 CFM bathroom fan. Filtration will be a 14x20x1 el cheapo furnace filter, the kind that has loosely knit fiberglass mesh. I've read that you don't want to use a good filter because it will restrict airflow too much.
The fan and light fixture will be independently switched. There will be a 14 gauge 3 wire cord coming into the switch box, and 14 gauge stranded wire cord running to the light, with 14 gauge NM cable powering the fan.
The first thing I did was to prepare the light fixture. The light fixture I am using is a 24" Metalux single T8 lamp fixture from Menard's.
Here I have it laid out and am ready to start wiring it up.


This little plastic connector is how the power wires are supposed to be connected, just push them in. Ummmm......... no. This was promptly cut off and disposed of.


In this pic, I have done several things. I used a 17/64 drill and made 4 holes in the 'dimpled' areas on the light housing. I then used 1/4" bolts to secure the housing to a piece of 27" x 5" of 3/4" plywood. This will be the valance for the light, and I will be making this valance removable from the front of the booth to make bulb changes much easier. The top of the booth will also have a slot cut in it for the cord, but more on that later. The excess length of the bolts will be cut off.
I have installed a 3/8" NM cable connector through which the 14 gauge power cord has been passed. I have also used wire nuts to connect the power cord to the light fixture wires, and installed the ground screw.


The other end of the ballast.


The bolts are a bit long.


The light plugged in and functioning. I ALWAYS use a bulb protector with fluorescent lights. I have seen what happens when one of them shatters, and it's not pretty!


I also cut the 27" by 18" piece of 3/4" plywood for the base.


I haven't decided yet on whether to have solid plywood for the top, or whether to cut a 'sun roof' in the top and use a piece of plexiglass to allow additional light. I'm leaning towards the plexiglass idea. Next I need to rip down some 2x4's to get true 1"x1" strips. But that's it for right now. More to come!
======================================================
Not sure if this is the right spot for this, but since it does apply to painting I decided to put it here. (Mods, if you feel it should be else where feel free to move it.)
I am going to be building a paint booth for my airbrushing activities. I will be using ONLY acrylic paints, no solvent based paints for me anymore. (I'm weird enough as it is, don't need to make it worse. Knowhutimean, Vern?) The booth will be 27" wide, 18" high, and 18" deep. It will have a 24" single bulb fluorescent light, and ventilation will be a 50 CFM bathroom fan. Filtration will be a 14x20x1 el cheapo furnace filter, the kind that has loosely knit fiberglass mesh. I've read that you don't want to use a good filter because it will restrict airflow too much.
The fan and light fixture will be independently switched. There will be a 14 gauge 3 wire cord coming into the switch box, and 14 gauge stranded wire cord running to the light, with 14 gauge NM cable powering the fan.
The first thing I did was to prepare the light fixture. The light fixture I am using is a 24" Metalux single T8 lamp fixture from Menard's.
Here I have it laid out and am ready to start wiring it up.
This little plastic connector is how the power wires are supposed to be connected, just push them in. Ummmm......... no. This was promptly cut off and disposed of.
In this pic, I have done several things. I used a 17/64 drill and made 4 holes in the 'dimpled' areas on the light housing. I then used 1/4" bolts to secure the housing to a piece of 27" x 5" of 3/4" plywood. This will be the valance for the light, and I will be making this valance removable from the front of the booth to make bulb changes much easier. The top of the booth will also have a slot cut in it for the cord, but more on that later. The excess length of the bolts will be cut off.
I have installed a 3/8" NM cable connector through which the 14 gauge power cord has been passed. I have also used wire nuts to connect the power cord to the light fixture wires, and installed the ground screw.
The other end of the ballast.
The bolts are a bit long.
The light plugged in and functioning. I ALWAYS use a bulb protector with fluorescent lights. I have seen what happens when one of them shatters, and it's not pretty!
I also cut the 27" by 18" piece of 3/4" plywood for the base.
I haven't decided yet on whether to have solid plywood for the top, or whether to cut a 'sun roof' in the top and use a piece of plexiglass to allow additional light. I'm leaning towards the plexiglass idea. Next I need to rip down some 2x4's to get true 1"x1" strips. But that's it for right now. More to come!