Alternate roadway materials


Davidfd85

Member
We have all made our roads using mostly proven materials. I've used the Smooth-it and it works great, fine ballast materials works alright, premixed joint compound, not so good it cracks to much, dry mix joint compound is pretty good much like Smooth-it, shingles and tar paper, and the plastic roadway kits work very well also. But has anyone tried any other materials to make your roads and streets.
I am mostly wondering about un-sanded grout for tiles. Has anyone tried this and could let us know how it came out and held up over time.

Thanks
David.
 
I wonder how Hard Rock Putty would do. Durham's is a really good brand. The stuff dries very hard, and can be put on pretty thick without cracking. You would want to get it pretty smooth before it hardened. But you could always go over it with a thin layer of joint compound to smooth it out. It would make for some pretty cheap roads.
 
400 grit wet-dry sandpaper. uploadfromtaptalk1393556664006.jpg
 
I think I've posted this before. For asphalt, I experimented with craft foam from Michael's. I sponged gray paint onto it. It's easy to make patches and large cracks, just tear the foam. It's the myriad little cracks that I haven't been able to replicate. I tried crackle finish, but that didn't do anything. I tried drawing them in with a soldering iron with no success. Any ideas?

Note:This isn't glued down, which is why there's a gap along the right rail.
asphalt2_zps8ee11ce4.jpg


These are the kind of small cracks I'm trying for...

Capture_zps4f3c0bc1.jpg


For asphalt between the rails, the foam is a little too thick for code 100 rail. You'll either have to sand down the edges or hand lay code 125 rail. Sand the underside of the foam so it doesn't change the texture of it.

For concrete, I made slabs of plaster using simple molds that I made from Depron.

street_zps2698b326.jpg


Mold_zps82f7e9af.jpg


Steve S
 
I mentioned above that the foam from Michael's was too thick for code 100 (it's 2mm thick.) I forgot I had a some 1mm foam. It should work fine on code 100 as long as your flanges aren't pizza cutters. I've never seen the 1mm sold locally. You'll probably need to order it online. I managed to get a couple of sheets from someone I know.

asphalt_zpsb555d45e.png


Steve S.
 
I've been working on a mockup of some street trackage using the craft foam.

asphalt4_zps3ea3a39b.jpg


I used 1mm black craft foam on code 100 track. You can go the full width of the rails and not interfere with the flanges as long as they aren't pizza cutters. The stuff at Michael's is 2mm (Hobby Lobby's is even thicker), which is fine for roads without track, but for street trackage you'll need to order some 1mm. An eBay seller named Wandy-Foam sells it.

Asphalt2_zpsa56966a2.png


The white foam underneath is Readiboard from the Dollar Tree store. While you're there, get some LA's Awesome spray cleaner. Spray it all over the board, wait a minute, and then peel off the paper layers. Do both sides or it may warp. You'll be left with a foam sheet that's a few millimeters thick. I sanded the white foam to give the road a crown. I also sanded in some dips and ruts, though they don't show up very well in the photos. They need to be exaggerated.

The paint is water-based craft paint from Michael's or Walmart. You can buy shades of gray paint, but if you want to mix your own, mixing black with white will result in a blueish tint. I mixed black with a light tan (suede) to remove any tint. I dabbed it on using a damp kitchen sponge. Look for a sponge that doesn't have any sort of pattern embossed into it. I also cut the sponge in half, using one half to apply the paint. The other was kept clean and damp and was used to remove paint if needed, such as the dark areas down the middle of the lanes. You want to dab the sponge on something else first, such as a piece of cardboard, to remove some paint (sort of like dry brushing.)

asphalt3_zpsd022e3b8.jpg


After the paint is dry, you can create patches and large cracks by tearing the craft foam. If you want fairly straight lines, score the underside of the foam with an X-Acto before tearing it. If you want more irregular lines then don't bother scoring first. To darken the patches I just ran them under the faucet for a minute and rubbed them with my finger to remove paint. Some patches are lighter than the road, so mix up a batch of light gray and dab some onto the patch.

For the small cracks I took a straight pin, clipped off the head, and chucked it into my Dremel mototool. I also used the grinding wheel on my Dremel to file a flat spot on the side of the pin point to give it a bit of a cutting edge. Then just etch the cracks into the craft foam. You can control the width of the cracks by how deep the pin penetrates. It helps to have some reference photos when drawing cracks. The street view on Google maps is good for this. You can paint tar lines on some of the cracks with a long thin brush. Use very dark gray instead of black because even tar fades.

For the white lines, I didn't want to use decals or chart tape because those would be too perfect for an old worn road. I used masking tape to mask off the lines. I reduced the stickiness of the tape by pressing it to the floor and pulling it up a few times. Even after doing this it took up a little bit of paint which really didn't look that bad. It gave some random wear to the pavement. If you don't want the tape to pull up any paint you should probably seal the foam with clear flat spray paint first.
I used the sponge to dab the white paint for the lines. The water in the sponge apparently allowed the paint to bleed a little under the tape making the edges a little messy in spots. I probably should have used a cosmetics sponge for this. Those don't need to be moist to be kept soft.

I brushed some real dirt onto road to make it look better.

I attached the craft foam to the white foam using spray adhesive.

asphalt5_zpsee3f161d.jpg


ETA: I should give credit where credit is due. I originally tried a technique described by Dan Crowley where he brushed tinted plaster on top of craft foam. The rigid plaster wasn't suitable for between the rails, and it didn't really allow for cutting out patches, but it got me to experiment with the craft foam.

Steve S
 
Last edited by a moderator:
has any one tried chalk board paint? I was thinking it might be a pretty good choice as it would take to the chalk for weathering
 
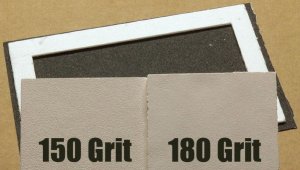
I'm bumping this up because I finally got around to testing something I've been wanting to try. In my above post, the concrete texture from the Depron foam was a little rough for HO, though it would probably look okay in O scale. So I tried using some waterproof sandpaper and the results are much better suited to HO scale.

(click to enlarge)

Concrete.jpg

My local Tru-Value hardware store sells individual 9"x11" sheets of this paper for $1.

Steve S
 
Last edited by a moderator:
Only issue I can visualize using sandpaper is how to put road markings on it due to the roughness of the paper. Would be interesting to see how that could be done effectively.
 
Doesn't WS make a road marking tape? That would be one method, as well as really painting on the lines. The area needing paint could be masked off and painted with airbrush, regular paint brush or even a foam type brush.
 
I use hand painted lines. Use an old brush as it's going to be shredded. Been using sandpaper for many years. Crinkle it to add texture and variations.

sent from my Galaxy Note
 
I've used a couple methods of striping a sandpaper road.
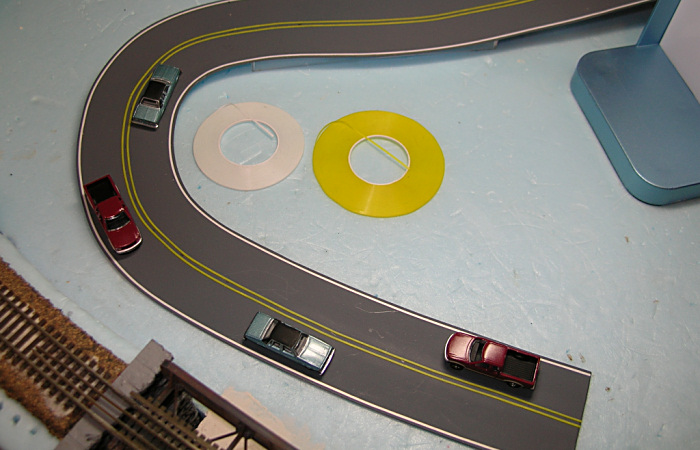
One way was using the yellow stripes from a set of VIA Rail decals, and the other was to lay thin pinstripe tape down beside where the stripes will go then use a yellow paint pen between the taping.
 
Only issue I can visualize using sandpaper is how to put road markings on it due to the roughness of the paper.

The sandpaper is just used to make the mold for pouring the plaster.

Back in post #8, I made the stripes on the asphalt by masking with tape and then dabbed paint on with a sponge (you could also airbrush them.) this is easy on straight roads, but masking on a curved road would be tougher.

Steve S
 
Last edited by a moderator:
Steve S that road work looks great! I'll be doing some paving and concrete pads in N scale soon, I'll see if I can adapt some of your techniques.
 
Have you considered drywall compound? I've used it for rock faces and other scenery work. I haven't tried it for roads yet.

One thing I'd recommend doing is to mix an appropriate paint color into the compound before putting it in place. I didn't and have been paying the price for it since then!

Photoman475


Back
Top